


14
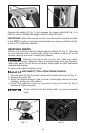
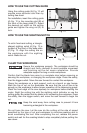
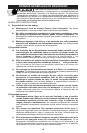
HOW TO USE THE CUTTING GUIDE
Using the cutting guide (A) Fig. 12 will
provide more accurate cuts than by
cutting free-hand.
For installation, insert the cutting guide
(A) Fig. 12 in the mounting slot (B) at
the front of the base plate (C). Select
the desired cut width on the cutting
guide and tighten the wing nut (D) to
lock.
A
B
C
D
Fig. 12
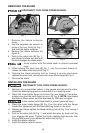
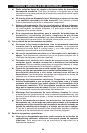
HOW TO USE THE SIGHTING NOTCH
To aid in free-hand cutting, a triangle-
shaped sighting notch (A) Fig. 13 is
located at the front of the base plate
(C) Fig. 13. Align the cutting line on
the workpiece with the sighting
notch. Make the cut.
Fig. 13
A
C
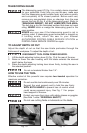
CLAMP THE WORKPIECE
Secure the workpiece properly. The workpiece should be
straight and firmly clamped to avoid possible movement
and pinching as the cut nears completion. Provide
adequate support for long or wide workpieces.
Confirm that the blade has come to a complete stop before removing or
securing the workpiece, or changing the workpiece angle. Press the safety,
then the trigger switch. Move the saw forward to contact the workpiece
.
Clamp the workpiece on a rigid support, such as a bench or saw horses.
Mark the line of cut on the workpiece. Be sure that the cut-off line is far
enough on the workpiece to allow proper operation of the telescoping guard.
Place the front edge of the saw squarely on workpiece before starting the
motor. Sight the cutting line with the sighting notch indicator or use the
cutting guide. Be certain that the blade is not contacting the workpiece. Press
the safety, then the trigger switch, and move the saw forward to begin the
cut.
Keep the cord away from cutting area to prevent it from
becoming entangled in the workpiece.
Do not force the saw. Let the saw do the cutting at the rate of speed
permitted by the type of cut and workpiece to minimize sparking and to
avoid overloading the tool. After completing the cut, release the power
switch and wait for the coasting blade to stop completely before putting the
saw down.