8
A
Fig. 5 Fig. 6
B
Fig. 7
FLUSH RECESSED
BREAK BREAK
BROKEN
BLADE
BROKEN
BLADE
A
Fig. 4
work the blade up and down while
rotating the clamp (in a counter-
clockwise direction).
If the blade breaks leaving nothing to
grasp (to pull it from the clamp), it may
be necessary to use another blade as
a tool to aid in removing the broken
piece (see Fig. 4). While holding the
release collar in the open position, use
the tip of another blade to “hook” the
broken piece and pull it from the
clamp. (A thin, fine-toothed, metal-
cutting blade works best.)
Periodically clean the blade clamp with dry compressed air. DO NOT lubricate
the blade clamp. Lubricant can attract contamination.
Wear safety glasses while using compressed air.
MODEL 738
Disconnect saw from power source before installing or
removing blades.
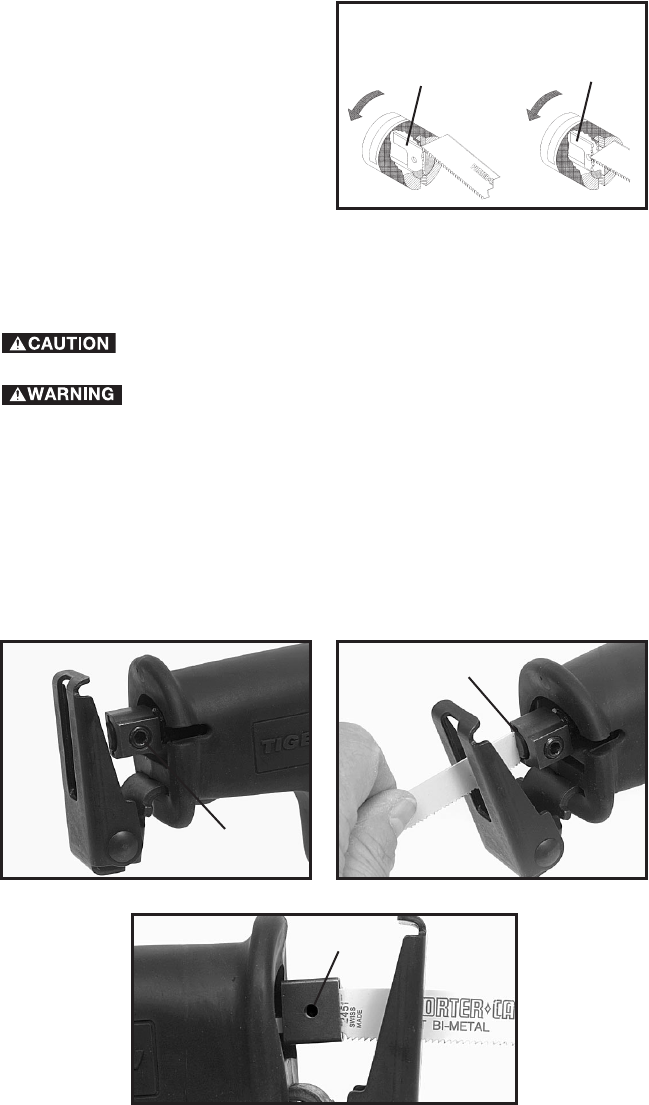
1. Use hex wrench (supplied with Model 738), to loosen blade clamp screw
(A) Fig. 5, by turning counterclockwise three to four turns.
2. Insert the blade into the blade clamp until it bottoms, (A) Fig. 6. When the
blade is properly positioned: the hole in the blade shank will align with the hole
(B) Fig. 7, in the backside of blade clamp.
3. Firmly tighten clamp screw.
4. To remove blade, loosen blade clamp three to four turns and pull blade
from clamp.


