10
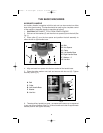
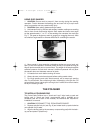
4. TO REMOVE: DISCONNECT TOOL FROM POWER SOURCE, grasp
edge of the buffing pad (or compounding pad) and “peel” away from back-
up pad, engage spindle lock pin and rotate back-up pad counterclockwise to
remove.
USING POLISHER
1. If item to be polished is light enough to be moved by the rotating
polishing pad, it should be securely anchored to prevent possible bodily
injury.
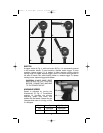
2. Hold polisher firmly by the rear and auxiliary handles, making sure
polishing pad is clear of work and foreign objects. Start polisher and lower at
an angle so that approximately
1
/2 or slightly less of the polishing pad
contacts the work.
3. Move polisher in long continuous sweeping strokes. DO NOT HOLD
POLISHER IN ONE SPOT as this will create heat and possibly damage
surface being polished.
4. Lift polisher from work before turning off motor.
5. Always be sure motor has stopped before setting polisher down.
POLISHING TIPS
USE ONLY QUALITY POLISH MADE FOR POWER POLISHING
APPLICATION and apply per manufacturer’s instructions.
For best results, thoroughly clean surface to be polished.
When polishing automobiles, wash the car thoroughly to remove dust, dirt
and other abrasives that may scratch the finish.
Buffs or pads may become gummed up after a period of use. They may be
washed out with soap and water. Shake out as much water as possible and
then spin dry on machine. Do this in an area where you will not splatter
articles.
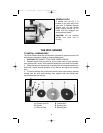
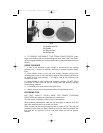
Fig. 8
A
B
C
D
A Spindle Lock Pin
B Spindle
C Back-up Pad
D Buffing Pad
892459 - 11-30-00.QXD 2/25/02 8:23 AM Page 10


