


11
SELECTING THE BLADE
For best performance, longer blade life, and smoother cut, select the proper
blade for the job. When cutting metal, always select a blade that will allow at
least three teeth to be engaged in the thickness of workpiece.
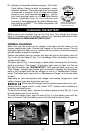
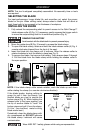
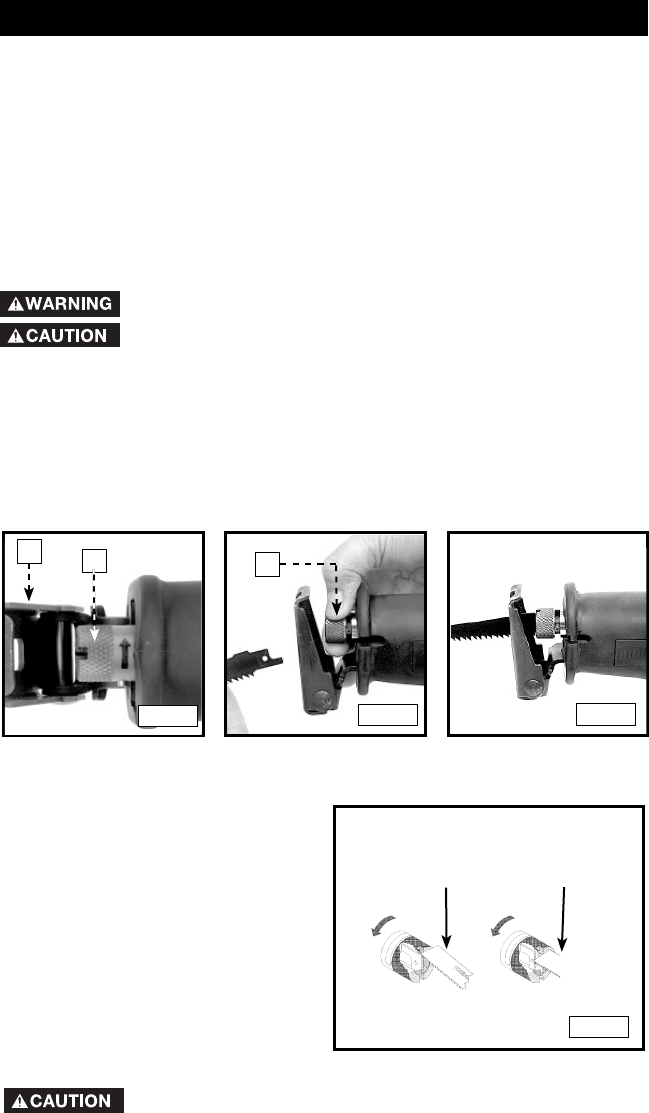
INSTALLING THE BLADE
1. Fully extend the reciprocating shaft to permit access to the Quik-Change
™
blade release collar (A) Fig. 3. If necessary, gently squeeze the trigger switch
to move the reciprocating shaft to its outermost position (Fig. 5).
REMOVE THE BATTERY.
Avoid contact with the blade teeth to prevent personal injury.
2. Move the guide shoe (B) Fig. 3 forward to access the blade clamp.
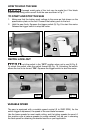
3. To open the blade clamp, rotate and hold the blade release collar (A) Fig. 4
counter-clockwise (viewed from the front of the saw).
4. Insert the blade into the clamp until it bottoms. Allow the release collar to
rotate clockwise to lock the blade in place (see Fig. 5).
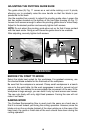
5. To remove the blade, first remove the battery. Then reverse steps 2 through
4. Pull the blade from the blade clamp while holding the release collar in
the open position.
Fig. 4
A
ASSEMBLY
Fig. 5
NOTE: This tool is shipped completely assembled. No assembly time or tools
are required.
NOTE: If the blade clamp collar resists rotation, work the blade up and down
while rotating the clamp (in a counter-clockwise direction).
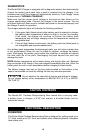
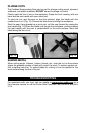
If the blade breaks, leaving nothing to
grasp (to pull it from the clamp), use
another blade as a tool to remove the
broken piece (Fig. 6). While holding the
release collar in the open position, use
the tip of another blade to “hook” the
broken piece and pull it from the clamp.
(A thin, fine-toothed, metal-cutting
blade works best.)
Periodically clean the blade clamp with
dry compressed air. DO NOT lubricate
the blade clamp. Lubricant will cause
contamination.
Wear ANSI Z87.1 safety glasses while using compressed air.
FLUSH
BREAK
Broken
Blade
Broken
Blade
Fig. 6
RECESSED
BREAK
A
B
Fig. 3
Fig. 5