


10
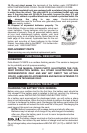
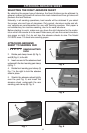
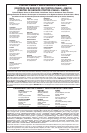
6. Rotate rear sanding pad clamp
(B) Fig. 9 to the right to lock the abra-
sive sheet in place.
Fig. 9
SANDER OPERATION
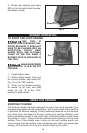
TO START AND STOP SANDER
THIS TOOL IS
ALWAYS IN AN OPERATING CON-
DITION BECAUSE IT DOES NOT
HAVE TO BE PLUGGED INTO AN
ELECTRICAL OUTLET. KEEP
HANDS, BODY, AND CLOTHING
CLEAR OF THE PAD WHEN A
BATTERY PACK IS INSTALLED IN
THE TOOL.
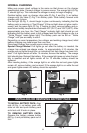
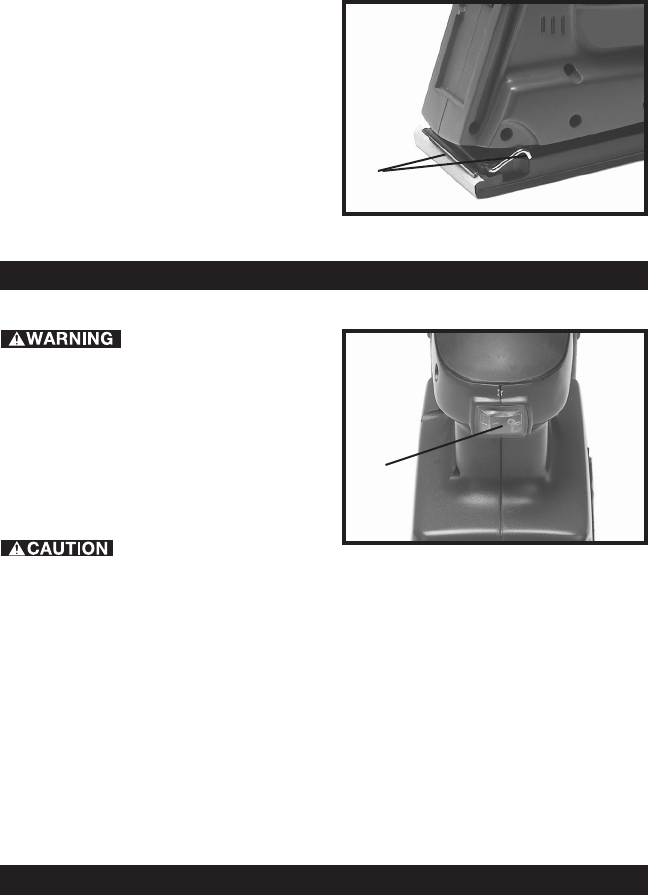
MAKE SURE POWER
SWITCH (A) FIG. 10, IS IN THE OFF
POSITION.
1. Install battery pack.
2. While holding sander firmly and
off of work surface, slide switch (A),
Fig. 10, to the “ON” position.
3. When you are finished sanding,
lift sander up off work and slide
switch (A), Fig. 10, to the “OFF”
position to stop sander.
Fig.10
USING THE SANDER
STARTING TO WORK
This finishing sander has been designed for one or two hand operation, and
can easily be guided over the work surface. The normal weight of the machine
is sufficient for efficient sanding. Putting additional pressure on the machine
only slows down the speed of the pad, reduces the sanding efficiency, and
puts an additional burden on the motor. Also, additional pressure might cause
the sander to “jump”. Always start the machine before placing it on the work
surface. Once it has started, ease it down on the work surface evenly and
move it slowly back and forth in wide, overlapping arcs. When you are through
sanding, lift the sander off of the work before stopping the motor.
A
B