


13
WARNING:
Collected sanding dust from sanding surface
coatings such as polyurethanes, linseed oil,
etc. can self-ignite in the sander dust bag or
elsewhere and cause fire. To reduce the risk of
fire always empty the dust bag frequently (10-15
minutes) while sanding and never store or leave
a sander without totally emptying its dust bag.
Also follow the recommendations of the coatings
manufacturers.
To empty the dust bag:
n Unplug the sander.
n Remove the dust bag from the sander.
n Remove the dust bag from the dust bag support.
n Unzip the dust bag.
n Shake out the dust.
n Install the dust bag on the dust bag support. Refer to
“Attaching the Dust Bag” earlier in this manual.
n Attach the dust bag support to the sander.
OPERATION
WARNING:
Before connecting the sander to a power supply,
make sure it is not in the locked-on position. Failure
to do so could result in accidental starting of the
tool resulting in serious injury.
To lock on the sander:
n Depress the trigger switch.
n Push in the lock-on button.
n Release the trigger switch.
n Release the lock-on button.
NOTE: To release the lock, depress the trigger switch.
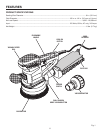
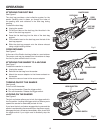
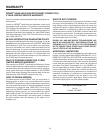
OPERATING THE SANDER
See Figure 9.
To operate the sander:
n Secure the workpiece to prevent it from moving under
the sander.
WARNING:
Unsecured workpieces could be thrown towards
the operator causing injury.
WARNING:
Keep your head away from the sander and the
sanding area. Your hair could be drawn into the
sander causing serious injury.
n Place the sander on the workpiece so that all of the
sanding disc surface is in contact with the workpiece.
CAUTION:
Be careful not to let your hand cover the air
vents.
n Turn on the sander and move it slowly over the
workpiece.
n Make successive passes in parallel lines, circles, or
crosswise movements.
n Turn off the sander and wait until the sanding disc
comes to a complete stop before removing it from the
workpiece.
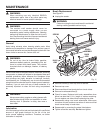
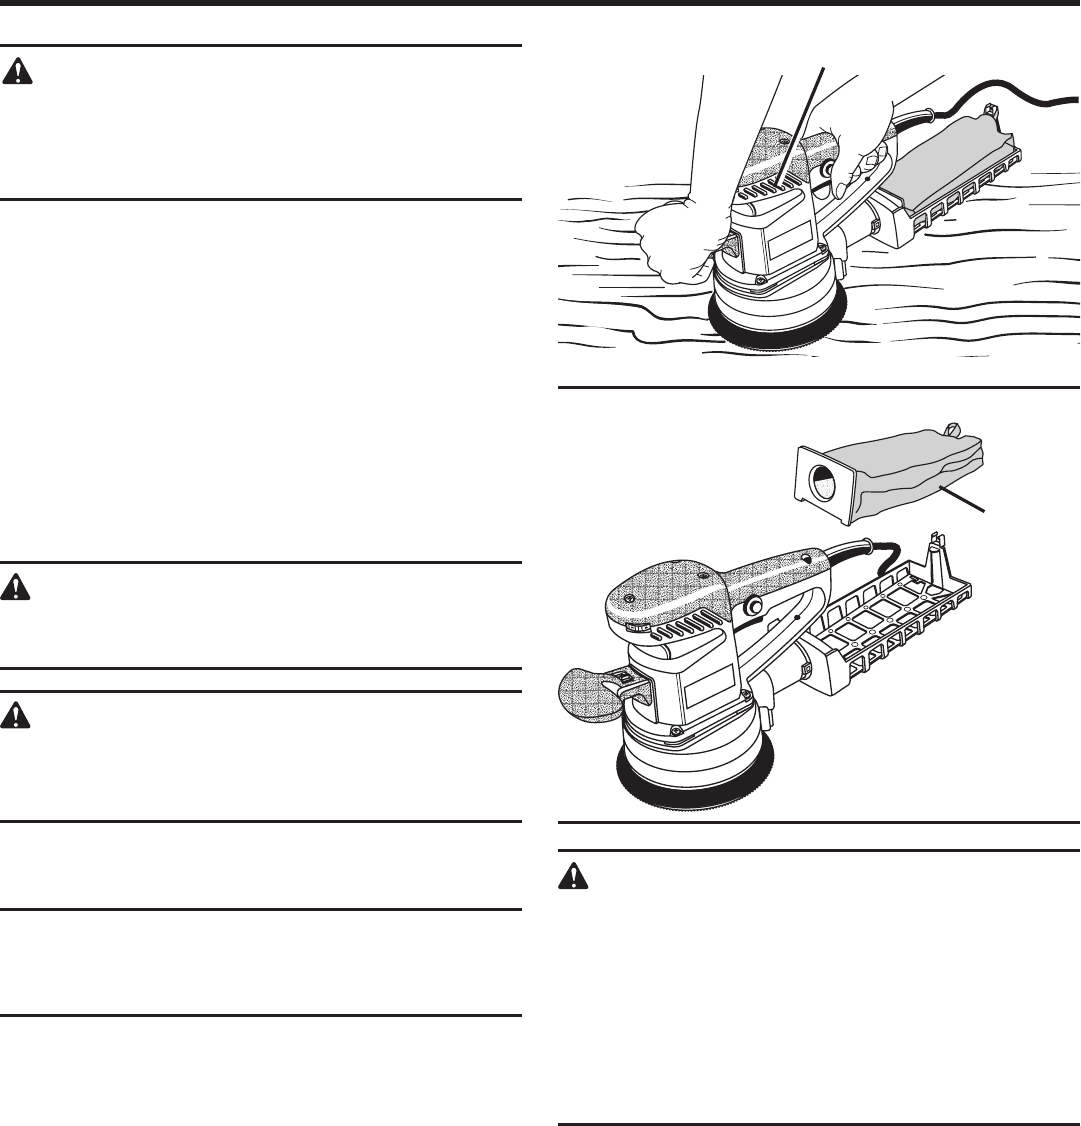
EMPTYING THE DUST BAG
See Figure 10.
For more efficient operation, empty the dust bag when it is no
more than half full. This will permit the air to flow through the
bag better. Always empty and clean the dust bag thoroughly
upon completion of a sanding operation and before placing
the sander in storage.
Fig. 10
Fig. 9
DUST BAG
AIR VENTS