


16
17
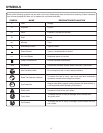
WARNING:
When servicing use only identical RIDGID
replacement parts. Use of any other parts may
create a hazard or cause product damage.
WARNING:
Always wear safety goggles or safety glasses with
side shields during power tool operation or when
blowing dust. If operation is dusty, also wear a
dust mask.
WARNING:
To avoid serious personal injury, always remove
the battery pack from the tool when cleaning or
performing any maintenance.
GENERAL MAINTENANCE
Avoid using solvents when cleaning plastic parts. Most
plastics are susceptible to damage from various types of
commercial solvents and may be damaged by their use. Use
clean cloths to remove dirt, dust, oil, grease, etc.
WARNING:
Do not at any time let brake fluids, gasoline,
petroleum-based products, penetrating oils, etc.,
come in contact with plastic parts. Chemicals can
damage, weaken or destroy plastic which may
result in serious personal injury.
To work properly, the plunger rod of the tool must remain
clean and free of all caulk and adhesive material. If material
does get on the plunger rod mechanism, clean the mate-
rial off according to the directions of the caulk or adhesive
manufacturer.
When the tool is shut off by the electronic overload protection
system, always wait for 3 to 5 seconds before depressing
the trigger for restart. Frequently depressing and releasing
the trigger under these circumstances may cause interior
damage to the caulk gun.
Only the parts shown on the parts list are intended to be
repaired or replaced by the customer. All other parts should
be replaced at a RIDGID authorized service center.
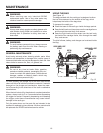
MAINTENANCE
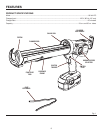
Fig. 12
R
R
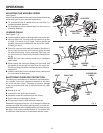
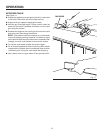
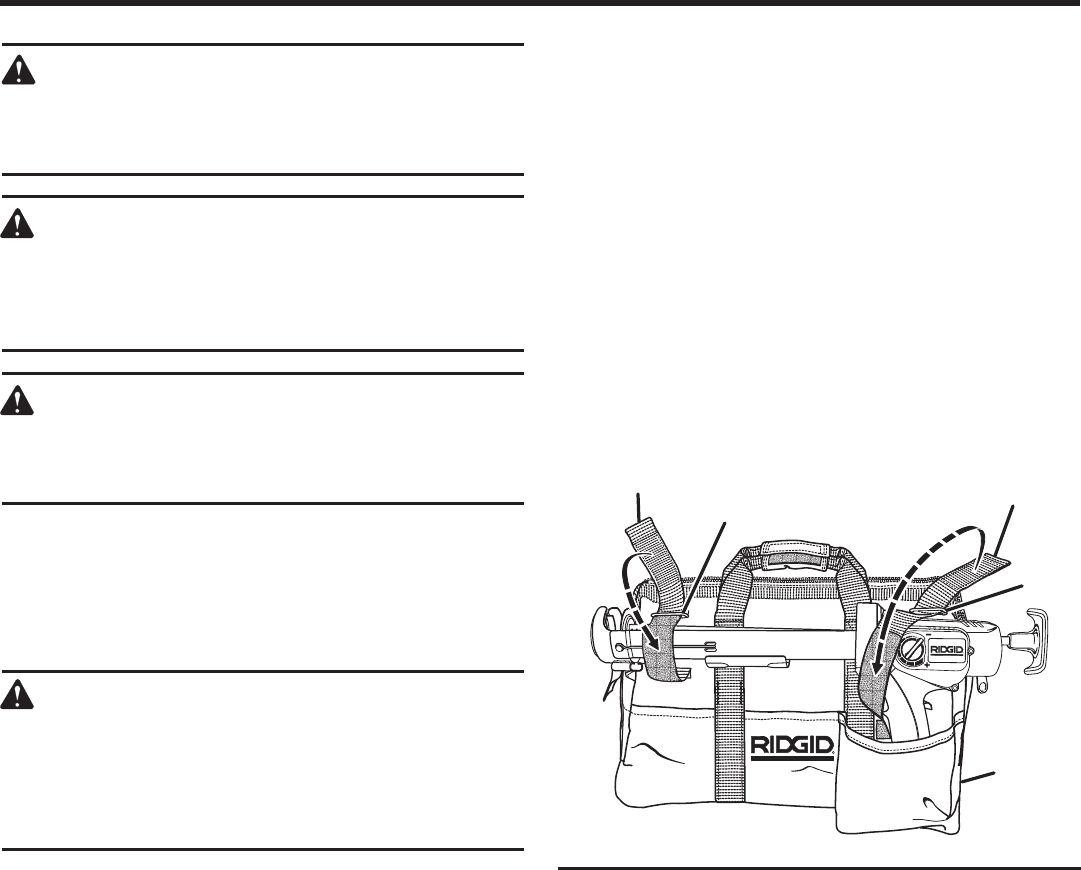
USING THE BAG
See Figure 12.
The bag provided with the caulk gun is designed to allow
the tool to be secured on the outside of the bag, which
helps keep the inside of the bag clean.
To transport the caulk gun:
n Place the base of the caulk gun inside the large pocket.
n Pass the left hook-and-loop strap over the carriage frame
and through the metal loop, then secure.
n Pass the right hook-and-loop strap over the tool body
just behind the carriage frame, then through the metal
loop, and secure.
The joist follower, battery, and charger can be stored inside
the bag.
HOOK-AND-LOOP
STRAP
HOOK-AND-LOOP
STRAP
POCKET
METAL
LOOP
METAL
LOOP