


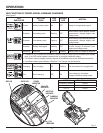
14
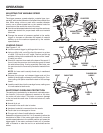
OPERATION
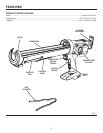
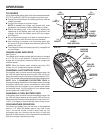
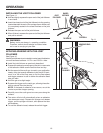
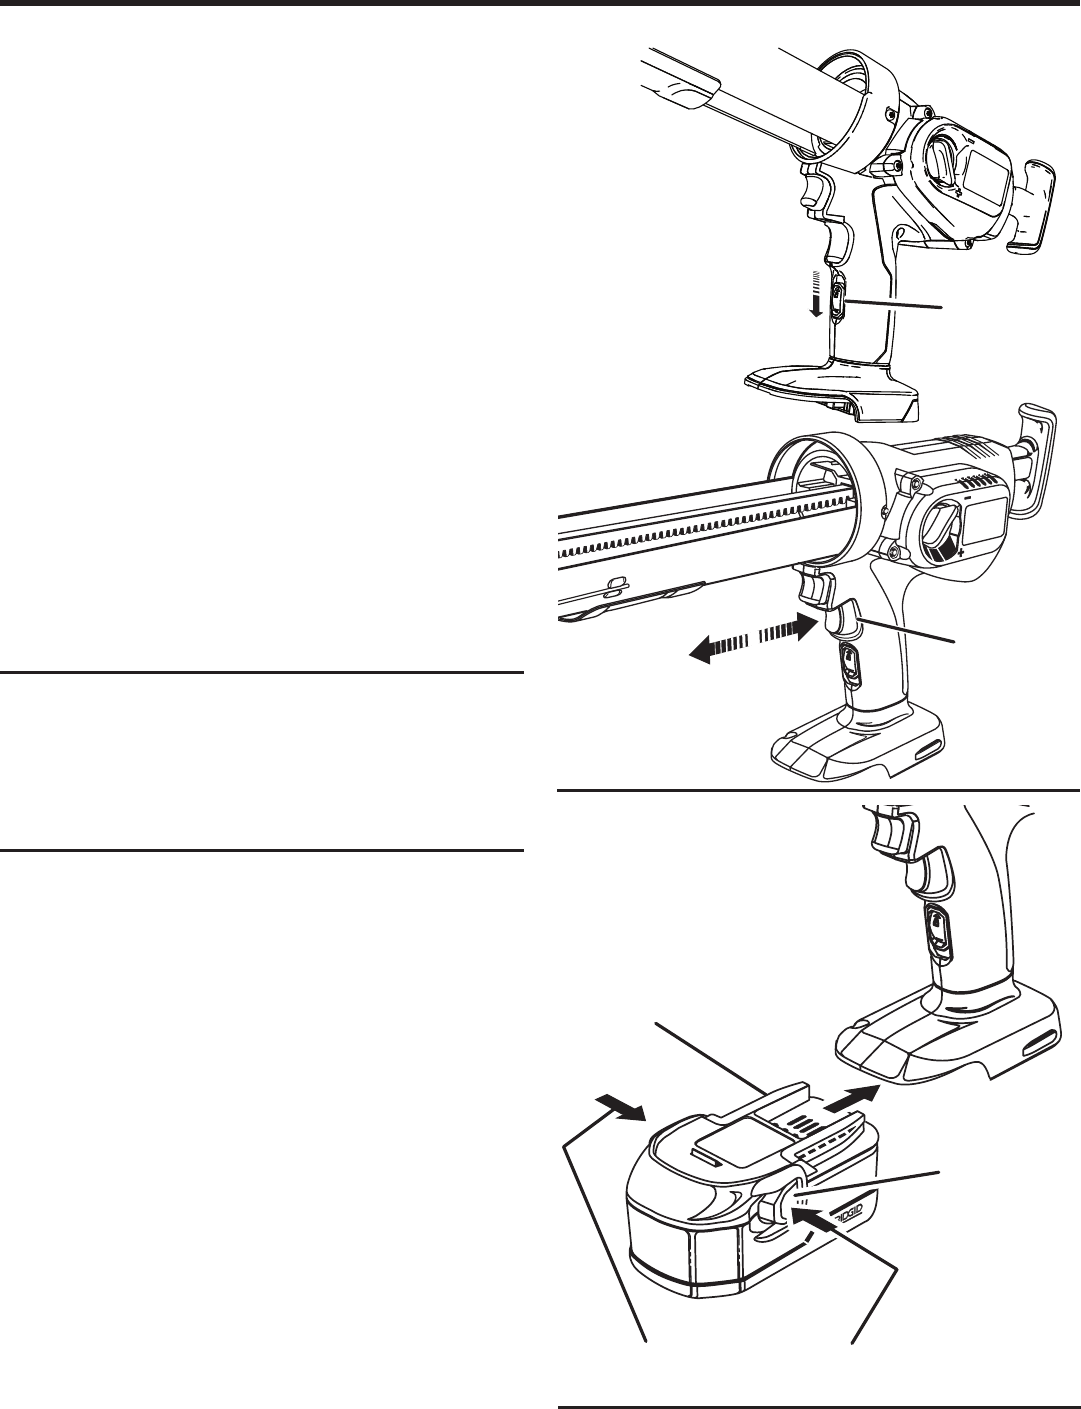
LOCKING THE SWITCH TRIGGER
See Figure 6.
The switch trigger of the caulk gun can be locked off using
the slide switch located below the switch trigger.
� To lock the switch trigger, slide the switch lock up. This
will prevent the caulk gun switch trigger from being
depressed.
� To unlock the switch trigger, slide the switch down. This
will allow the caulk gun switch trigger to be depressed.
STARTING/STOPPING THE CAULK GUN
See Figure 6.
Before attempting to start the caulk gun, be sure the switch
lock is in the unlocked position.
� To turn the caulk gun ON, depress the switch trigger.
� To turn the caulk gun OFF, release the switch trigger.
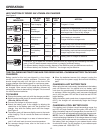
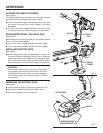
INSTALLING BATTERY PACK
See Figure 7.
While holding the caulk gun pointed away from you, lock
the switch trigger by sliding the switch lock up. Place the
battery pack on the tool. Make sure the latches on each
side of the battery pack snap into place and the battery
pack is secured on the tool before beginning operation.
CAUTION:
When placing battery pack in the tool, be sure raised
rib on battery pack aligns with the bottom of the tool
and latches into place properly. Improper installation
of the battery pack can cause damage to internal
components.
REMOVING THE BATTERY PACK
See Figure 7.
� Lock the switch trigger by sliding the switch lock up.
� Depress the latches on the side of battery pack.
� Remove the battery pack from the tool.
Fig. 6
Fig. 7
LATCHES
DEPRESS LATCHES TO
RELEASE BATTERY PACK
BATTERY PACK
SWITCH
LOCK
UNLOCK
ON
SWITCH
TRIGGER
OFF
ON