


5
n Position the zero clearance insert until the key slot drops
over the flat head screw.
n The zero clearance insert should be flush with the table
top.
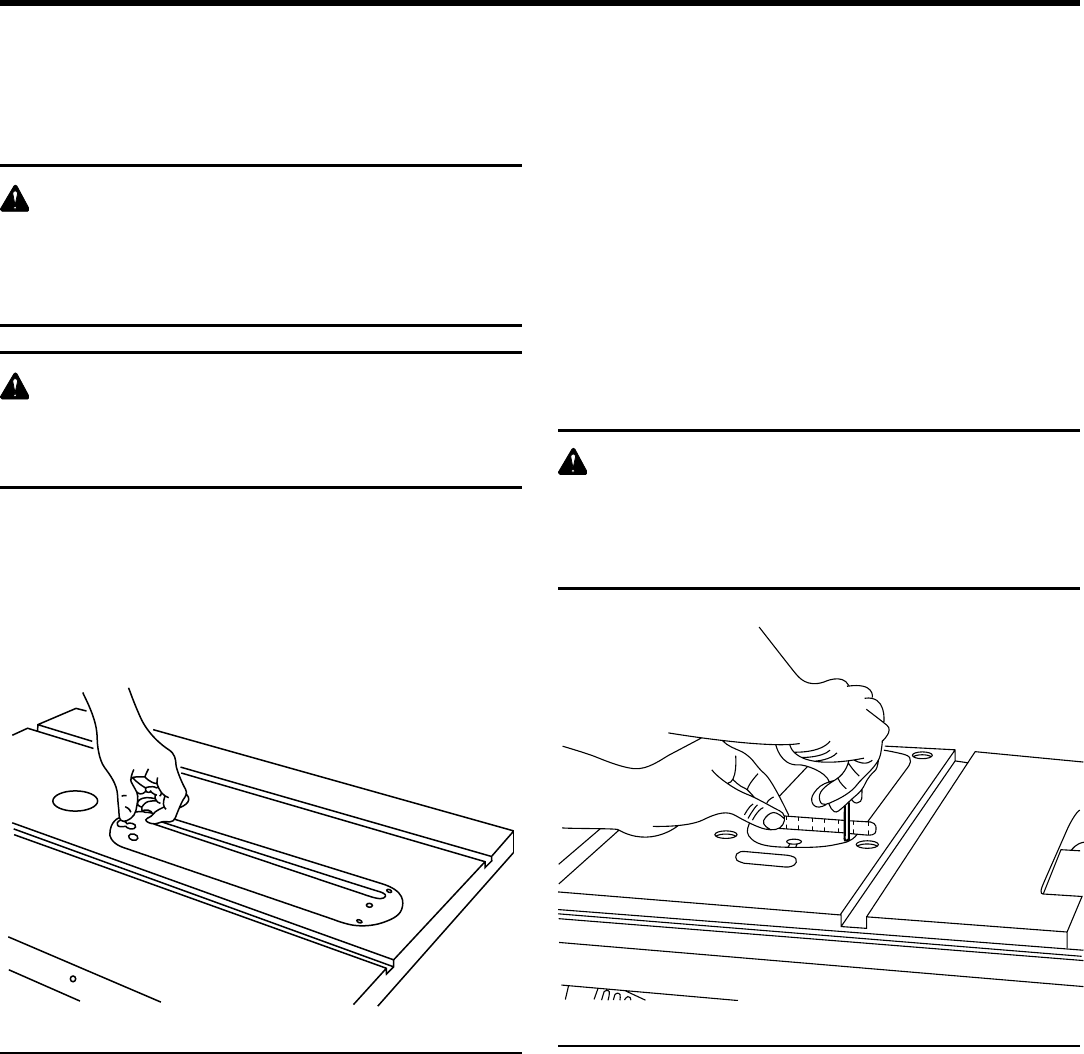
Adjust the four set screws as needed. (See Fig 2.)
NOTE: If necessary, adjust the side positioning set screw
found on the edge of the zero clearance insert to eliminate
side play. Tighten the flat head screw. Do not tighten the
screw to the point where it deflects the zero clearance
insert.
n Make sure blade guard is properly installed.
n Check all clearances for free blade rotation.
n Plug in the saw then turn the saw on.
n Slowly and cautiously raise the saw blade into the zero
clearance insert.
WARNING:
The zero clearance insert must be even with the table
surface. Inserts too high or low can let the workpiece
"snag" or catch on uneven edges. Workpiece could
twist and kickback and could result in injury.
INSTALLATION
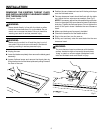
REMOVING THE EXISTING THROAT PLATE
AND INSTALLING ZERO CLEARANCE INSERT
FOR THROUGH CUTS
See Figures 1 and 2.
WARNING:
Never stand directly in line with the blade or allow
hands to come closer than 3 in. to the blade. Do not
reach over or across the blade. Failure to heed this
warning can result in serious personal injury.
WARNING:
Make sure the switch is off and the plug is out of
the outlet. Failure to do so could result in accidental
starting, resulting in serious personal injury.
n Unplug the saw.
n Lower the blade completely then remove the blade guard
assembly.
n �Loosen flathead screw and remove the throat plate by
lifting the front end of the throat plate and pulling it toward
the front of the saw.
Fig. 1
Fig. 2