


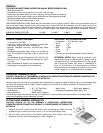
CUTTING TABLE
MARKED IN INCHES AND CENTIMETERS FOR ACCURATE CUT DIMENSIONS. STEPS FOR
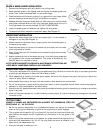
POSITIONING 45° / 90° RIP GUIDE:
1. Set the rip guide by positioning it on the desired dimension and tighten the threaded
knob on the rip guide. Make sure rip guide is firmly tightened to avoid slippage.
2. The rip guide can be used for 90° rip cuts and 45° rip cuts from both the left and right
side! (Notice the straight and 45° angled slits on the bottom of the rip guide in the
diagram.)
3. After the rip guide is positioned for the desired cut, place material flush against the rip
guide and the measurement rail. For 45° rip cuts, place the corner of material in the
open slot of the measurement rail.
4. Now you are ready to make your cut.
- 6 -
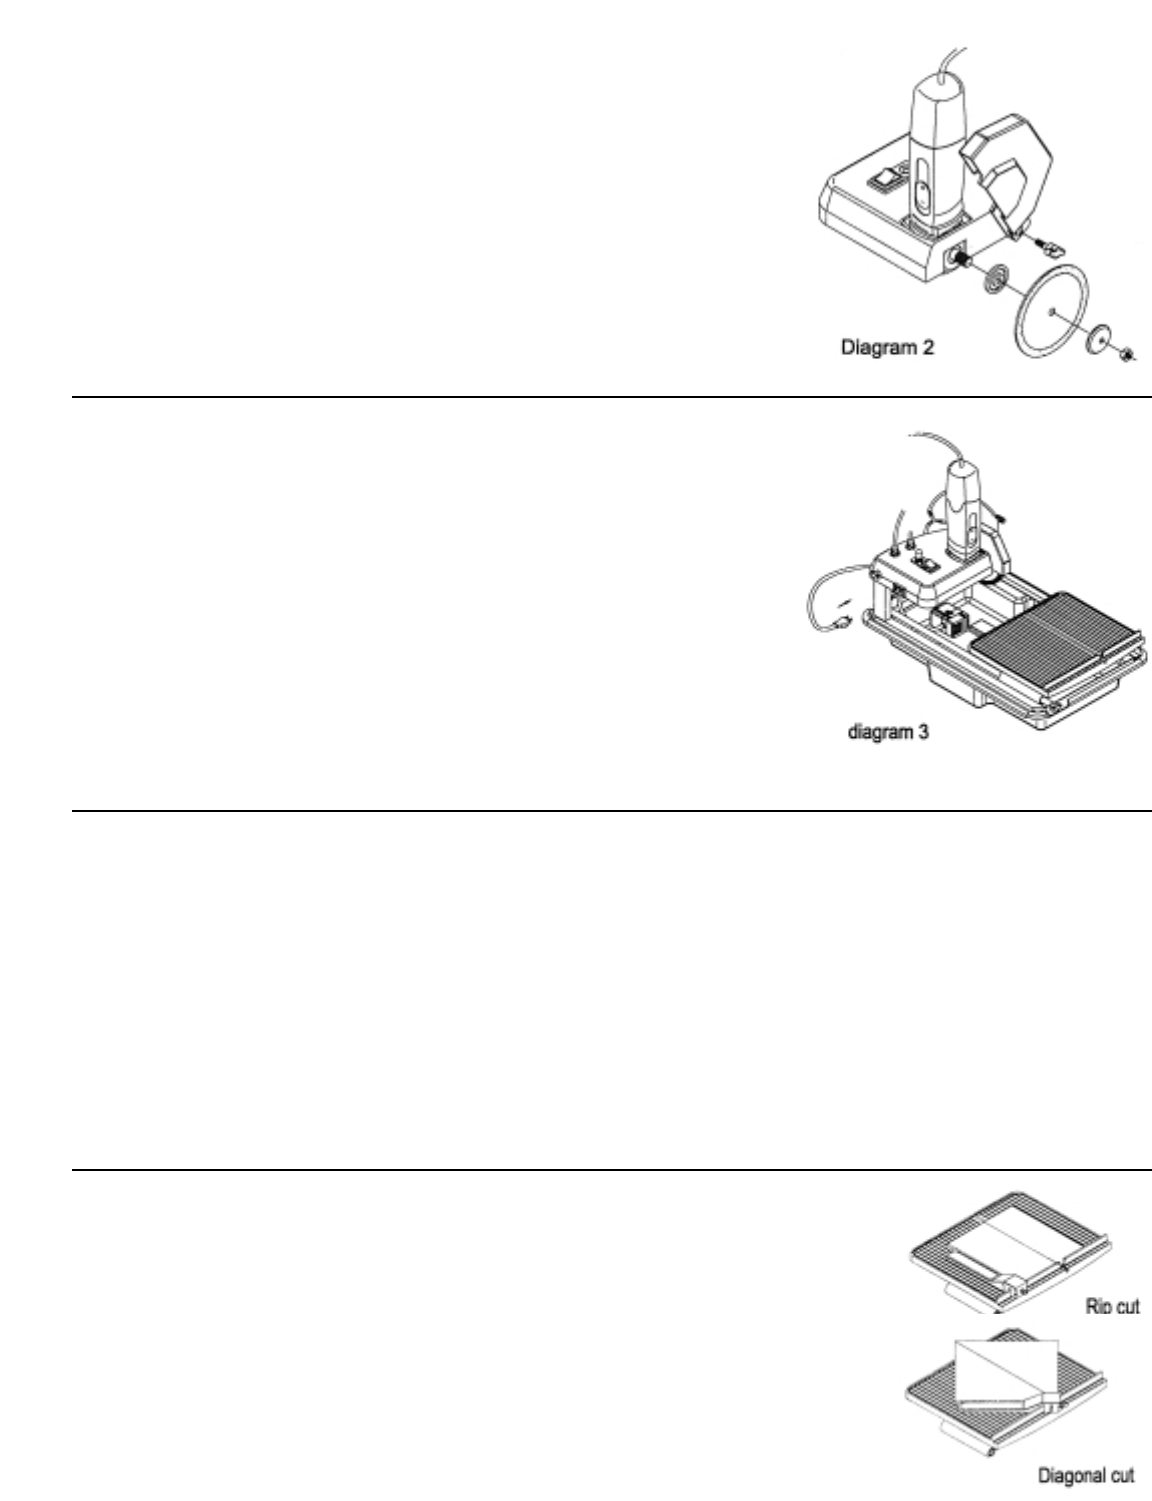
BLADE & BLADE GUARD INSTALLATION
1. Remove the blade guard and set it aside in the cutting head.
2. Raise the blade guard to the highest level and tighten the blade guard wing
screw. Then, remove the blade shaft nut and outer flange.
3. Place the blade onto the shaft, pushing it up against the inner flange. Make
sure the directional arrow is pointing in the direction of rotation.
4. Replace the outer flange and blade shaft nut. With one hand, hold the blade
and tighten the blade shaft nut with your free hand. Make certain the nut is
firmly tightened with wrench provided. DO NOT OVER-TIGHTEN!
5. Lower the blade guard into position and tighten the wing screw.
6. To remove the blade, reverse the installation steps. (See Diagram 2)
ENGLISH
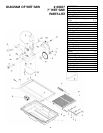
WATER PUMP INSTALLATION
1. Remove the water pump from its box and ensure that it is not cracked or
damaged in any way (See Diagram 3)
2. Attach the end of the plastic tubing, hanging down from the blade guard, to
the water pump nipple.
3. Place the water pump in the rear of the water tray on its side, with the water
pump nipple also on its side.
4. Next, fill the water tray with the water so that its level is higher than the water
intake nozzle.
5. Keep the power cord out of the water and plug it into the 3-prong receptacle
on the back of the cutting head assembly. The pump is activated by the
ON/OFF switch on the electric motor.
NOTE: WATER PUMP SAFETY GUIDELINES & MAINTENANCE INSTRUCTIONS ARE
LISTED BELOW. PLEASE READ CAREFULLY AND COMPLETELY.
WATER PUMP SAFETY GUIDELINES
1. The pump is equipped with a grounding-type attachment plug. Be sure to connect the plug to a properly grounded
grounding type receptacle to reduce the risk of electric shock.
2. When assembling & installing the water pump system, be sure to fully support the pump and piping to reduce the
chance of pump failure or damage.
3. Never handle the pump by the cord, with wet hands or when standing on a wet surface.
4. Do not use the pump to pump anything other than water, or other compatible liquids. Never use to pump gasoline,
kerosene, or other combustible or corrosive liquids.
5. Should pump fail, always disconnect from power source before handling pump or attempting to unclog or service the
pump in any way.
6. Never let the pump operate dry. It is self-cooled by pumping liquid. Dry use will cause pump damage and may cause
the motor to fail.