


5
ASSEMBLY
MITER
SLOT TABLE
1/4-20 x 1 in.
HEX CAP SCREW
WASHER
1/4-20 NUT
SHIMS
PLACE SHIMS
AS SHOWN
Fig. 4
FRONT VIEW
REAR VIEW
Fig. 5
1/4-20 NUT
SHIM
WASHER
MITER
SLOT TABLE
1/4-20 x 1 in.
HEX CAP SCREW
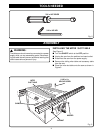
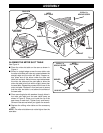
ALIGNING THE MITER SLOT TABLE
See Figure 4.
■ Place the miter slot table on the saw as shown in
Figure 4.
■ Extend a straight edge across the saw table onto
the miter slot table and note any space between the
straight edge and the miter slot table. If space ex-
ists, place one of the shims under the miter slot
table and recheck. Add shims as required between
the miter slot table and the saw table to allow the
miter slot table to be flush with or slightly lower than
the saw table. Repeat the process for the rear of the
miter slot table. Recheck in front and rear to assure
that the miter slot table is not above the surface of
the saw table.
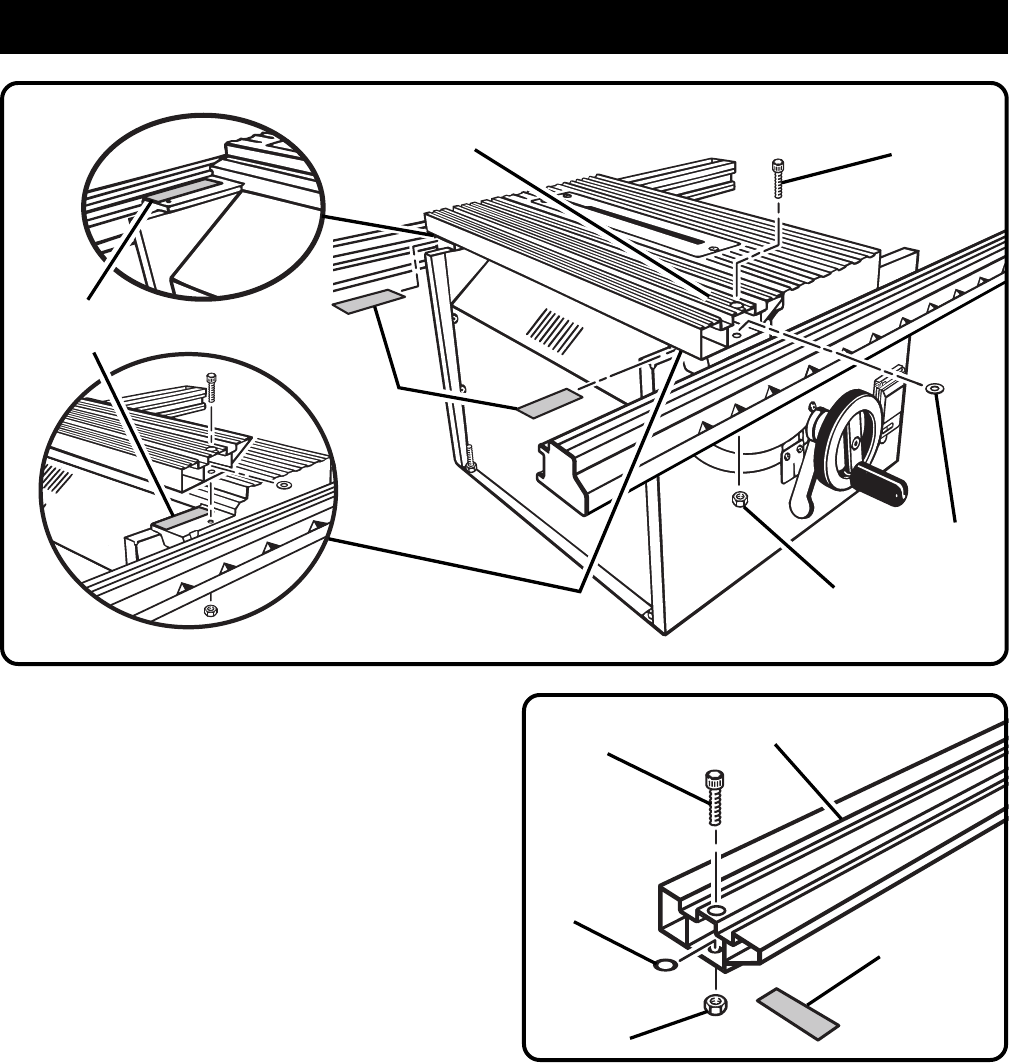
■ Place mounting bolts with washers through holes in
the miter slot table and the saw table frame as
shown in Figure 5. Place a nut under the lip of the
saw frame on each bolt. Tighten firmly and evenly.
Shims will be secured when you tighten the screws.
■ Replace the sliding miter table and the accessory
table.
NOTE: The miter slot table must not be higher than the
saw table.