


5
ASSEMBLY
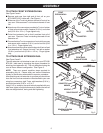
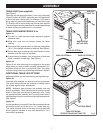
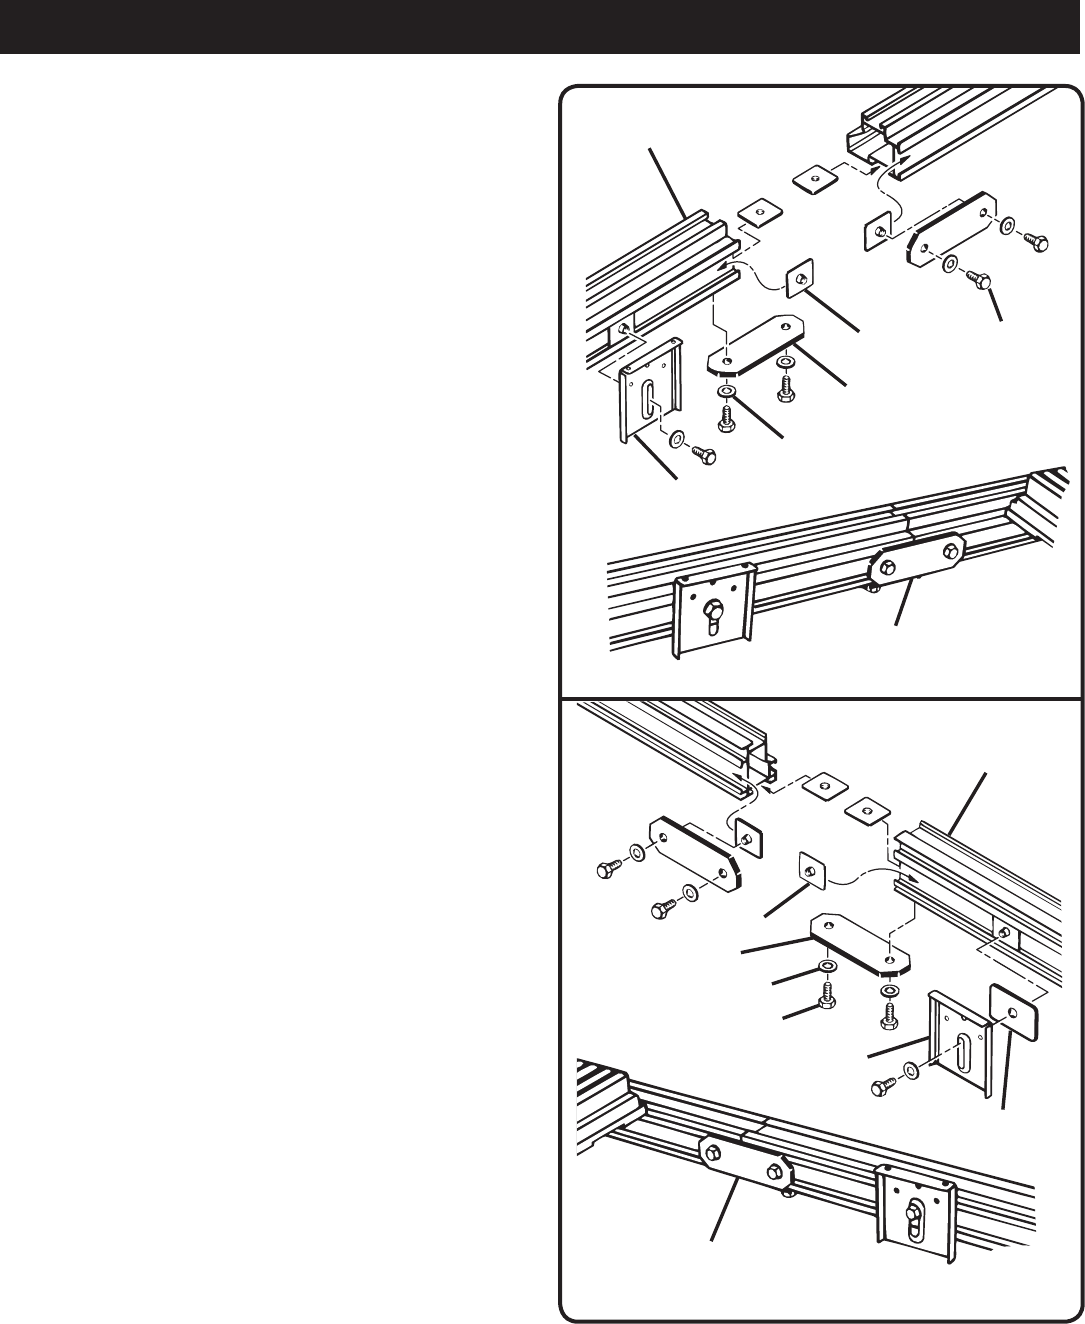
Fig. 2
Fig. 3
CONNECTOR
TABLE BRACKET
FRONT
EXTENSION RAIL
WASHER
T-NUT
HEX BOLT
FRONT RAILS
SHOWN ATTACHED
REAR RAILS SHOWN
ATTACHED
CONNECTOR
T-NUT
WASHER
HEX BOLT
TABLE BRACKET
SPACER
REAR
EXTENSION RAIL
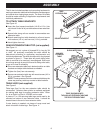
TO ATTACH FRONT EXTENSION RAIL
See Figure 2 and 4.
Remove end caps from right end of front rail on your
BT3100/BT3100-1 table saw. See Figure 4.
Slide one of the T-nuts into bottom channel of front rail on
your saw. Slide a second T-nut into back channel of front
rail.
Attach one of the connectors provided to T-nut on bottom
of front rail and secure with a washer (5/16 in.) and a hex
bolt (5/16-18-x 1/2 in.). Finger tighten only.
Orient front extension rail so that it matches front rail of
your saw. Place two T-nuts in matching channels of front
extension rail.
Connect bottom T-nut to connector on front rail of your saw
and secure with a washer (5/16 in.) and a hex bolt (5/16
in. x 1/2 in.). Finger tighten only.
Attach a second connector to back channel of front rail and
front extension rail. Secure it to each T-nut with a washer
(5/16 in.) and hex bolt (5/16 in. x 1/2 in.). Finger tighten
only.
TO ATTACH REAR EXTENSION RAIL
See Figure 3 and 5.
The rear extension rail attaches to rear rail on your BT3100/
BT3100-1 table saw by repeating the above procedure for
attaching front extension rail. The only difference being the
rear rail has a different conguration. See Figure 3.
NOTE: There are several repetitive steps required for
assembling this kit. Please study and review illustrations
closely for clarication when asked to repeat a procedure.
After attaching rear rail extension to your saw you should now
have the front and rear extension rails attached to your saw
using four connectors, eight T-nuts, eight washers (5/16 in.),
and eight hex bolts (5/16 in. x 1/2 in.).
Using a 1/2 in. socket or the small wrench supplied with your
table saw, tighten all eight bolts securely. Assure the two rail
sets are straight before, during and after tightening.