


6
ASSEMBLY
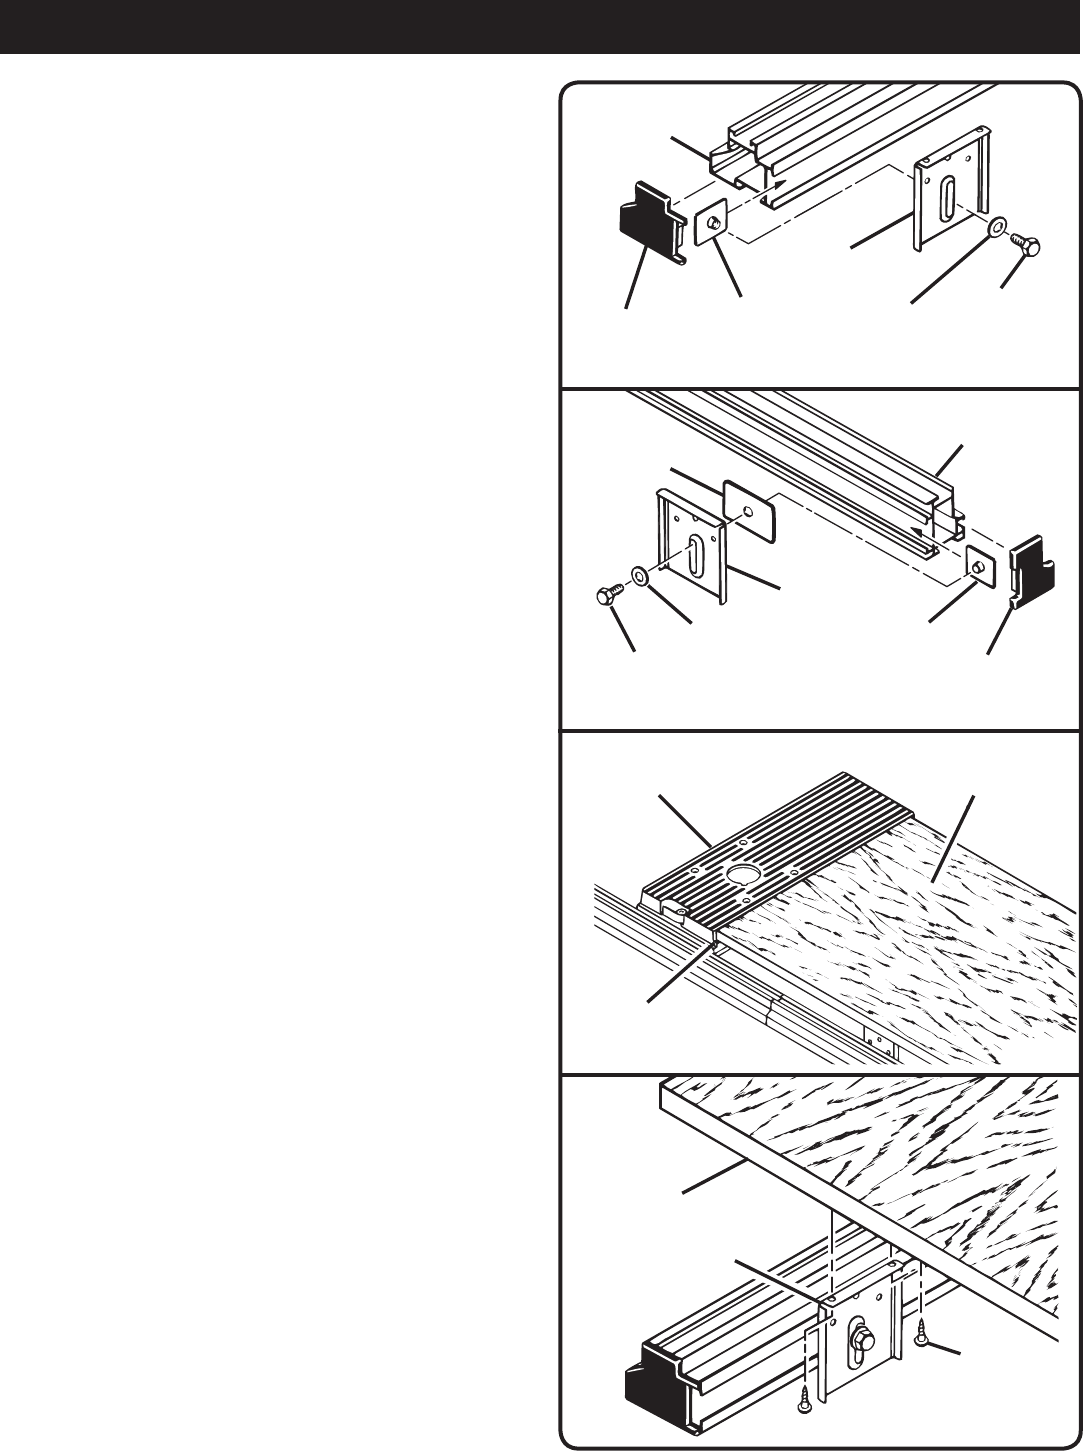
Fig. 6
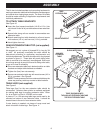
Fig. 5
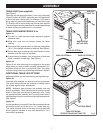
Fig. 4
Fig. 7
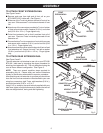
TO ATTACH TABLE BRACKETS
Slide two T-nuts into channel on rear portion of front
extension rail. See Figures 2 and 4.
Attach two table brackets and secure with washers (5/16
in.) and hex bolts (5/16 in. x 1/2 in.) supplied. Hand tighten
only.
Slide two T-nuts into channel on front portion of rear
extension rail. See Figures 3 and 5.
Place a spacer between table brackets and T-nuts on rear
extension rail as shown in gure 5.
Secure table brackets and spacers with two washers (5/16
in.) and two hex bolts (5/16 in. x 5/8 in.) supplied. Hand
tighten only.
NOTE: These bolts are longer to accomodate spacers.
Spacers are needed to provide clearance for the rip fence
when sliding along extension rails.
AUXILIARY TABLE TOP (not supplied)
We suggest you make the auxiliary table top from a piece
of plywood cut 22 in. wide by 44 in. long by 3/4 in. thick.
Space table brackets on each of the four corners so that
they are approximately 6 in. from the ends of extension
rails. See Figures 4 and 5.
Place table top in desired position on table brackets and
adjust table brackets as needed.
NOTE: End of table top closest to saw will rest on lip of
accessory table. See Figure 6.
Tighten the four table bracket bolts securely.
Slide rip fence the entire length of extension rails to
make sure it will clear your new extension table. Make
adjustments as needed for clearance and smooth operation
of rip fence.
Cut a piece of 2 x 4 approximately 19 in. long and secure
to bottom of table top with wood screws. See Figure 8.
NOTE: Use at head wood screws (not included) if attaching
this piece thru table top. Make sure these screw heads
are below the surface of table top. We suggest you mount
it from underneath table top if possible.
This piece should also be located close to the end of your
table top. We suggest that you turn it on its edge as shown
in gure 8.
NOTE: Table legs will be secured to this piece of wood.
Reposition table top on table brackets and secure with
wood screws (#10 x 5/8 in.) provided. See Figure 7.
NOTE: These screws mount from underneath table top.
FRONT
EXTENSION RAIL
END CAP
T-NUT
TABLE
BRACKET
WASHER
HEX BOLT
T-NUT
TABLE
BRACKET
END CAP
SPACER
REAR
EXTENSION RAIL
LIP
ACCESSORY
TABLE
AUXILIARY TABLE TOP
(22 in. X 44 in. X 3/4 in.)
AUXILIARY
TABLE TOP
WOOD
SCREW
TABLE
BRACKET
WASHER
HEX BOLT