


17
TIMING BELT REPLACEMENT
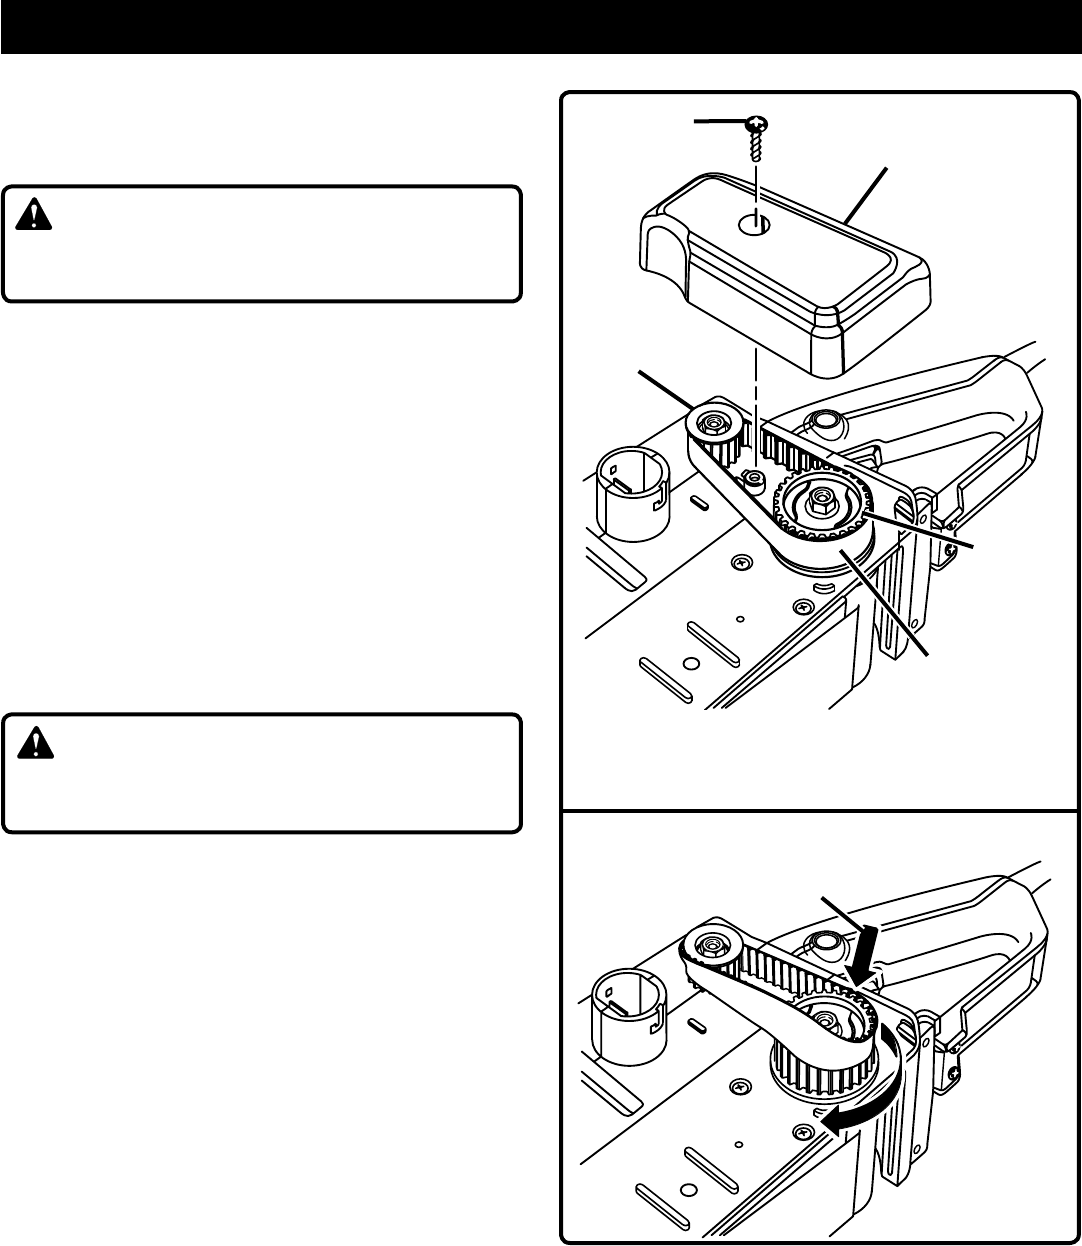
See Figures 11 - 12.
n Unplug the sander.
WARNING:
Failure to unplug the sander could result in accidental
starting causing possible serious personal injury.
n Remove dust bag.
n Remove sanding belt from sander. Follow instructions on
page 12 to remove sanding belt.
NOTE: Removing sanding belt will simplify the process
of installing a new timing belt.
n
Remove belt cover screw and belt cover.
n Force old timing belt from large pulley with a screwdriver
and remove it from small pulley. If it is worn out, simply
cut the old timing belt and remove.
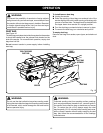
n Install new timing belt over small pulley first.
n Holding the timing belt as shown in Figure 12, press belt
onto the large pulley turning it as you press the belt on.
n Reassemble belt cover and screw.
n Tighten screw securely.
WARNING:
Never attempt to operate the belt sander without belt
cover in place.
Fig. 12
APPLY PRESSURE HERE AND
TURN LARGE PULLEY
MAINTENANCE
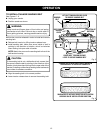
Fig. 11
SANDER SHOWN WITH DUST BAG AND
SANDING BELT REMOVED
LARGE
PULLEY
SMALL
PULLEY
TIMING
BELT
SCREW
BELT
COVER