


Page 12
ASSEMBLY
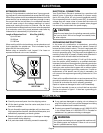
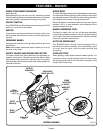
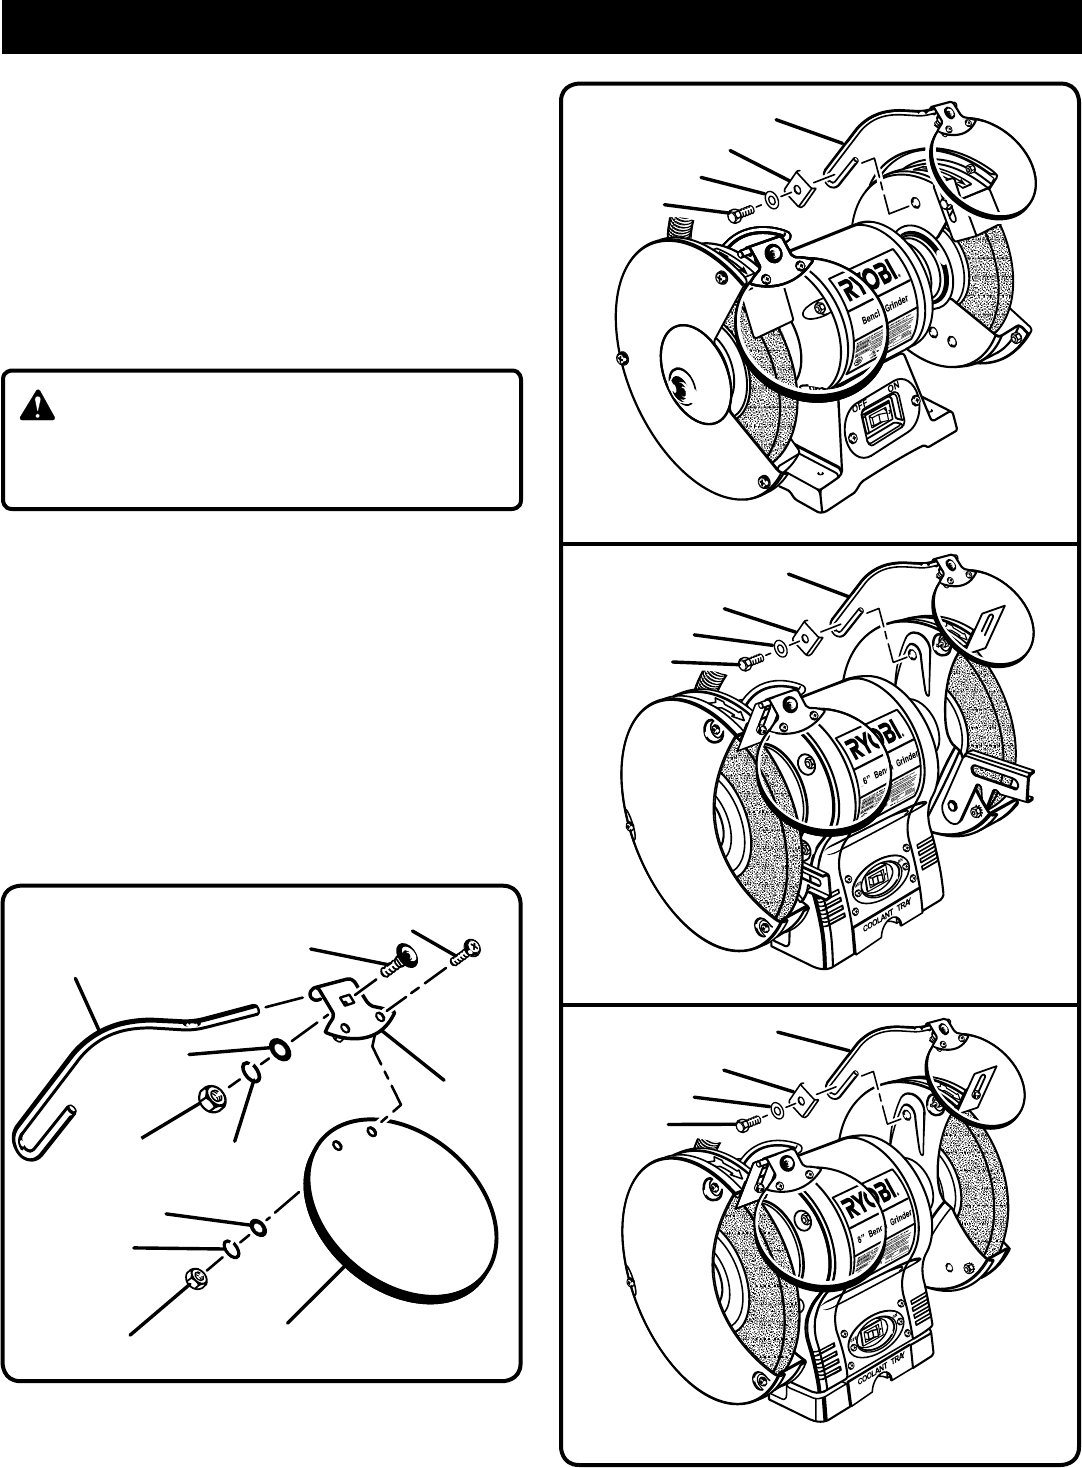
Fig. 6b
HEX BOLT
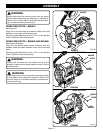
BGH615
BGH625
WASHER
CLAMP BRACKET
SHIELD ROD
BGH825
SHIELD BRACKET ASSEMBLY
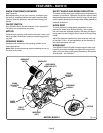
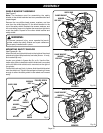
See Figure 5.
Note: The hardware used for assembling the safety
shields to the shield brackets has been preassembled and
prepackaged.
Remove the two phillips head screws, washers, and hex
nuts from the shield bracket. Fit the shield bracket to the
top of the safety shield. Reattach the screws, washers, and
hex nuts taking care not to tighten the screws so tight as to
crack the plastic. Repeat for the other shield bracket and
safety shield.
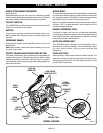
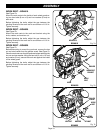
Fig. 6c
Fig. 6a
HEX BOLT
WASHER
CLAMP BRACKET
SHIELD ROD
HEX BOLT
WASHER
CLAMP BRACKET
SHIELD ROD
Fig. 5
SHIELD ROD
CARRIAGE
BOLT
PHILLIPS SCREW
SHIELD
BRACKET
HEX NUT
WASHER
WASHER
HEX NUT
SAFETY
SHIELD
WARNING:
To prevent personal injury, never operate the bench
grinder unless the safety shields and spark deflectors
are properly installed and in place.
MOUNTING SAFETY SHIELDS
See Figures 6a - 6c.
Mount the left and right shield rods to the inside of the wheel
guards using the clamp brackets, hex bolts (8 mm x 14 mm),
and washers (8 mm).
Locate your grinder in figures 6a, 6b, or 6c. Use the illus-
tration as a guide to determine which shield rod is mounted
on the left and which shield rod is mounted on the right of
the grinder.
Once shield rods are firmly in place, slide the shield bracket
onto the shield rod. Tighten the carriage bolt leaving it loose
enough to allow the safety shield to be raised and lowered
easily.
LOCK
WASHER
LOCK
WASHER