


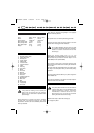

SPECIFICATIONS
EPN-6082 EPN-7582N
Input 230 V ~ 50 Hz 230 V ~ 50 Hz
Power 600 W 750 W
No load speed 16000 min-
1
16000 min-
1
Max. planing depth 1.5 mm 2 mm
Max. planing width 82 mm 82 mm
Max. rabbet depth 8 mm 12 mm
Weight 3.1 kg 3.2 kg
Be sure to check the nameplate on the product,
because the voltage is subject to change depending
on the area in which in the product is to be used.
DESCRIPTION
1. Exhaust direction knob
2. Depth adjust knob
3. Exhaust port
4. Trigger switch
5. Rear handle
6. Lock-off button
7. Livetool indicator
8. Collar
9. Dust bag
10. Front shoe
11. Blade
12. Knob bolt
13. Bracket
14. Edge guide
15. Knob nut
16. Carriage head bolt
17. Blade holder
18. Belt cover
19. Belt
20. Small pulley
21. Large pulley
22. Kick stand
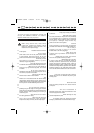
FEATURES
WARNING
If any parts are missing, do not operate your
planer until the missing parts are replaced.
Failure to do so could result in possible serious
personal injury.
KNOW YOUR PLANER
Before attempting to operate your planer, familiarize
yourself with all operating features and safety
requirements. However, do not let familiarity with the tool
make you careless.
Your planer is compact and lightweight. It is equipped
with the following features:
SWITCH
The planer has a conveniently located trigger switch.
LOCK-OFF
The lock-off button locks the trigger switch in the OFF
position when the trigger switch is released.
WARNING
Do not allow familiarity with your planer to make
you careless. Remember that being careless a
fraction of a second is sufficient time to inflict
severe injury.
DEPTH ADJUSTMENT
Adjust the planing depth from 0 to 1.5 mm
(EPN-6082)/2.0 mm (EPN-7582N) in 0.2 mm increments,
and the last step to meet the maximum depth 1.5 mm
(EPN-6082)/2.0 mm (EPN-7582N).
KICK STAND (Fig. 11)
Your planer is fitted with an automatic retracting kick
stand to prevent the blade from contacting the workbench
on run down.
The kick stand will automatically retract as it passes over
the edge of the workpiece when you commence planing
operation.
EDGE/RABBET GUIDE
The edge guide included allows you to plane edges and
make rabbet cuts.
DUST BAG
The dust bag attaches to the planer and helps keep the
work area free of dust and debris.
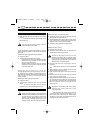
ADJUSTMENTS
WARNING
The power planer should never be connected to
a power supply when you are assembling parts,
making adjustments, cleaning, performing
maintenance, or when the tool is not in use.
Disconnecting the tool prevents accidental
starting that could cause serious injury.
ATTACHING THE DUST BAG (Fig. 1)
Follow these steps to attach the dust bag (9).
■ Unplug the planer.
9
GB
English
F D E I P NL S DK N FIN GR H CZ RUS PL
RO
SLO TR
HR
EPN-6082-7582N 3/08/06 11:24 Page 9