


8 9
WARNING:
Do not allow familiarity with worklights to make you care-
less. Remember that a careless fraction of a second is
sufficient to inflict serious injury.
WARNING:
Do not use any attachments or accessories not recom-
mended by the manufacturer of this worklight. The use
of attachments or accessories not recommended can
result in serious personal injury.
CAUTION:
To prevent damage to the battery pack, remove the bat-
tery pack from the charger immediately if no LED comes
on. Return the battery pack and charger to your nearest
service center for checking or replacing. Also, if you are
removing the battery pack from the charger and no LEDs
are on, return both the battery pack and the charger to
your nearest service center. Do not insert another bat-
tery pack into the charger. A damaged charger may
damage a battery pack.
CHARGING THE WORKLIGHT
If the worklight did not come in a cordless kit with other
cordless products, a battery pack and charger were not
included. If you need to purchase a battery pack, request
recommended battery pack part number 130255004 or
130224028. If you need to purchase a charger, request
recommended charging assembly part number 1423701 or
140237021 or 140237023. If your worklight came with a kit,
use the battery pack and charger included with the kit.
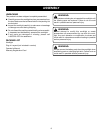
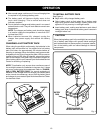
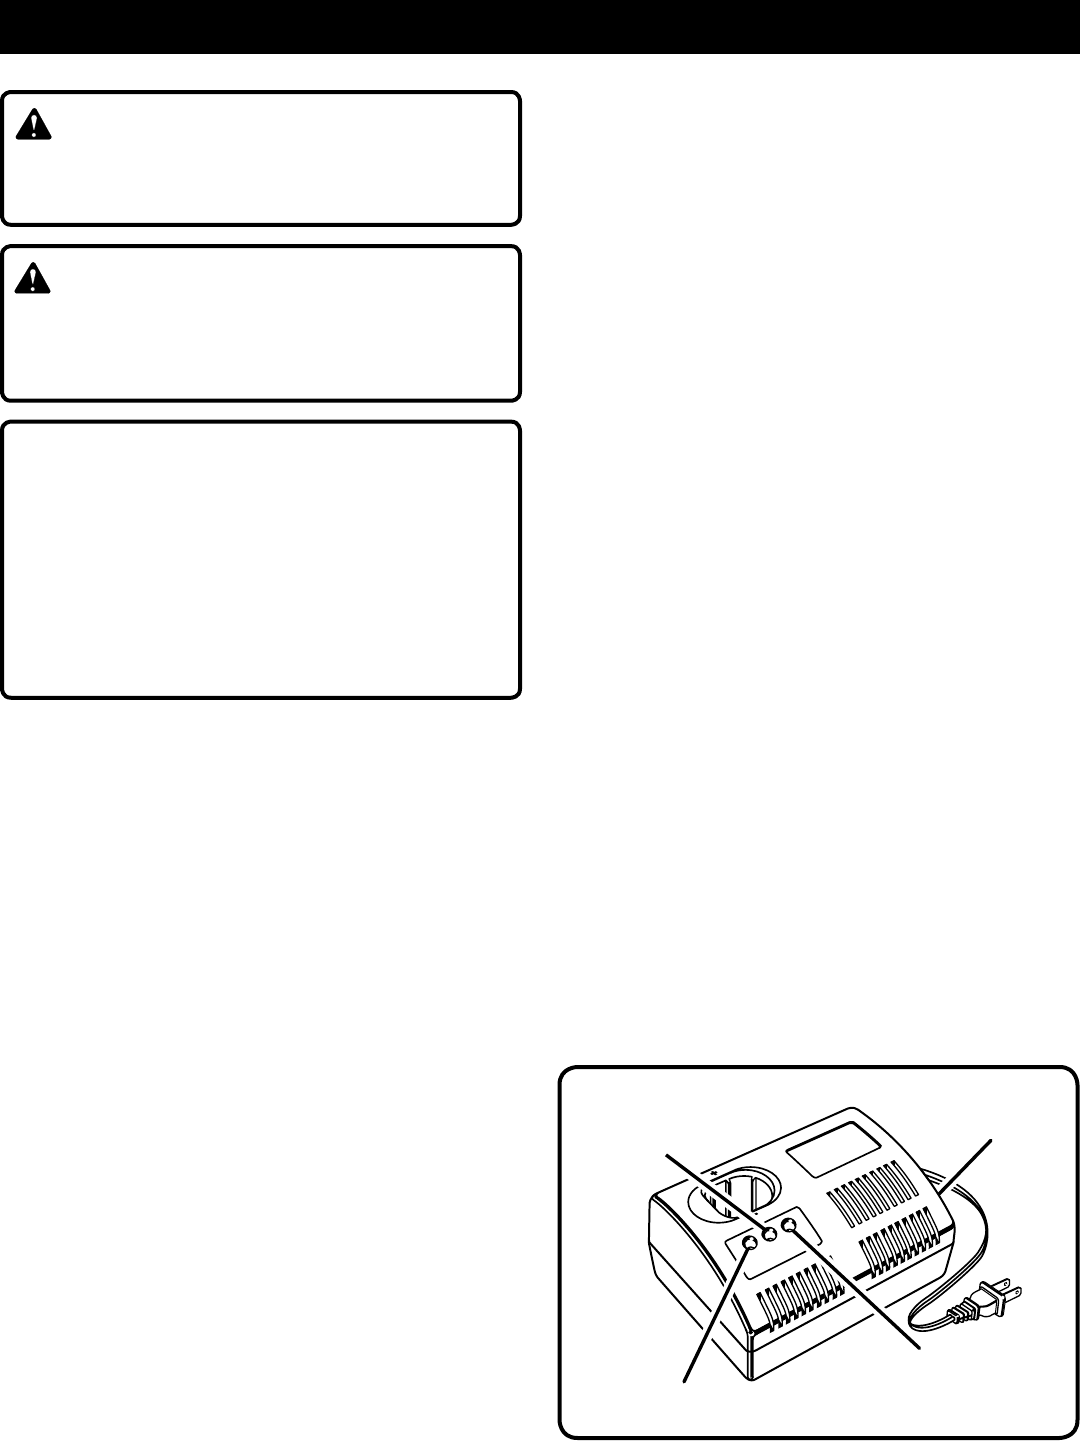
LED FUNCTIONS OF CHARGER
LED WILL BE ON TO INDICATE STATUS OF
CHARGER AND BATTERY PACK:
See Figure 2.
n Red LED on = Fast charging mode.
n Green LED on = Fully charged and in maintenance charge
mode.
n Green LED on = When battery pack is inserted into
charger, indicates hot battery pack or that battery pack
is out of normal temperature range.
n Yellow and Green LEDs on = Deeply discharged or
defective battery pack.
n No LED on = Defective charger or battery pack.
CHARGING THE BATTERY PACK
Battery packs for this worklight are shipped in a low charge
condition to prevent possible problems. Therefore, you
should charge it until the green LED on the front of the
charger comes on.
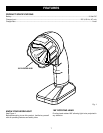
OPERATION
NOTE: Batteries will not reach full charge the first time they
are charged. Allow several cycles (operation followed by
recharging) for them to become fully charged.
CHARGING A COOL BATTERY PACK
If battery pack is within normal temperature range, the red
LED on charger will come on.
NOTE: If the charger does not charge the battery pack
under normal circumstances, return both the battery pack and
charger to your nearest Ryobi Authorized Service Center for
electrical check.
n Charge the battery pack only with a recommended
charger.
n Make sure the power supply is normal household
voltage, 120 volts, 60 Hz, AC only.
n Connect the charger to the power supply.
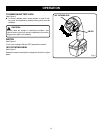
n Place the battery pack in the charger aligning raised rib
on the battery pack with the groove in the charger. See
Figure 3.
n Press down on the battery pack to be sure contacts on
the battery pack engage properly with contacts in the
charger.
n Normally the red LED on charger will come on. This
indicates the charger is in fast charging mode.
n Red LED should remain on for approximately 1 hour
then the green LED will come on. Green LED on
indicates battery pack is fully charged and charger is
in maintenance charge mode.
NOTE: The green LED will remain on until the
battery pack is removed from the charger or charger is
disconnected from the power supply.
n If both yellow and green LEDs come on, this indi-
cates a deeply discharged or defective battery pack.
Allow the battery pack to remain in the charger for 15
to 30 minutes. When the battery pack reaches normal
voltage range, the red LED should come on. If the
red LED does not come on after 30 minutes, this may
indicate a defective battery pack and should be
replaced.
Fig. 2
P110
CHARGER
GREEN LED
YELLOW
LED
RED LED