


10
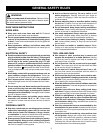
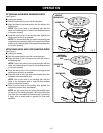
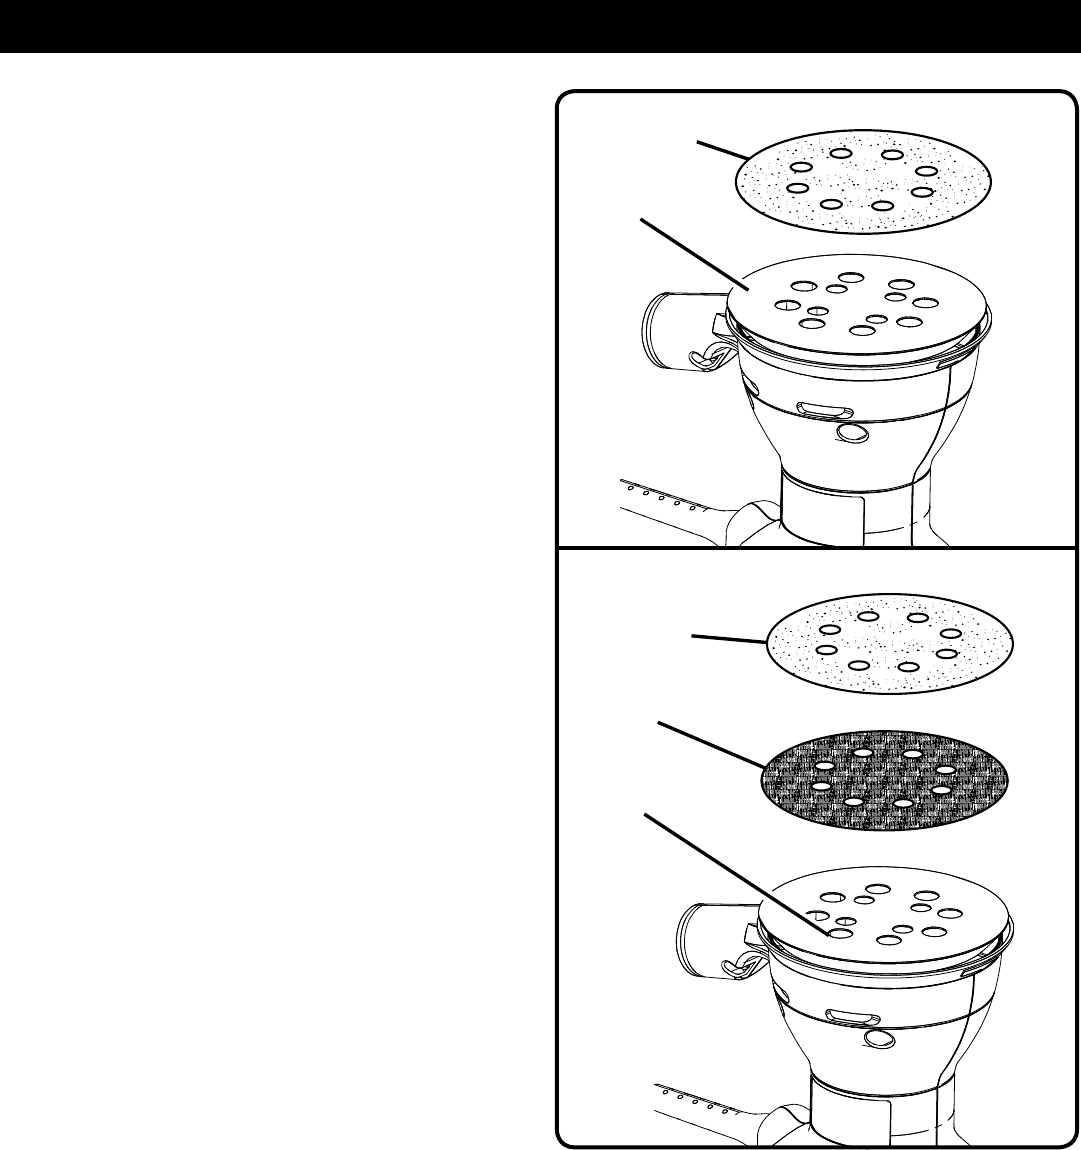
Fig. 2
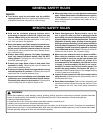
Fig. 3
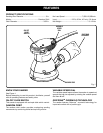
ATTACHING ADHESIVE SANDING DISCS
See Figure 2.
n Unplug the sander.
n Peel the paper backing from the sanding disc.
n Align the holes in the sanding disc with the holes in the
backing pad.
NOTE: Line up the holes in the sanding disc with the
holes in the backing pad in order for the dustless feature
to function properly.
n Press the sticky side of the sanding disc against the
backing pad as firmly as possible.
NOTE: It is recommend that you clean the backing pad
occasionally by brushing it lightly with a small brush. Dust
buildup on the backing pad could cause the sanding disc
to not stick properly.
ATTACHING HOOK AND LOOP SANDING DISCS
See Figure 3.
n Unplug the sander.
n Peel the paper backing from the conversion pad.
n Align the holes in the conversion pad with the holes in
the backing pad.
NOTE: Line up the holes in the conversion pad with the
holes in the backing pad in order for the dustless feature
to function properly.
n Press the sticky side of the conversion pad against the
backing pad as firmly as possible.
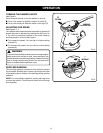
n Align the holes in the hook and loop sanding disc with
the holes in the conversion pad.
NOTE: Line up the holes in the sanding disc with the
holes in the conversion pad in order for the dustless
feature to function properly.
n Press the fuzzy side of the sanding disc against the
conversion pad as firmly as possible.
NOTE: You can reuse hook and loop type sanding discs
for the life of the sanding abrasive. We recommend that
you clean the conversion pad occasionally by brushing
it lightly with a small brush to provide for their best
adhesion.
ADHESIVE
SANDING DISC
HOOK AND
LOOP SANDING
DISC
CONVERSION
PAD
BACKING PAD
BACKING PAD
OPERATION