


5
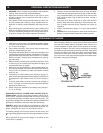
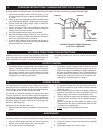
A SPARK NEAR THE BATTERY MAY CAUSE BATTERY EXPLOSION. TO REDUCE RISK OF A SPARK NEAR BATTERY:
1. Check polarity of battery posts. POSITIVE (POS, P,+) bat-
tery post usually has a larger diameter than NEGATIVE (NEG,
N, -) post.
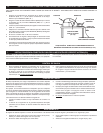
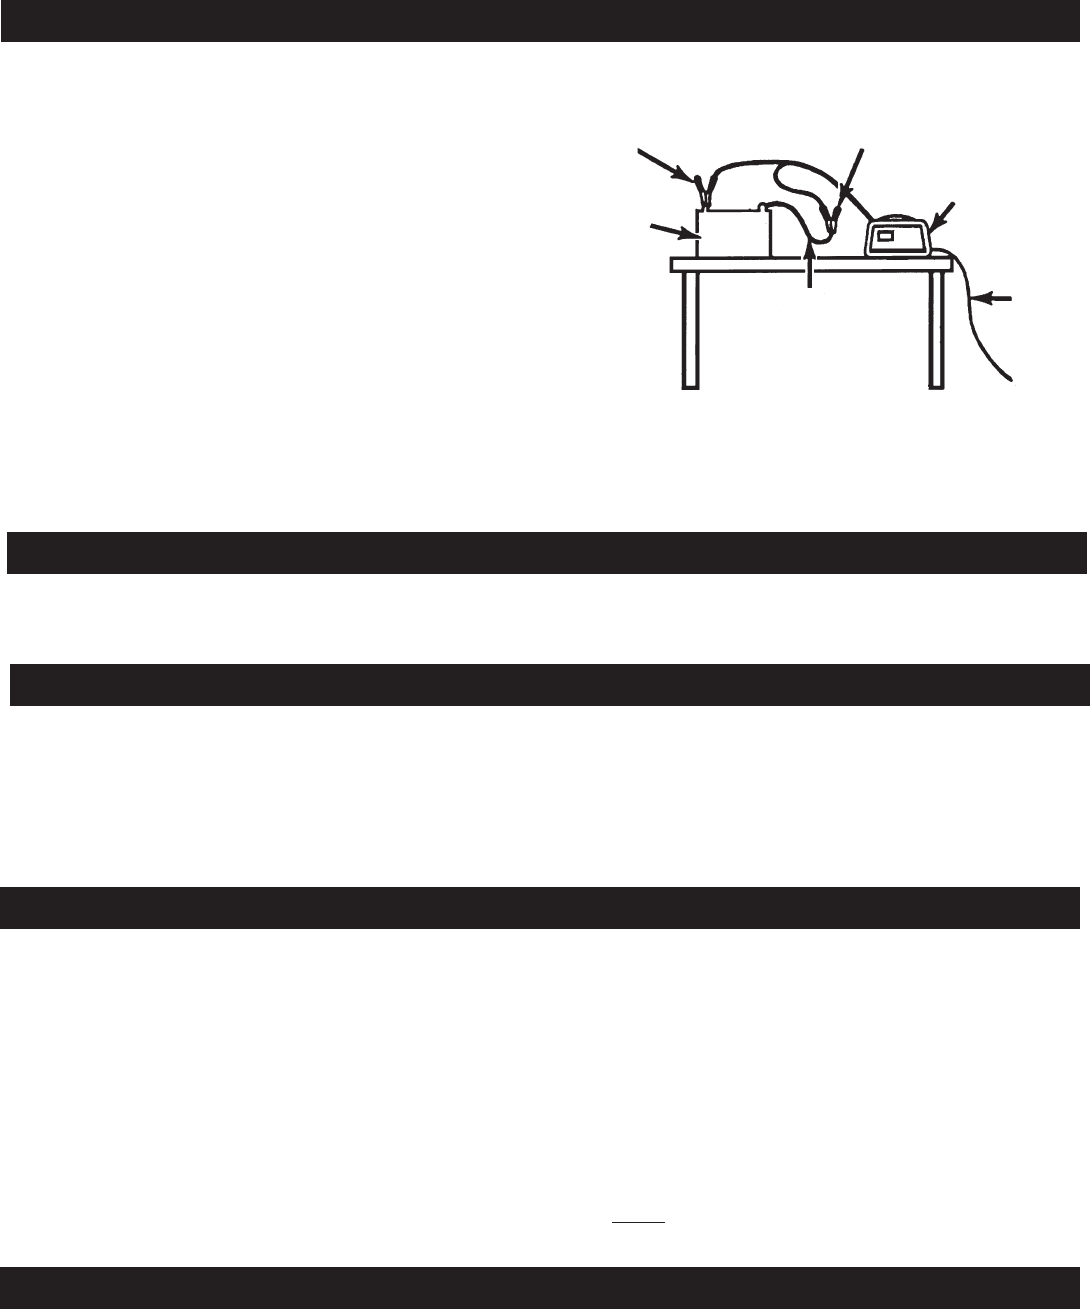
2. Attach at least a 24”-long 6-gauge (AWG) insulated battery
cable to NEGATIVE (NEG, N, -) battery post (not provided).
3. Connect POSITIVE (RED) charger clamp to POSITIVE
(POS, P,+) post of battery.
4. Position yourself and free end of cable as far away from
battery as possible. Then connect NEGATIVE (BLACK)
charger clamp to free end of cable.
5. Do not face battery when making final connection.
6. When disconnecting charger, always do so in reverse se-
quence of connecting procedure and break first connection
while as far away from battery as practical.
7. A marine (boat) battery must be removed and charged on
shore. To charge a battery on the boat requires equipment
specially designed for marine use.
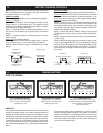
POSITIVE
NEGATIVE
CHARGER
POWER
CORD
24"
6-GAUGE
CABLE
BATTERY
FIGURE 8: CONNECT NEGATIVE BATTERY
CLIP TO 24” CABLE END
H. OPERATING INSTRUCTIONS: CHARGING BATTERY OUT OF VEHICLE
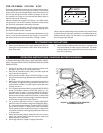
I. AC POWER CORD CONNECTION INSTRUCTIONS
This battery charger is for use on a nominal 120 Volt, 60 Hz
circuit.
DANGER: Never alter AC cord or plug provided. If it will not fit
outlet, have proper outlet installed by a qualified electrician. Im-
proper connection can result in a risk of an electric shock.
J. OUTPUT CONTROL
1. This battery charger is equipped with a self-resetting circuit
breaker. This device protects the charger from temporary
overloads. In the event of an overload, the circuit breaker
will trip open, and after a short cooling off period, will reset
automatically. This process is known as cycling and can be
recognized by an audible clicking sound.
2. This battery charger is equipped with an electronic control
circuit which automatically governs the charge rate to your
battery. The charger will satisfactorily charge maintenance-
free and conventional batteries. The PS-1022MA (Manual
Position) and the PS-2100MA (6V 15A Position) are not con-
trolled by the control board and must be monitored. Over-
charging can cause damage to your battery.
TO GROUNDED
POWER OUTLET
The approximate time required to bring a battery to full charge
state depends upon the number of ampere hours (Ah) depleted
from the battery. Ahs are determined by multiplying the number
of hours by the number of amps supplied to a load.
For example, if a load was connected to a battery, which drew
7 Amp for a period of 5 hours, the battery will have supplied 35
Ah. The approximate recharge time would then be calculated by
dividing the 35 Ah depleted from the battery, by the ampere charge
rate of the charger. To allow for tapering off of the charge rate,
add 25% to the charge time.
Indications of a fully charged battery are:
1. When the meter indicates an intermittent current flow to the
battery.
2. A hydrometer reading of the specific gravity of the electro-
lyte (fluid) of a battery in good condition should be between
1.250 and 1.285.
3. When a battery reaches 80–85% of full charge, bubbles will
appear on the surface of the fluid. As the battery nears full
charge, bubbling will become more noticeably active.
4. The time required to charge two 6 Volt batteries connected
in series will be the same as for one 12 Volt battery of equiva-
lent size.
NOTE: This charger will shut off when the battery is fully
charged and will turn back on automatically when the bat-
tery needs to be charged again.
5.
Do not charge two 12 Volt batteries in parallel.
K. CHARGE PERIOD
L. MAINTENANCE
Very little maintenance is required for the battery charger. Follow common sense in wiping the charger clean and store in a clean, dry area.
1. After use, wipe all battery corrosion and other dirt or oil from
clamps, cords, and the charger case. Use a dry cloth.
2. Coil charger cords to prevent damage.
3. Have any cracked or frayed cords replaced by a qualified
professional.
4. Store battery charger in a clean, dry area.