


• 12 •
OPERATING INSTRUCTIONS12.
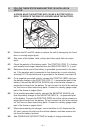
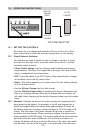
SETTING THE CONTROLS12.1
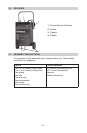
All controls for your charger are located on the front of the unit. Follow
these instructions to obtain the accurate charge level for your battery.
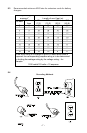
Output Selector Switches:12.2
Two switches are used to select the rate of charge or function; a 3-posi-
tion switch on the right, and a 2-position switch to the left of it. Use the
3-position switch to select:
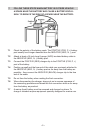
2 Amp Trickle Charge:• Use for charging small batteries and warming
large batteries. The lower the charge rate, the longer it will take, but the
battery is subjected to much less stress.
OFF: • Leave the switch in the OFF Position while connecting the charger
to the battery and to the AC power outlet.
Select: • This setting enables you to select one of the two settings offered
by the 2-position switch.
Use the • 40 Amp Charge rate for a fast charge.
Use the • 200 Amp Engine Start for cranking the engine. Remember that
little or no charging has been done by the charger and your battery will
still need further charging by the vehicle charging system once the engine
starts.
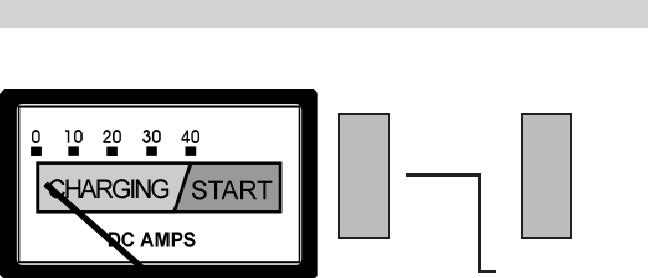
Ammeter:12.3 Indicates the amount of current measured in amperes that is
being drawn by the battery. For example, in the 40 amp charge rate, a
typical discharged battery will initially draw approximately 40 amps. As
the battery continues to charge, current will taper to 15 to 20 amps at full
charge. The Start area of the meter indicates a high rate of current be-
ing drawn from the charger. When cranking an engine, the starter motor
draws upwards to 200-300 amps. The meter needle will be at the extreme
right side of the start area. Sometimes, for the rst few minutes of its
charge, the battery will draw more than 40 amps; in this case, the needle
may be within, but not all the way over, to the right side of the start area.
OFF
40A 12V
CHARGE
2A 12V
CHARGE
200A 12V
ENGINE
START
SELECT
VOLT/AMP SELECTOR