• 6 •
ASSEMBLY INSTRUCTIONS9.
No assembly required.9.1
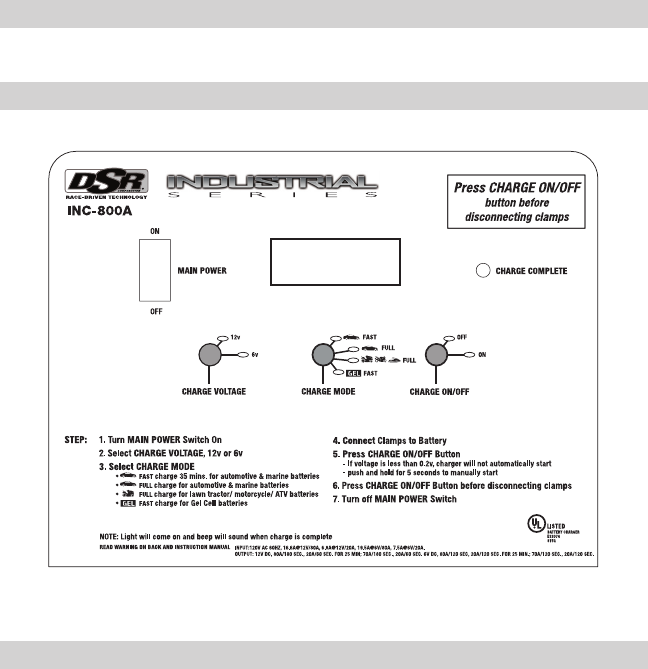
CONTROL PANEL10.
OPERATING INSTRUCTIONS11.
Connect the battery cable assembly to the INC-800A with the quick-con-11.1
nect connector on the back of the unit.
Connect the battery cable assembly to the battery as described in sections 11.2
6 and 7.
Plug the INC-800A into a 120V AC wall outlet.11.3
NOTE: The INC-800A intermittently draws more than 15 amps of current.
We recommend that you either install a 20 amp circuit or do not run any-
thing else on the same circuit as the INC-800A or you may trip the breaker
supplying the AC power.
Turn the 11.4 MAIN POWER switch to the ON position. When the charger pow-
ers up, the LCD screen defaults to and displays 12V FAST on the top line
and CONNECT BATTERY blinking on the bottom line. The charger also
checks for a properly connected battery. When it nds one, the display
changes to show the voltage of the battery on the top line and PRESS ON
blinking on the bottom line (referring to the CHARGE ON/OFF button).


