


• 3 •
OPERATING INSTRUCTIONS7.
This battery charger must be properly assembled in accordance with the
assembly instructions before it is used.
Charging
NOTE: Examine the battery for excessive wear, cracks, bulging or damage each time
you charge it. If damage is detected, do not charge the battery, replace it immediately. If
the battery is hot, allow it to cool before charging.
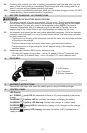
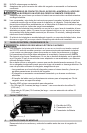
Connect the battery following the ride-on toy’s instruction manual.1.
Connect the AC power following the precautions listed in section 3.2.
If you’ve connected everything correctly, the CHARGING 3. LED should be lit,
indicating that the charger is charging.
Quick Charge
When the CHARGED LED begins to ash, the battery is “Ready To Use”. Unplug
the charger from the wall outlet and then disconnect the charger from the battery. NOTE:
The CHARGING LED will remain lit while the CHARGED LED is ashing.
Complete Charge
When the CHARGED LED stops ashing and stays lit and the CHARGING
LED turns off, the battery is completely charged and the charger has stopped charging
and switched to the Maintain Mode of operation. When ready to use, unplug the charger
from the wall outlet and then disconnect the charger from the battery.
NOTE: For longer battery life, the battery must be completely charged after two
consecutive quick charges. (Example: quick-quick-complete.)
Aborted Charge
If charging can not be completed normally, charging will abort. When charging aborts,
the charger’s output is shut off, and the CHARGING LED will blink. To reset after
an aborted charge, unplug the charger from the AC outlet, wait a few moments and plug
it back in.
MAINTENANCE/STORAGE INSTRUCTIONS8.
After use and before performing maintenance, unplug and disconnect the battery charger.8.1
Use a dry cloth to wipe all battery corrosion and other dirt or oil from the connector, 8.2
cords and the charger case.
Servicing does not require opening the unit, as there are no user-serviceable parts.8.3
All other servicing should be performed by qualied service personnel.8.4
Store the charger unplugged, inside, in a cool, dry place.8.5
TROUBLESHOOTING9.
PROBLEM POSSIBLE CAUSE REASON/SOLUTION
Power light will not turn on. AC outlet is dead.
Poor electrical connection.
Check for an open fuse or
circuit breaker supplying the
AC outlet.
Check the power cord and
extension cord for a loose
tting plug.
Charger makes a loud buzz
or hum.
Transformer laminations
vibrate (buzz).
No problem; this is a normal
condition.
CHARGING LED is
ashing.
Charger is in abort mode. See Section 7 OPERATING
INSTRUCTIONS – Aborted
Charge.
CHARGED LED is
ashing.
Battery is 80% charged and
is “ready to use”.
See Section 7 OPERATING
INSTRUCTIONS – Quick
Charge.