


• 7 •
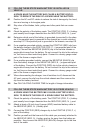
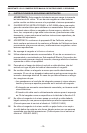
CHARGING STATUS (yellow and green) LED 12.2 – The CHARGING STA-
TUS LED glows yellow when the charger is charging and green when the
battery is charged and in maintain mode.
LED Color/Flash Pattern Explanation
Red On AC Power Present
Yellow On Charging
Green On Charge Complete
OPERATING INSTRUCTIONS13.
WARNING: Failure to follow instructions may cause damage or an explo-
sion. Read the entire instruction manual before use.
Make sure that the charger is unplugged from the AC outlet.13.1
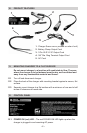
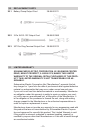
Connect one of the three optional output cables to the charger output con-13.2
nector.
Connect the other end of the output cable to the battery.13.3
Plug the charger into the AC outlet. The POWER ON (red) LED will glow 13.4
to show that AC power is present. Then the green and yellow LED will
blink once as a self-test to make sure that the LED is operating properly.
After three seconds, the CHARGING (yellow) LED will glow to show that 13.5
charging has begun. If none of the LEDs glow, or if the CHARGING (yel-
low) LED does not glow, refer to the troubleshooting section. Charge time
may vary from less than one hour to 12 hours.
When charging is complete, the CHARGED (green) LED will glow and the 13.6
charger will automatically go into maintain mode. If desired, the charger
can now be unplugged from the AC outlet.
NOTE: If the battery has not reached at least 18-volts after ve minutes of
charging or at least 24-volts after four hours of charging, the charger will
abort the charging process and turn the yellow LED off.
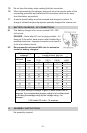
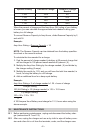
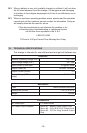
CALCULATING CHARGE TIME14.
To determine the time needed to fully charge your battery, you must
rst determine the battery’s charge level with a hydrometer or electronic
Percent-of-Charge Tester. The following table will help you convert hy-
drometer readings to percent of charge values.