


• 36 •
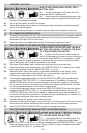
Connect the POSITIVE (RED) charger clip to the POSITIVE (POS, P, +) post of the battery.7.3
Position yourself and the free end of the cable you previously attached to the NEGATIVE 7.4
(NEG, N, -) battery post as far away from the battery as possible – then connect the
NEGATIVE (BLACK) charger clip to the free end of the cable.
Do not face the battery when making the nal connection. As stated in 7.4, face away 7.5
from the battery when connecting the negative clip to the cable.
Connect charger AC supply cord to electrical outlet.7.6
When disconnecting the charger, always do so in the reverse order of the connecting 7.7
procedure and break the rst connection while as far away from the battery as practical.
A marine (boat) battery must be removed and charged on shore. To charge it onboard 7.8
requires equipment specially designed for marine use.
GROUNDING AND AC POWER CORD CONNECTIONS8.
RISK OF ELECTRIC SHOCK OR FIRE.
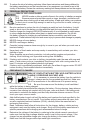
This battery charger is for use on either a nominal 120V, 8.1
50/60 Hz or a nominal 230V, 50/60 Hz circuit. (See the warning
label on the charger for the correct input voltage.) The charger
must be grounded to reduce the risk of electric shock. The plug
must be plugged into an outlet that is properly installed and
grounded in accordance with all local codes and ordinances.
The plug pins must t the receptacle (outlet). Do not use with an ungrounded system.
8.2 Never alter the AC cord or plug provided – if it does not t the outlet,
have a proper grounded outlet installed by a qualied electrician. An improper
connection can result in a risk of an electric shock or electrocution.
If the AC cord is damaged, it must be replaced by the manufacturer, its service agent or 8.3
other qualied person in order to avoid a risk of personal injury or property damage.
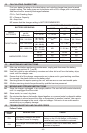
Recommended minimum AWG size for extension cord:8.4
100 feet (30.5 meters) long or less - use a 14 gauge (2.5mm•
2
) extension cord.
Over 100 feet (30.5 meters) long - use a 12 gauge (4mm•
2
) extension cord.
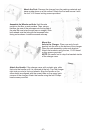
ASSEMBLY INSTRUCTIONS9.
It is important to fully assemble your charger before use. Remove all cord wraps and 9.1
uncoil the cables prior to using the battery charger. Follow these instructions for assembly.
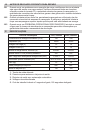
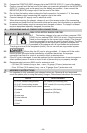
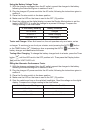
PARTS TOOLS NEEDED
(2) 10-32, thread cutting screws
(4) ¼-20, thread cutting screws
(4) Phillips head sheet metal screws
(2) wheels
(1) axle
(2) axle caps
(2) axle brackets
(1) handle
(1) foot
3/8" wrench (for mounting foot)
5/16" wrench (for mounting wheels)
hammer
screwdriver (at blade)
screwdriver (Phillips)