


Alignment and Adjustment
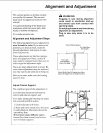
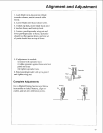
Make Blade Parallel to Table
The goal of this adjustment is to keep the
workpiece from being thrown or
damaged. This adjustment will also reduce
splintering of the workpiece and burning
of the kerf during ripping and crosscutting.
1. Lock blade in straight crosscut position.
2. Pull blade forward and lock rip lock.
3. Raise blade at least 2" above table.
4. lock motor at 90 ° bevel (blade horizon-
tal).
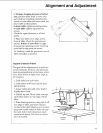
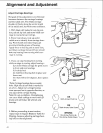
5. Place square so long side is on table
under right side of blade, and short side
hangs down vertically at front of saw.
Push edge of square against fence
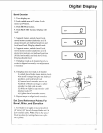
6. [x)wer radial arm until blade surface,
not a tooth, just rests on square.
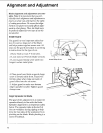
7. There should be no gap between blade
and square. Note: Not all blades are per-
fectIy flat. Check different points along
blade surface by making quarter turns and
looking for gap each tbne. Consider overall
fit of blade, if there is no gap, no adjust-
ment is needed.
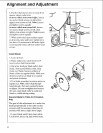
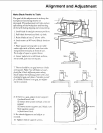
Correct
Motor
Wrong Wrong
11
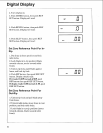
8. if there is a gap, adjust motor support:
i) unlock bevel lock
ii) loosen two screws on back of motor
support
iii) move motor support until blade rests
flush against square
iv) lock bevel lock.
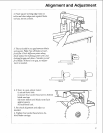
9. Re-check alignment and adjust as
needed.
10. Tighten motor support screws.
45