


• 11 •
OPERATING INSTRUCTIONS11.
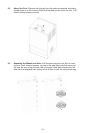
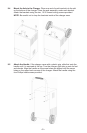
This battery charger must be properly assembled in
accordance with the assembly instructions before it is used.
Charging
Ensure that all of the charger components are in place and in good working 1.
condition, for example, the plastic boots on the battery clips. Make sure the
electrolyte (battery liquid) in each cell is at the correct level.
Set the Output Selector Switch #2 to the OFF position.2.
Connect the battery following the precautions listed in sections 6 and 7.3.
Connect the A.C. power following the precautions listed in section 8.4.
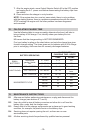
Place the output selector switches #1 and #2 in the preferred position.5.
For the 2A charge rate, switch #1 is not used and switch #2 should be •
toggled up.
For the 40A charge rate, both switches #1 and #2 should be toggled down.•
To disconnect the charger, reverse the procedure.6.
NOTE: This is a manual charger and will overcharge a battery if
permitted to operate for extended periods of time. Monitor the charging
progress often.
Manual Mode
Be sure to monitor the charging progress and stop it when the battery is fully
charged. This charger is a manual charger and is not equipped with automatic
shut off. Not doing so may cause damage to your battery or may cause other
personal property damage or personal injury.
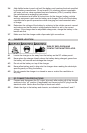
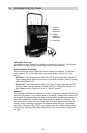
Using the Engine Start feature
Your battery charger can be used to jumpstart your car if the battery is low.
Follow these instructions on how to use the ENGINE START feature.
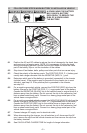
Follow all safety instructions and precautions for charging
your battery. Wear complete eye protection and clothing protection. Charge
your battery in a well-ventilated area.
Using the ENGINE START feature WITHOUT a battery
installed in the vehicle could cause damage to the vehicle’s electrical system.
NOTE: If you have charged the battery and it still will not start your car, do not
use the engine start feature, or it could damage the vehicle’s electrical system.
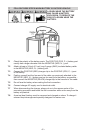
Set Output Selector Switch #2 to the OFF position.1.
With the charger unplugged from the A.C. outlet, connect the charger to 2.
the battery following the instructions given in section 6: FOLLOW THESE
STEPS WHEN BATTERY IS INSTALLED IN VEHICLE.
Plug the charger A.C. power cord into the A.C. outlet.3.
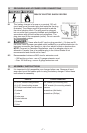
With the charger plugged in and connected to the battery of the vehicle, set 4.
the Output Selector Switch to the engine start position (switch #1 up, switch
#2 down).
Crank the engine until it starts or 5 seconds pass. If the engine does not 5.
start, wait 4 minutes before cranking again. This allows the charger and
battery to cool down.
NOTE: During extremely cold weather, or if the battery is under 2 volts, charge
the battery for 5 minutes before cranking the engine.
If the engine fails to start, charge the battery for 5 more minutes before 6.
attempting to crank the engine again.