


-15-
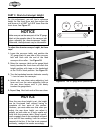
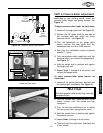
Figure 21. Rear drum micro adjustment knob
and lock lever.
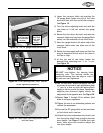
4. Lower the conveyor table and position the
30" gauge block under one end of the front
drum and flush with the end of the conveyor.
See Figure 19.
5. Turn the micro adjusting knob and raise the
rear drum so it will not contact the gauge
block.
6. Rotate the front drum by hand, and raise the
conveyor table until you hear the gauge block
barely rub the underside of the front drum.
7. Move the gauge block to the other side of the
conveyor table under the other end of the
front drum.
8. Rotate the drum again and listen and feel the
drag to determine which end of the drum is
too low or high.
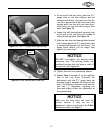
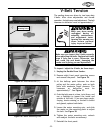
9. At the low end of the drum, loosen the
bearing-block mounting nuts
1
⁄4 to
1
⁄3 turn.
See Figure 20.
10.Use a 4 mm Allen
®
wrench to equally turn the
set screws at one end of each adjustment plate
1
⁄8" turn at a time to raise the bearing block
height at the low end of the drum. Remember,
adjusting one drum-end slightly affects the
adjustment at the opposite end. See Figure 20.
11.Repeat Steps 1 through 10 to achieve front
drum-to-conveyor squareness.
12.Tighten the nuts in an alternating pattern and
recheck the squareness.
13.Now use the 30" gauge block at the rear drum
to find which end is too low.
14.Unlock the micro-adjustment lock knob, and
turn the micro-adjust knob to adjust the rear
drum height. See Figure 21.Unlike the front
drum, there are no set screws to adjust the
rear drum height.
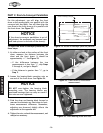
NOTICE
DO NOT over-tighten the bearing block
mounting nuts. The bearing blocks are
machined housings that can warp or crack if
the nuts are over-tightened.
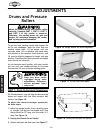
Figure 20. Front bearing block, nuts, and set
screw tightening sequence.
Figure 19. The 30" gauge block positioning.
Gauge Block
Barely Touching
the Underside
of Drum.
Gauge
Block End
Flush with
End of
Conveyor.
Mounting
Nut
Adjustment
Plate
Set
Screws
ADJUSTMENTS