


-9-
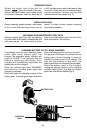
Release battery pack from tool by pressing
on both sides of the battery release tabs and
pull downwards. To insert battery, align
battery and slide battery pack into tool until it
locks into position. Do not force.
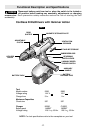
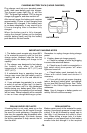
Always keep the spindle threads, the threads
of the chuck and securing screw free of
debris. To install a chuck, reverse “removing
the chuck” procedure.
INSTALLING CHUCK
RELEASING AND INSERTING BATTERY PACK
Rotate the clutch ring to the drill bit
symbol “ ”. Open the chuck all the way,
remove left-hand thread screw inside chuck
by turning it clockwise. Insert the short arm of
a 3/8" hex key wrench and close jaws on flats
of wrench. Strike long arm of wrench sharply
counterclockwise, remove wrench and
unthread chuck from spindle (Fig. 2).
REMOVING CHUCK
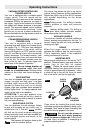
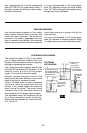
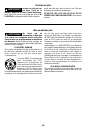
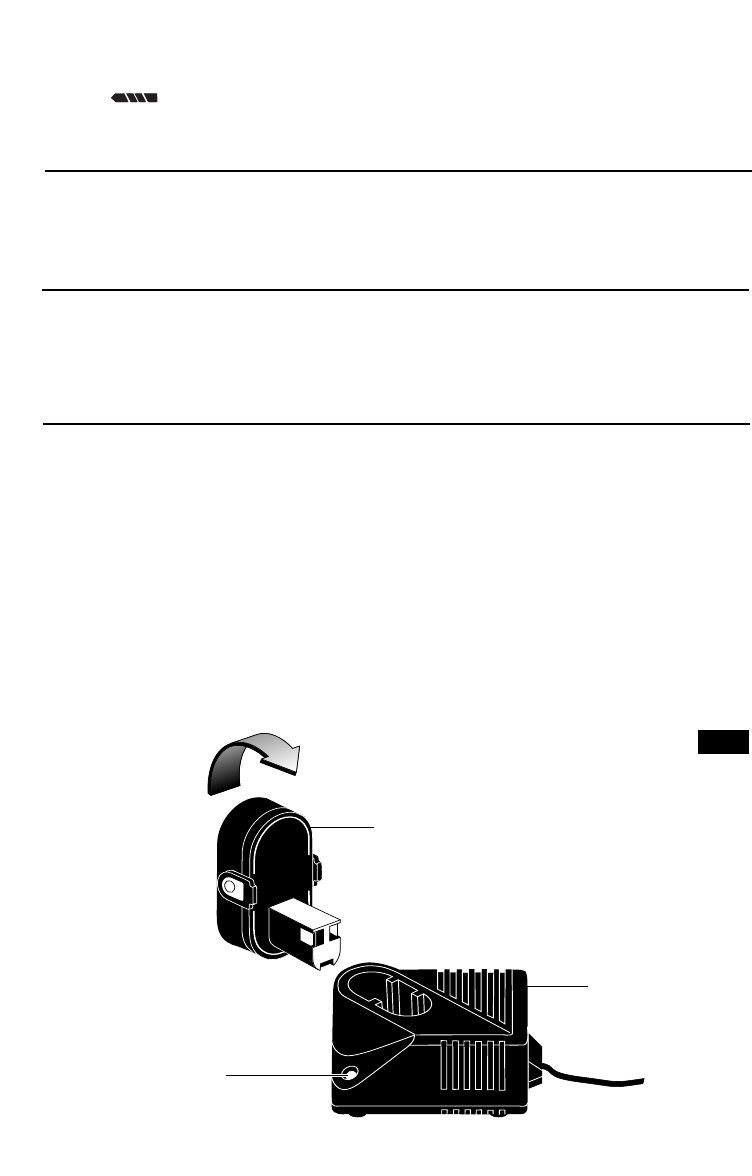
CHARGING BATTERY PACK (1 HOUR CHARGER)
INDICATOR
LIGHT
CHARGER
BATTERY PACK
FIG. 3
Plug charger cord into your standard power
outlet, then insert battery pack into
charger.The charger’s green indicator will
begin to “BLINK”. This indicates that the
battery is receiving a fast charge. Fast-
charging will automatically stop when the
battery pack is fully charged.
When the indicator light stops “BLINKING”
(and becomes a steady green light) fast
charging is complete.
When you begin the charging process of the
battery pack, a steady green light could also
mean the battery pack is too hot or too cold.
The purpose of the light is to indicate that the
battery pack is fast-charging. It does not
indicate the exact point of full charge. The
light will stop blinking in less time if the
battery pack was not completely discharged.
When the battery pack is fully charged,
unplug the charger (unless you're charging
another battery pack) and slip the battery
pack back into the tool handle (Fig.3).