


#'!'&&!
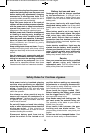
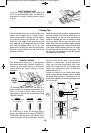
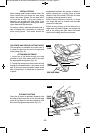
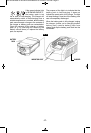
Plunge cutting is useful and time-saving in
making rough openings in softer materials. It
is not necessary to drill a hole for an inside or
pocket cut. Draw lines for the opening, hold
the saw firmly, tilt it forward so that the toe of
the saw foot rests on the work, but with the
blade well clear of the work. Start the motor,
and then very gradually lower the blade. When
it touches, continue pressing down on the toe
of the saw foot slowly pivoting the saw like a
hinge until the blade cuts through and the foot
rests flat on the work. Then saw ahead on the
line of cut line. We do not recommend plunge
cutting with a scroll blade (Fig. 10).
To make sharp corners, cut up to the corner,
then back up slightly before rounding the
corner. After the opening is complete, go back
to each corner and cut it from the opposite
direction to square it off. Do not try to plunge
cut into hard materials such as steel.
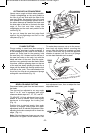
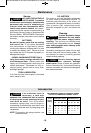
("$!'&&!
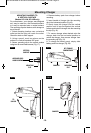
Disconnect battery pack from tool and remove
the blade.
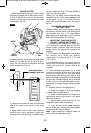
The foot can be adjusted to cut any angle
from 0˚ to 45,˚ and is equipped with quick
reference detent stops at 0˚, 15˚, 30˚, and 45˚.
TO ADJUST: Lift foot adjustment lever in the
bottom of foot as shown, move foot slightly
backward to disengage the locking tab
(Fig. 11).
Position foot to desired angle, then push
forward to engage locking tab and lower
adjustment lever to maintain adjustment. After
adjusting foot make a sample cut to check the
angle, (Fig. 11).
!;@1If the foot becomes loose you can use a
screwdriver to tighten screw located on the
foot adjustment lever, then re-adjust the foot
adjustment lever.
TOE OF
FOOT
FIG. 10
-11-
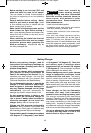
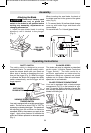
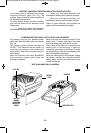
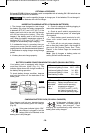
'&&!)&%&$&
Always use a rough cut blade when possible.
Clamp a straightedge on the work parallel to
the line of cut and flush with the side of the
saw foot. (Either first mark the line of cut and
then position the straightedge parallel and at
the same distance as between the blade and
the side edge of the foot or first mark the side
edge of the foot and then clamp the
straightedge on the mark and parallel to the
cut line Fig. 9)
As you cut, keep the saw foot edge flush
against the straightedge and flat on the
workpiece (Fig. 9).
LINE
OF
CUT
CLAMPS
FIG. 9
FOOT
ADJUSTMENT
LEVER
LOCKING
TAB
SCREW
FOOT
FIG. 11
""&!%&
%
&$&
SM 1619X04463 05-09:SM 1619X04463 05-09 5/29/09 3:22 PM Page 11