


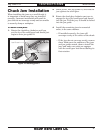
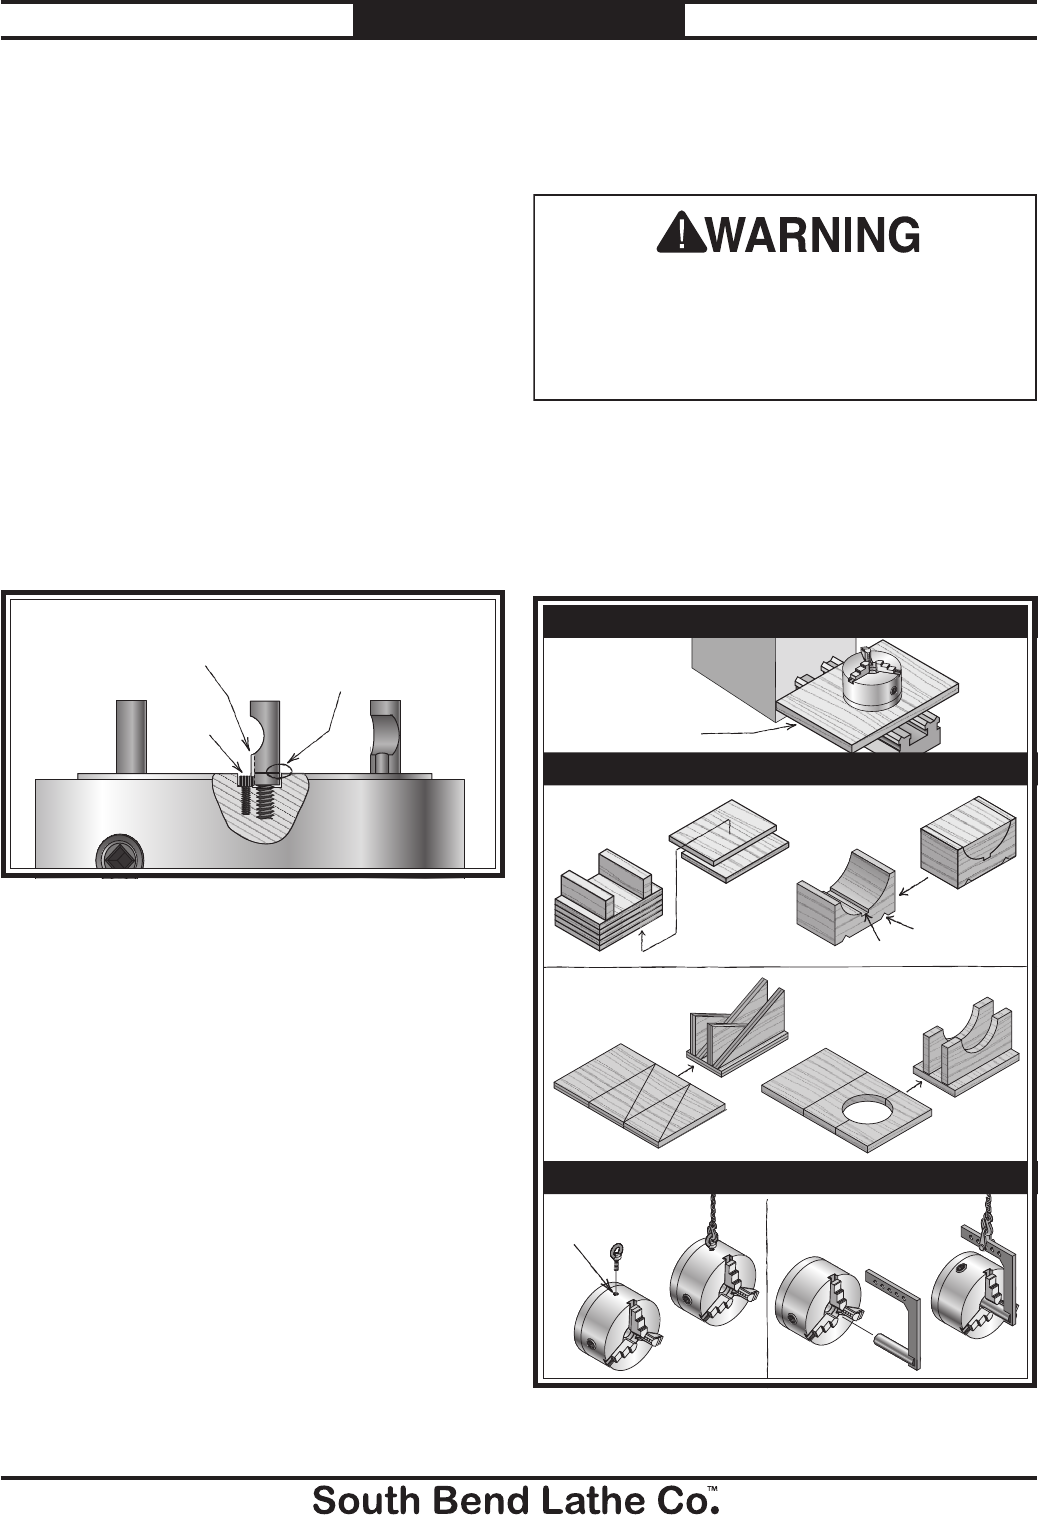
Chuck Installation &
Removal Devices
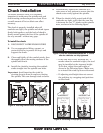
Because chucks are heavy and often awkward to
hold, some kind of lifting, support, or protective
device should be used during installation or
removal. The weight and size of the chuck will
determine the appropriate device to use (refer to
the following figure for examples).
Pre-Threaded Hole
for Lifting Eye
Way Slot
Jaw Slot
Plywood & 2x4
Chuck Cradle
Plywood Chuck Cradle
(Straight Cuts)
Plywood Chuck Cradle
(Curved Cuts)
Fabricated Steel
Lifting Hook
Solid Block
Chuck Cradle
Plywood Protection
Plate for Chucks
Installed by Hand
SMALL, LIGHTWEIGHT CHUCKS
MEDIUM-SIZE, HEAVY CHUCKS
LARGE, VERY HEAVY CHUCKS
Figure 3. Examples of common devices used during
chuck installation and removal.
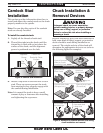
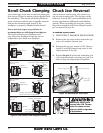
Camlock Stud
Installation
This section provides information about how to
install and adjust the camlock studs so the chuck
properly mounts to the spindle.
Note: You can skip this section if the camlock
studs are already installed.
Figure 2. Camlock stud installation.
Cap
Screw
Datum Line
Flush with Chuck
Surface
Alignment
Groove
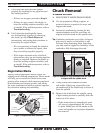
To install the camlock studs:
1. Lightly oil the threads of each stud.
2. Thread the studs into the chuck until the
datum line is flush with or just above the
surface of the chuck, and the alignment
groove is positioned over the hole.
3. Install a cap screw in the hole next to each
stud. These cap screws prevent the studs
from rotating so they properly engage with
the camlock during installation.
Note: It is normal for studs to have a small
amount of play or looseness after installing
and tightening the cap screws.
A dropped chuck can cause amputation,
serious crushing injuries, or property damage.
Always use a lifting, support, or protective
device to reduce this risk when installing or
removing a chuck.
Mfg. Since 1/11 Model SB1224
-3-
INSTRUCTIONS