


Care & Maintenance
Foroptimumperformancefromyourchuck,
followthemaintenanceschedulebelow,and
neverhammeronthechuck,jaws,oraworkpiece
clampedinthechuck.Neversubjectthechuckto
abrasives,ame,orwater.
Daily:
• Check/correctloosemountingbolts.
• Useavacuum,rag,orbrushtocleanthe
chuckafteruse.Neveruseairpressureto
cleanchipsawayfromachuck.
• Wipethechuckdownwithathincoatofway
oiltopreventsurfacerust.
• Greasethechuckttingwithonetotwo
pumpsofNLGI#2grease.
Ifthechuckeverbecomesstifftooperate,itmay
havebeencontaminatedwithmetalchipsor
abrasivesfromneglectorpoorservicepractices.
Thechuckmustbedissembled,cleaned,andre-
lubricated.
To disassemble the chuck for a full cleaning
and lubrication service:
1. DISCONNECTLATHEFROMPOWER!
2. Markthechuckandthemountingplate
wheretheymatetoensurethatwhen
reassembledbothhalveslineup.Next,
unboltthechuckandseparatebothhalves.
3. Insertandrotatethechuckkey
counterclockwiseuntilthescroll-gearhas
releasedallthreejawsfromthechuck.
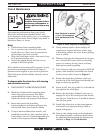
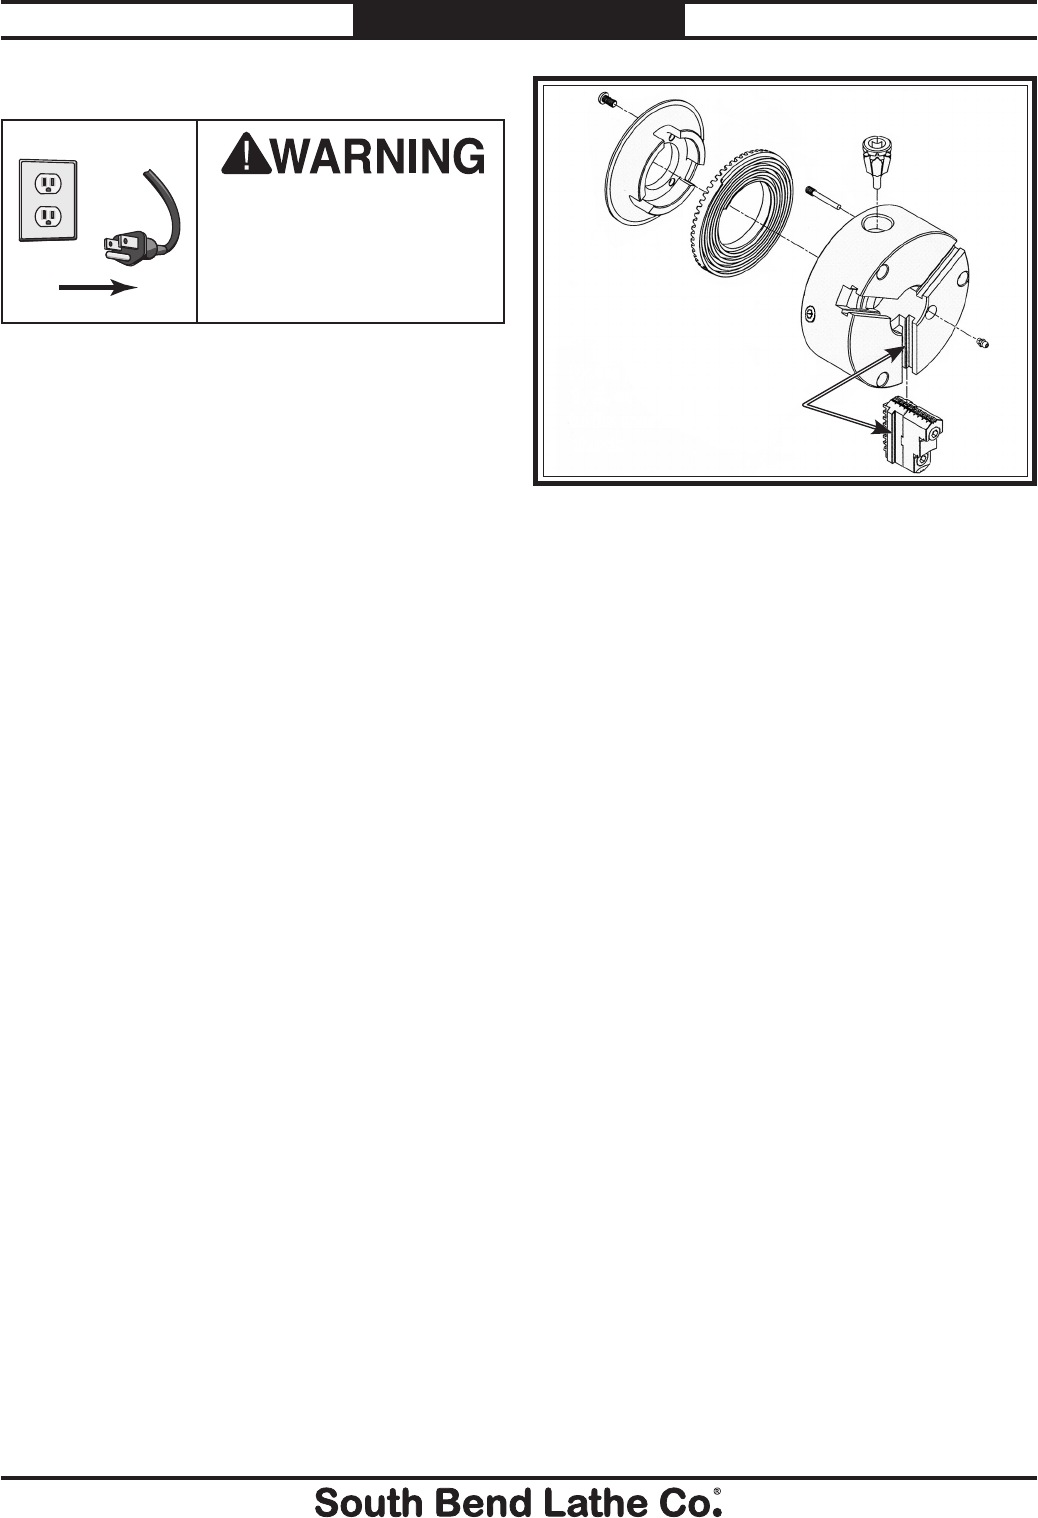
4. Usinga4mmand6mmhexwrench,a#1
standardscrewdriver,andaratchetwitha
7mmsocket,startat#1anddisassemblethe
chuckinthesequenceshowninFigure 2.
Always disconnect
machine from power before
performing maintenance or
serious personal injury may
result.
!
5. Usingmineralspirits,cleananddryall
components.Inspectallbores,teeth,pins,
andmatingsurfacesforwear,burrs,galling,
rust,orcracks.
6. Withoutchangingthedimensionofanypart,
useawirebrush,emerycloth,ordressing
stones,toremoveallrust,burrs,andany
highspotscausedbygalling.
7. CoatallpartswithanyautomotiveNLGI#2
grease,andcarefullyreassemblethechuck
inthereverseordershowninFigure 2.
8. Rotatethechuckkeyclockwiseuntilyou
seethetipofthescroll-gearleadthreadjust
begintoenterjawguide#1.
9. Insertjaw#1intojawguide#1,andholdthe
jawagainstthescroll-gear.
10. Rotatethechuckkeyclockwiseoneturnto
engagethetipofthescroll-gearleadthread
intothejaw.Pullthejaw;itshouldbelocked
intothejawguide.
11. Installtheotherjawsinthesamemanner,
andinstallanewgreasettingifballor
nippleleakgrease.
12. Lineupthetimingmarkonthechuckand
themountingplate,andfastenbothhalves
bytighteningandtorquingthefastenersas
outlinedinStep 11 in Installation.
2
3
6
4
5
1
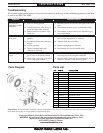
Figure 2. Chuck sequence of disassembly.
7
Note: Each jaw is marked
1, 2, or 3 to correspond
to its marked slot in the
chuck
Mfg.Since3/10 ModelSB1314
-3-
INSTRUCTIONS