


6
NOTE: REGARDING THE USE OF THIS TOOL TO INSTALL PRE-FINISHED FLOORING
The BOSTITCH MFN-201 has been precisely engineered to be compatible with today’s vast array of hardwood
flooring products, including pre-finished flooring. Due to the ever changing products and manufacturing
processes used in producing pre-finished hardwood flooring, caution must be used to ensure that the flooring
finish is not damaged by the tool. Always test the tool and installation technique on a sample section of flooring
to be certain that both the tool and the installation technique do not damage the pre-finished flooring. This
procedure should be followed before each job due to variations in flooring and tool condition.
BOSTITCH
cannot assume responsibility for any flooring damage.
OPERATION
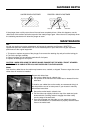
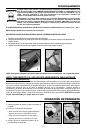
EYE PROTECTION which conforms to ANSI specifications and provides protection against
flying particles both from the FRONT and SIDE should ALWAYS be worn by the operator and
o
thers in the work area when loading, operating or servicing this tool. Eye protection is
r
equired to guard against flying fasteners and debris, which could cause severe eye injury.
The employer and/or user must ensure that proper eye protection is worn. Eye protection
equipment must conform to the requirements of the American National Standards Institute,
ANSI Z87.1 and provide both frontal and side protection. NOTE: Non-side shielded spectacles
and face shields alone do not provide adequate protection.
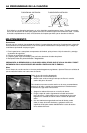
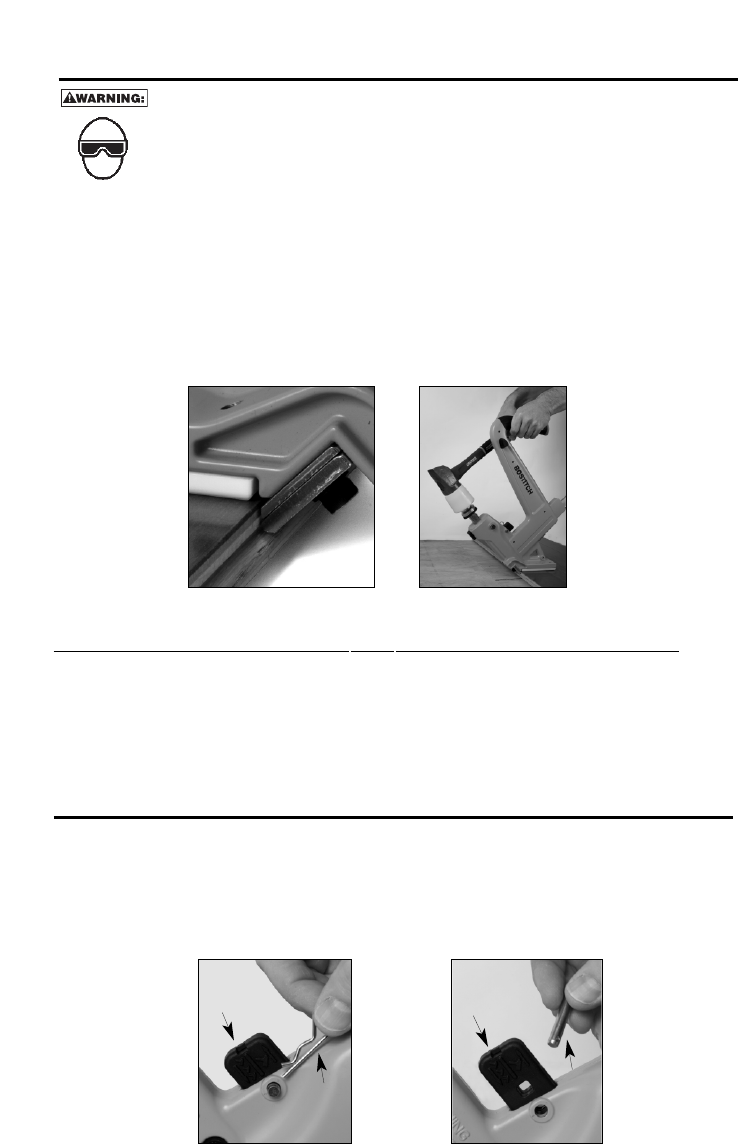
The MFN-201 was designed to install 1/2”- 3/4”tongue and groove hardwood flooring.
NOTE:Always test on a scrap piece of flooring.
C
AUTION: NEVER HIT THE PLUNGER WITH THE METAL END OF THE MALLET.
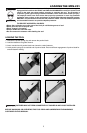
1.Position the flooring per the manufacture’s specifications.
2.Place the tool with the guide plate above the tongue and firmly against the forward face of the flooring material.
3.Ensure that the composite foot is firmly held against the top surface of the flooring.
4.Using the rubber face of the mallet strike the top end of the metal plunger.
NOTE: Sufficient force is required to completely drive a single fastener with one strike of the mallet.
2.
4.
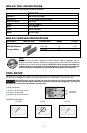
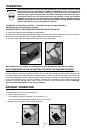
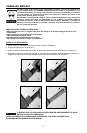
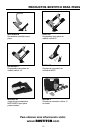
RATCHET OPERATION
To change drive mode:
1. Remove the cotter pin and then the clevis pin.
2. Position ratchet mechanism.
• For ratcheting (multi-b
low) operation, set as shown in Fig.1.
• For non-r
atcheting (single-blow) operation, set as shown in Fig.2.
3. Replace clevis pin and the cotter pin after adjustment.
Fig. 1
Fig. 2
RA
TCHETING
NON-
RA
TCHETING
cotter
pin
cle
vis
pin