Page 30
the hex cams have a “dot” machined on the cam face to show
the high point when installed.
3. Assemble a washer and hex cap screws into each adjustment
cam hole and finger tighten them.
4. Slowly turn the rotor back and forth. Using the right hand and
left hand adjustment cams, move the bed comb in or out as
required to clear the rotor combs. The rotor/bed comb
clearance is normally set to approximately .005". Once the in
or out position is determined, lightly tighten the left hand and
right hand adjustment cam screws. Check that the clearance
left to right between the rotor and bed combs is approximately
.005". Position the bed comb by using the center adjustment
cam. Once positioned, lightly tighten the adjustment cam
screw.
5. Turn the rotor through 360
o
in both rotation directions to
ensure clearance with the bed comb. Once clearance is
established, fully tighten the adjustment cam screws.
6. Repeat steps 1 through 5 for all bed combs.
7. Fully tighten all bed comb adjustment screws to 12 ft/lbs.
5-5 Adjusting the Sensitivity of the Optional Bin Level
Monitor
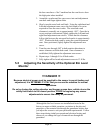
!!! DANGER !!!
Because electrical power must be supplied to the sensor to permit testing and
adjustment, it is EXTREMELY VITAL that you secure the machine for normal
operations.
Do so by closing the cutting chamber and hopper access door, which returns the
safety limit switch to the closed position, PRIOR to beginning any sensor
adjustments to ensure the safety of personnel.
Although the bin level sensor was installed and tested at the
factory to ensure reliable operation, variations in the physical
properties of the material run through the granulator require that
you adjust the sensor to suit your particular requirements. Follow
these steps during initial pre-operational electrical testing and
whenever you change the type of material run through the
granulator.


