


Models: PMD8137
PMD8142
Owner’s Manual
Length of service of your battery will depend on the type of work you are doing.
The batteries in this tool have been designed to provide maximum, trouble-free
life. However, like all batteries, it will eventually wear out. Do not disassemble
battery pack and attempt to replace the batteries.
To make your batteries last as long as possible, we suggest the following:
1. Store and charge your batteries in a cool area. Temperatures above or below
normal room temperatures will shorten battery life.
2. Never store batteries in a discharged condition. Recharge them immediately
after they are discharged.
3. All batteries gradually lose their charge. The higher the temperature the
quicker they lose their charge. If you store your tool for long periods of time
without using it, recharge the batteries every month or two. Getting into this
habit will prolong battery life.
THE ASSEMBLY OF THIS SAW:
WARNING: Always remove the battery pack from your saw when you are as-
sembling parts, making adjustments, assembling or removing blades, cleaning
or when not in use. Removing the battery pack will prevent accidental starting
that could cause serious personal injury.
To remove/attach Battery Pack:
To Remove:
1. Locate latches on side of the battery pack and depress both sides to release
battery pack from your saw.
2. Remove the battery pack from your saw.
To Attach:
1. Place the battery pack in your saw aligning the raised ribs on the battery pack
with the groove in the saw’s battery port.
2. Make sure that the latches on each side of the battery pack snap into place
and the battery pack is secured to the saw before beginning operation.
7
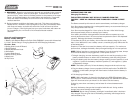
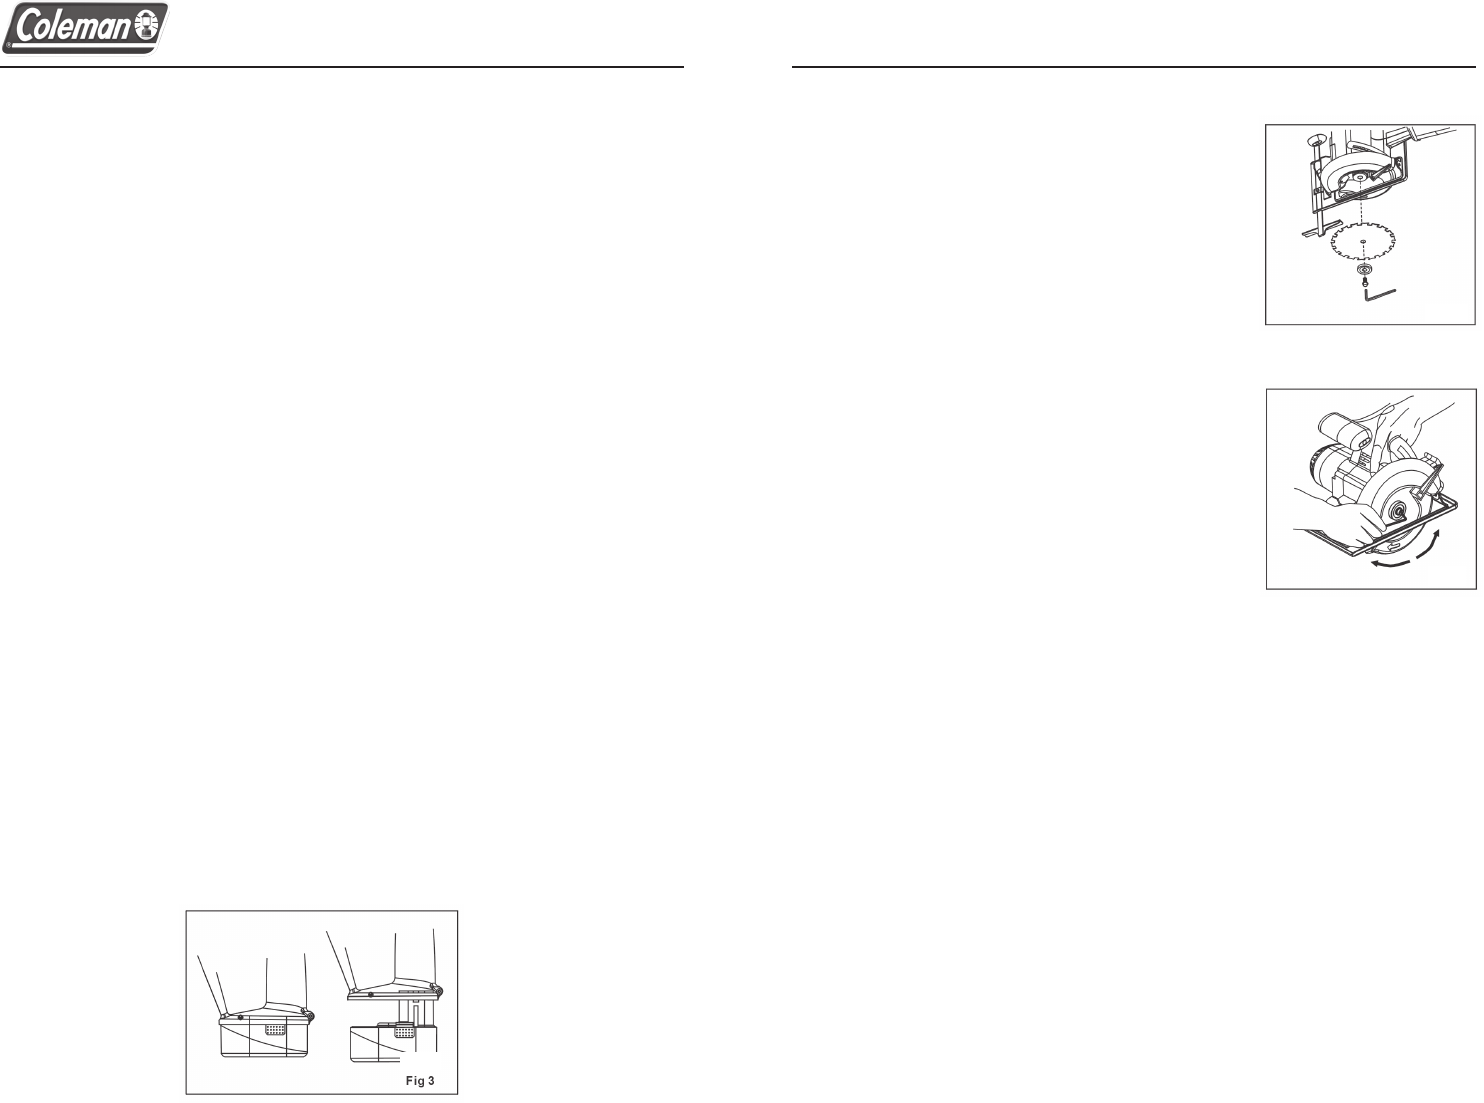
To install the saw blade:
1. REMOVE battery pack first.
WARNING: Failure to remove battery pack from
the saw could result in accidental starting
causing possible serious personal injury.
2. To attach blade, retract lower blade guard and
place blade over spindle and against the inner
clamp washer. Place outer clamp washer against
the blade. (Blade must go on with the printed
side out, teeth at the bottom of the blade
pointing forward.
3. Thread on blade clamping screw firmly by hand
to hold the washer in position. (Screw has left
hand threads and must be turned counter-
clockwise to tighten).
4. Lightly depress the blade lock while turning the
spindle until the blade stops rotating.
5. Tighten blade clamping screw (counter-clockwise)
firmly with the blade wrench.
6. To remove blade, TURN OFF TOOL AND REMOVE
BATTERY PACK. Engage the blade lock-off
button and unscrew the blade clamping screw by
turning it clockwise with the blade wrench.
NOTE: Never engage blade lock while saw is running, or engage in an effort to
stop the tool. Never turn switch on when blade lock is engaged. Serious
damage to your saw may result.
7. Replace the battery pack.
Blades
A dull blade will cause slow, inefficient cutting overload on the saw motor,
excessive splintering, and could increase the possibility of kickback.
CAUTION: Do not use abrasive discs or blades for cutting ferrous (steel)
materials.
8