


EK22GL Battery-powered, High-speed Crimping Tool
Greenlee Textron / Subsidiary of Textron Inc. 6 4455 Boeing Dr. • Rockford, IL 61109-2988 USA • 815/397-7070
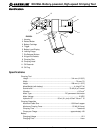
Operation
Charging the Battery
Read the instructions supplied with the battery charger.
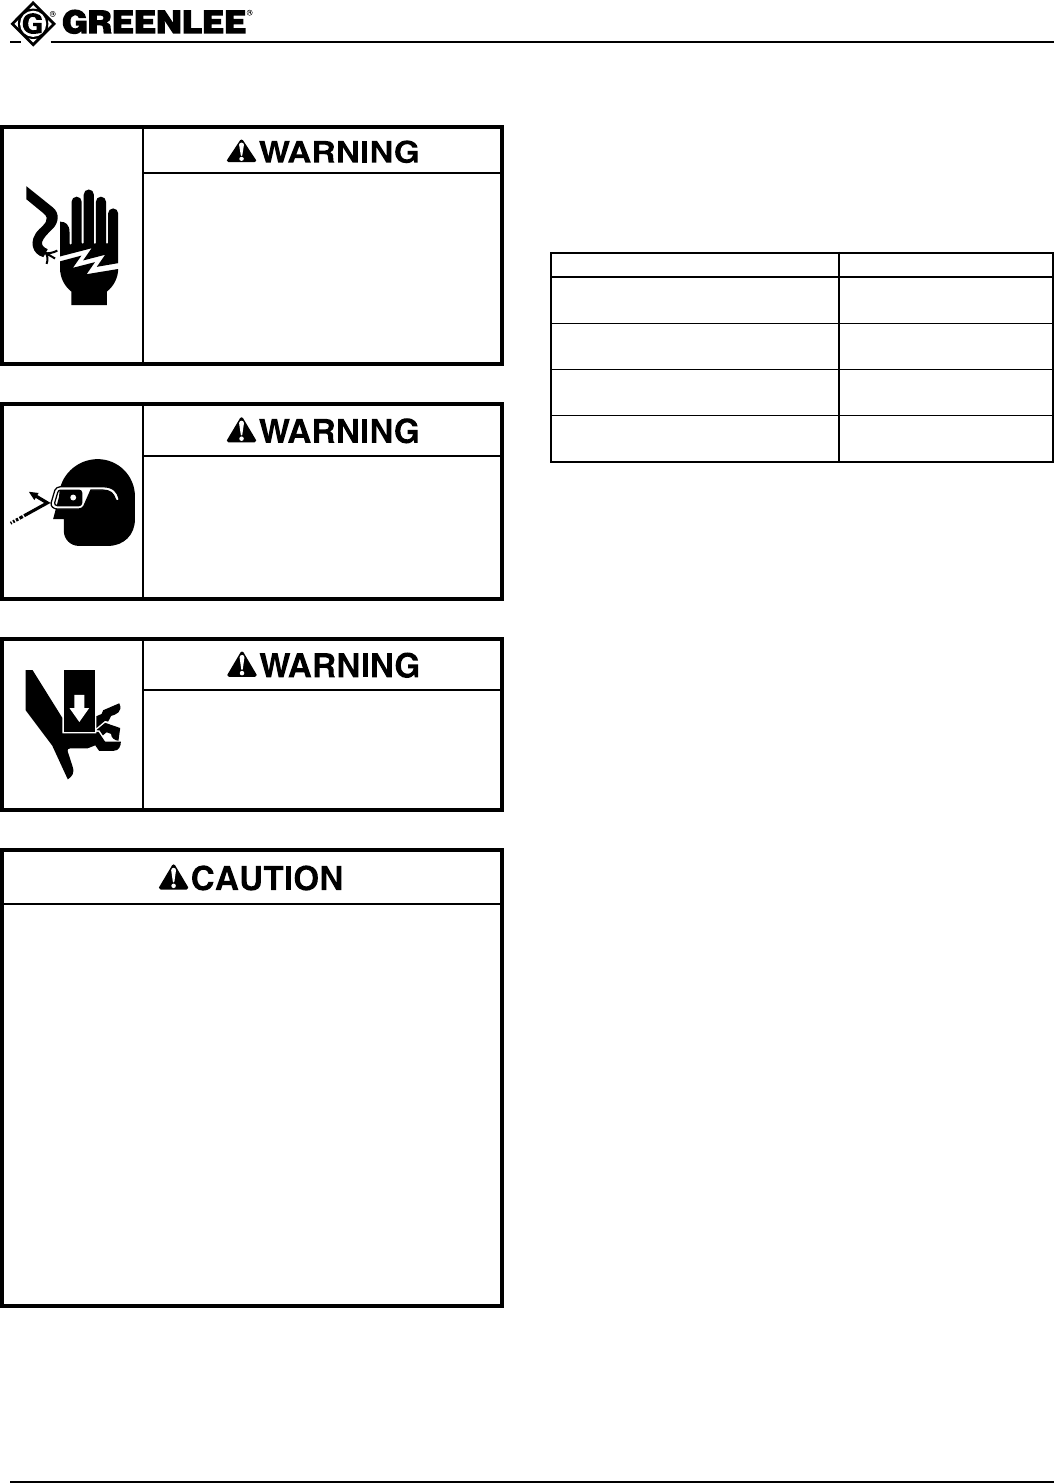
Battery Condition
Wear eye protection when operating
or servicing this tool.
Failure to wear eye protection can
result in serious eye injury from
flying debris or hydraulic oil.
Electric shock hazard:
This tool is not insulated. When
using this unit near energized
electrical lines, use proper personal
protective equipment.
Failure to observe this warning can
result in severe injury or death.
Keep hands away from the crimping
head when crimping.
Failure to observe this warning can
result in severe injury or death.
• Do not operate the tool without dies. Damage to
the ram or crimping head can result.
• Do not operate with the crimping head open.
Damage to the ram or seals can result.
• This tool is not designed for continuous use.
After 30 to 40 crimping cycles, allow the crimping
tool to cool for 15 minutes.
• Do not place the tool in a vise. The crimping tool
is designed for hand-held operation.
• Protect the crimping tool from rain and moisture.
Water will damage the crimping tool and battery.
• Use this tool for the manufacturer’s intended
purpose only.
Failure to observe these precautions can result in
injury or property damage.
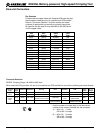
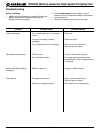
Battery Load Display Battery Condition
Momentary illumination at Normal or operating
beginning of crimp charge level
Flickering at point of Normal or operating
maximum crimping force charge level
Flickering during entire
Low charge level
crimping cycle
Constant illumination when
Low charge level
operating without a load
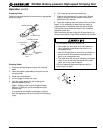
Installing K22-type Dies
1. Select the proper dies for the intended crimp.
2. Push the die release button.
3. Slide the die into the crimping head until it “snaps”
into place.
4. Properly position the second die. Repeat Steps
2 and 3.
Installing W-type Dies
1. Push the die release button.
2. Slide the die adapter (Greenlee part number
500 4292.0) into crimping head until it “snaps”
into place.
Note: The die adapters have the “D
3
” die profile.
No additional dies are needed if the connector to be
crimped requires a “D
3
” die.
3. Repeat for the other adapter.
4. Select the proper dies for the intended crimp.
5. Press the locking flange and open the crimping
head.
6. Push the W-type die detent and slide the W-type die
into place.
7. Properly position the second die. Repeat Steps
5 and 6.