


6
Battery management
Warning!
Batteries contain harmful chemicals and
when used incorrectly, may cause injury. Observe the
guidelines for battery care, maintenance and safety in
this manual and in the documentation supplied with
your battery.
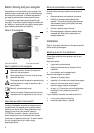
Battery charging
Warning!
- Do not attempt to recharge a non-rechargeable
battery.
- When recharging a battery, ensure that there is
adequate ventilation to allow gases to disperse.
Regular recharging of the battery is essential. Use a
suitably rated battery charger and refer to the battery
manufacturer’s recommendations.
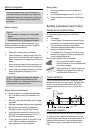
1 Disconnect the battery from the energizer.
2 Attach the positive (+) battery charger lead to the
positive terminal of the battery, and the negative (–)
battery charger lead to the negative terminal on the
battery.
3 Insert the battery charger's input power plug into a
mains or line socket and turn on the power supply.
4 After the battery is charged, disconnect it from the
battery charger before connecting it to the
energizer.
Caution!
Over-charging the battery will reduce its
life. Do not exceed the recommendations of the
battery manufacturer on recharging the battery from a
mains-powered (line-powered) source.
Battery care and maintenance
• House the battery in a suitably designed battery
box, if the battery is likely to be exposed to the
weather.
• When not in use, keep the battery as fully charged
as possible.
• Recharge a discharged battery as soon as possible.
• Batteries should be stored fully charged and
recharged at regular intervals (every 8 weeks)
• Inspect the battery regularly to ensure that the
electrolyte level does not fall below 12 mm (½")
above the surface of the battery plates.
• Fill using deionised, distilled or rain water. Do not
overfill. Refer to the battery manufacturer’s
recommendations for more information.
Battery safety
• Ensure that the battery is well ventilated when
recharging.
• Avoid temperatures greater than 50 °C (120 °F).
• Ensure the battery is not exposed to naked flame or
sparks.
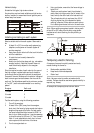
Building a permanent electric fence
Components of an electric fence
An electric fence system comprises the following
elements:
•
An energizer.
•
An earth system.
This comprises a number of metal
rods inserted into the ground, which are connected
to the Fence earth terminal on the energizer.
•
Insulated underground cables.
Used to connect the
energizer to the earth and fence.
•
An insulated fence.
Connected to the Fence output
terminal of the energizer. Fences can be made to a
variety of designs (see below).
Other useful components that can be added:
Cut-out switches. Installed at regular
intervals, these allow you to isolate sections
of the fence for repair.
Lightning diverter kit. Used to minimise the
damage to your energizer from lightning
conducted down the fence line.
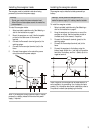
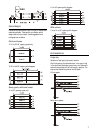
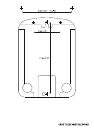
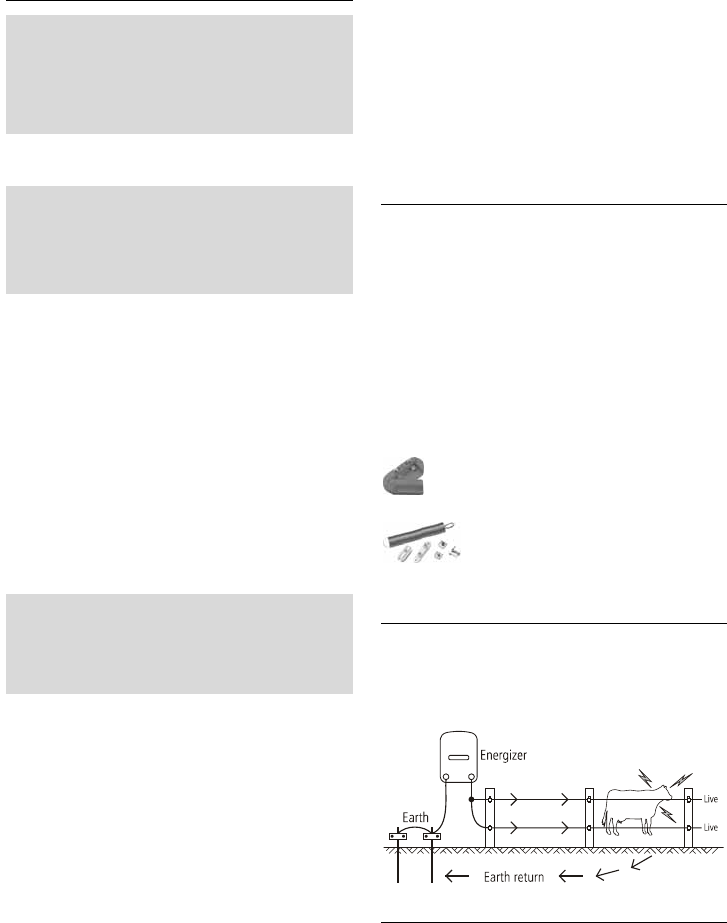
Typical installation
The animal receives a shock when it completes a circuit
between the fence and the earth system. The fence below
has all live wires and requires conductive soils. These
fences are often referred to as 'all-live' or 'earth-return'
fences.
Alternative installation
For poor conductivity soils (dry or sandy), a 'fence-return'
or 'earth-wire-return' system is recommended. On these
fences the Fence earth terminal is connected directly to at
least one of the fence wires. The animal gets maximum
shock from touching a live and earth wire at the same
time.