


8
IMPORTANT:
Always leave the tire chuck thumb latch in the open position when storing unit.
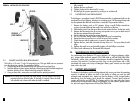
6.2 INFLATE OTHER ARTICLES (WITHOUT VALVE STEM)
Inflation of items, others than tires, requires use of one of the nozzles (adapters).
A nozzle can be attached to the tire chuck, or it can directly be connected to the
compressor’s outlet, if the hose is removed.
To attach a nozzle to the tire chuck, open the nozzle hatch cover and remove the
required nozzle. Place the tire chuck over the nozzle fitting and secure by moving the
chuck thumb latch so it is parallel with the hose. Make sure the nozzle is clean and
secure before turning on the compressor. After use, release the nozzle from the chuck
by lifting the latch. Return the nozzle to the nozzle hatch.
To attach a nozzle directly to a compressor.
1. Remove the hose from the compressor outlet by loosening (counterclockwise) the
hose retaining ring and sliding out the ribbed brass fitting.
2. Insert the selected nozzle into the compressor outlet and secure it by tightening the
hose retaining ring.
3. After using the compressor, remove and store the nozzle in the nozzle hatch.
Refer to “Typical Inflation Times” for approximate pressure and time. Small items like
volleyballs, footballs, etc. inflate very rapidly.
4. Insert nozzle (e.g needle) into item to be inflated and inflate to desired pressure.
5. Turn on compressor switch - inflate to desired pressure or fullness.
7. TYPICAL INFLA
TION TIMES FOR COMPRESSOR USE
The following are approximate pressure and inflation times for various items:
VEHICLE AND TRAILER TIRES
TIRE SIZE PRESSURE TIME FROM “0” PRESSURE
155/80R 13" 26 psi 2.50 min.
185/70R 14" 30 psi 4.50 min.
235/75R 15" 30 psi 6.50 min.
235/85R 16" 50 psi 16.00 min.
BICYCLE TIRES
TIRE SIZE
PRESSURE
TIME FROM “0” PRESSURE
27 x 1" racing 10 psi 40 sec.
INFLATABLE ARTICLES
ITEMS PRESSURE TIME FROM “0” PRESSURE
Football
13 psi
24 seconds
Basketball 9 psi 20 seconds
Volleyball 5 psi 6 seconds
WARNINGS:
Always follow tire manufacturers recommendations for pressure on item to be inflated.
7
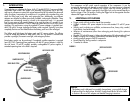
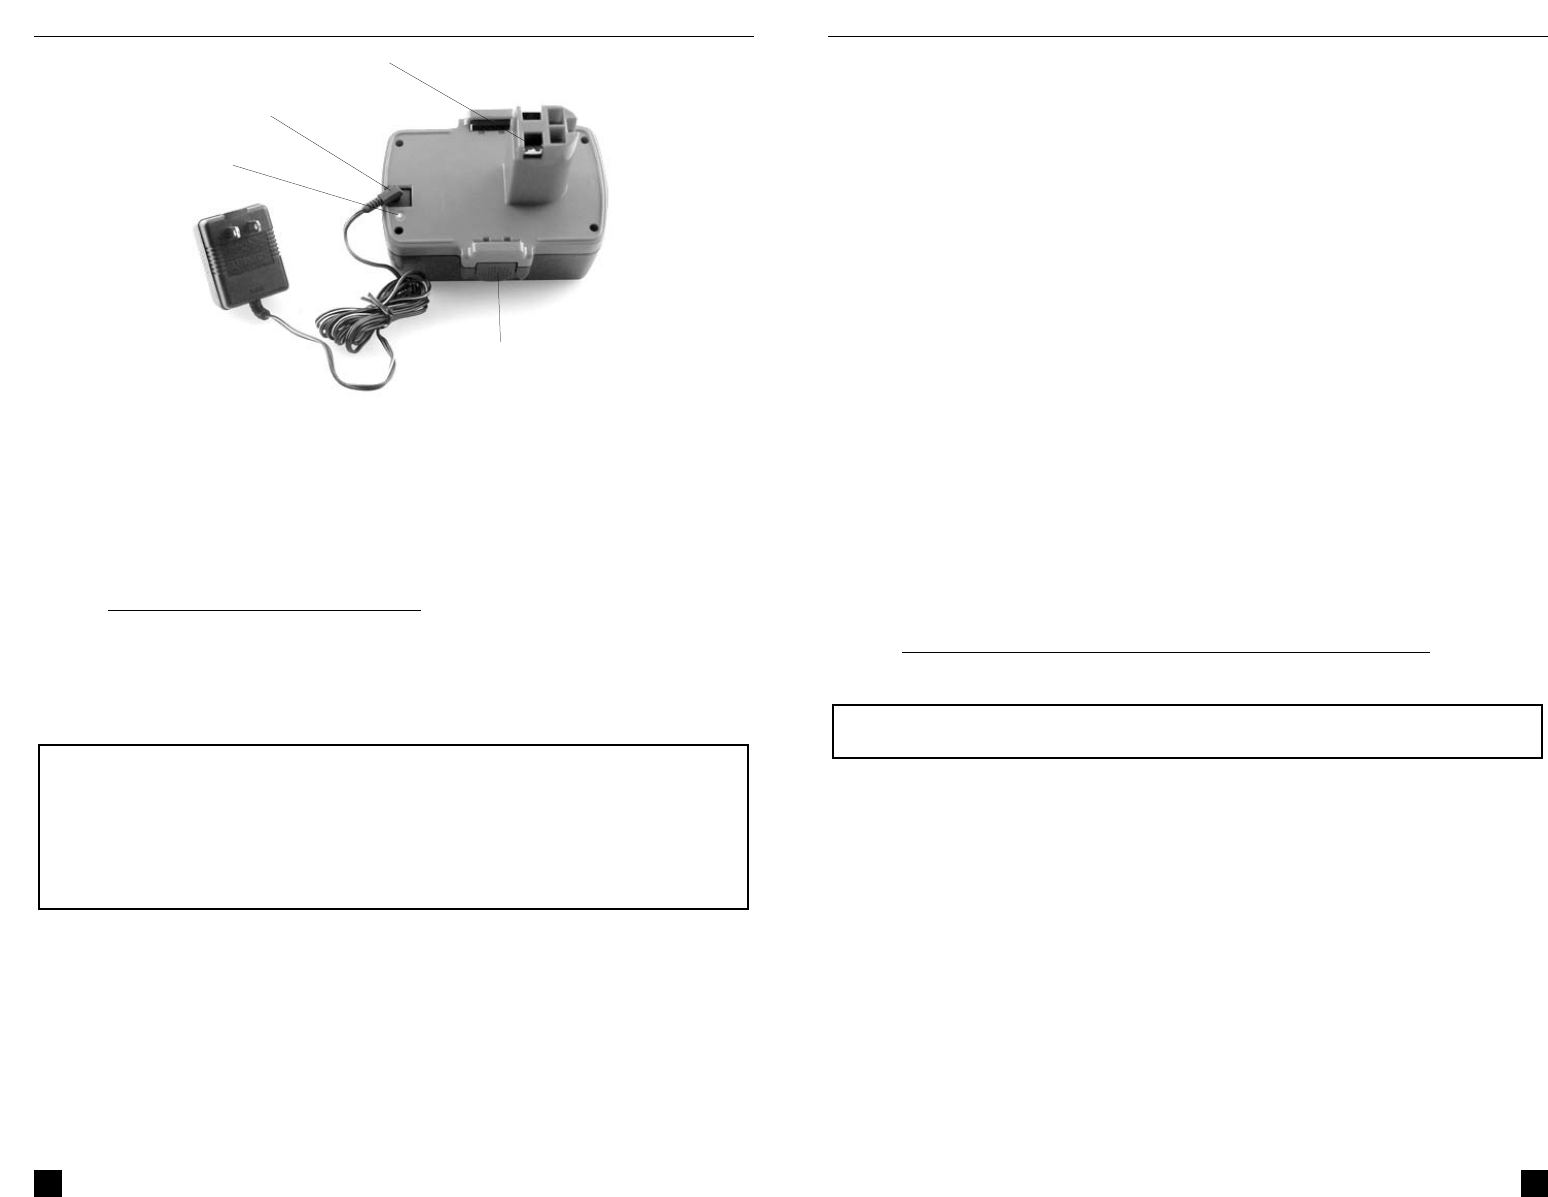
FIGURE 4
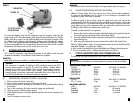
To remove the battery pack from the appliance body for charging, make sure the
trigger switch is OFF. Press both battery pack release buttons at the same time. Pull the
battery pack down away from the appliance body. Insert the barrel connector of the
AC adapter into the battery pack’s receptacle (recharge port). Plug the AC adapter
into a 120 volt AC standard household receptacle. Observe the red LED lights. Charge
for the recommended time. Do not overcharge! Disconnect and store the AC recharge
adapter from the battery pack and AC source when not in use.
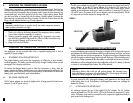
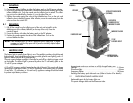
6. COMPRESSOR/TIRE INFLATOR
This 12 volt DC compressor is the ultimate compressor for all vehicles, trailer tires and
recreational inflatables. Three different sized nozzles are supplied.
IMPORTANT:
Read safety instructions carefully to avoid possible injury or property damage.
6.1 TIRE INFLATION OR PRODUCTS WITH A VALVE STEM
1. Place connector (chuck) on valve stem.
2. Push connector toward valve stem and close thumb latch.
3.
Make sure connector is pushed onto valve stem as far as possible before closing
thumb latch.
4. Turn on the compressor (for larger items the trigger can be latched).
5. Observe pressure with the pressure gauge.
6. When desired pressure is reached, open thumb latch and remove connector from
valve stem.
7. Turn off compressor power switch.
WARNINGS:
The compressor is capable of inflating to 260 pounds per square inch (PSI)
pressure (approximately 18 kg/cm). To avoid over-inflation, carefully follow
instructions on articles to be inflated. Never exceed recommended pressures.
Bursting articles can cause serious injury. Always check pressure with the
pressure gauge. Never leave compressor unattended while in use. Allow unit to
cool for five minutes after 10 minutes of continuous operation.
CONTACT
RECHARGE PORT
RECHARGE LED
RELEASE BUTTON
110/120 VOLT AC WALL
ADAPTER WITH CORD