


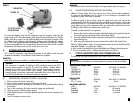
12
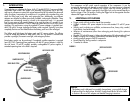
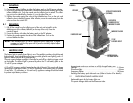
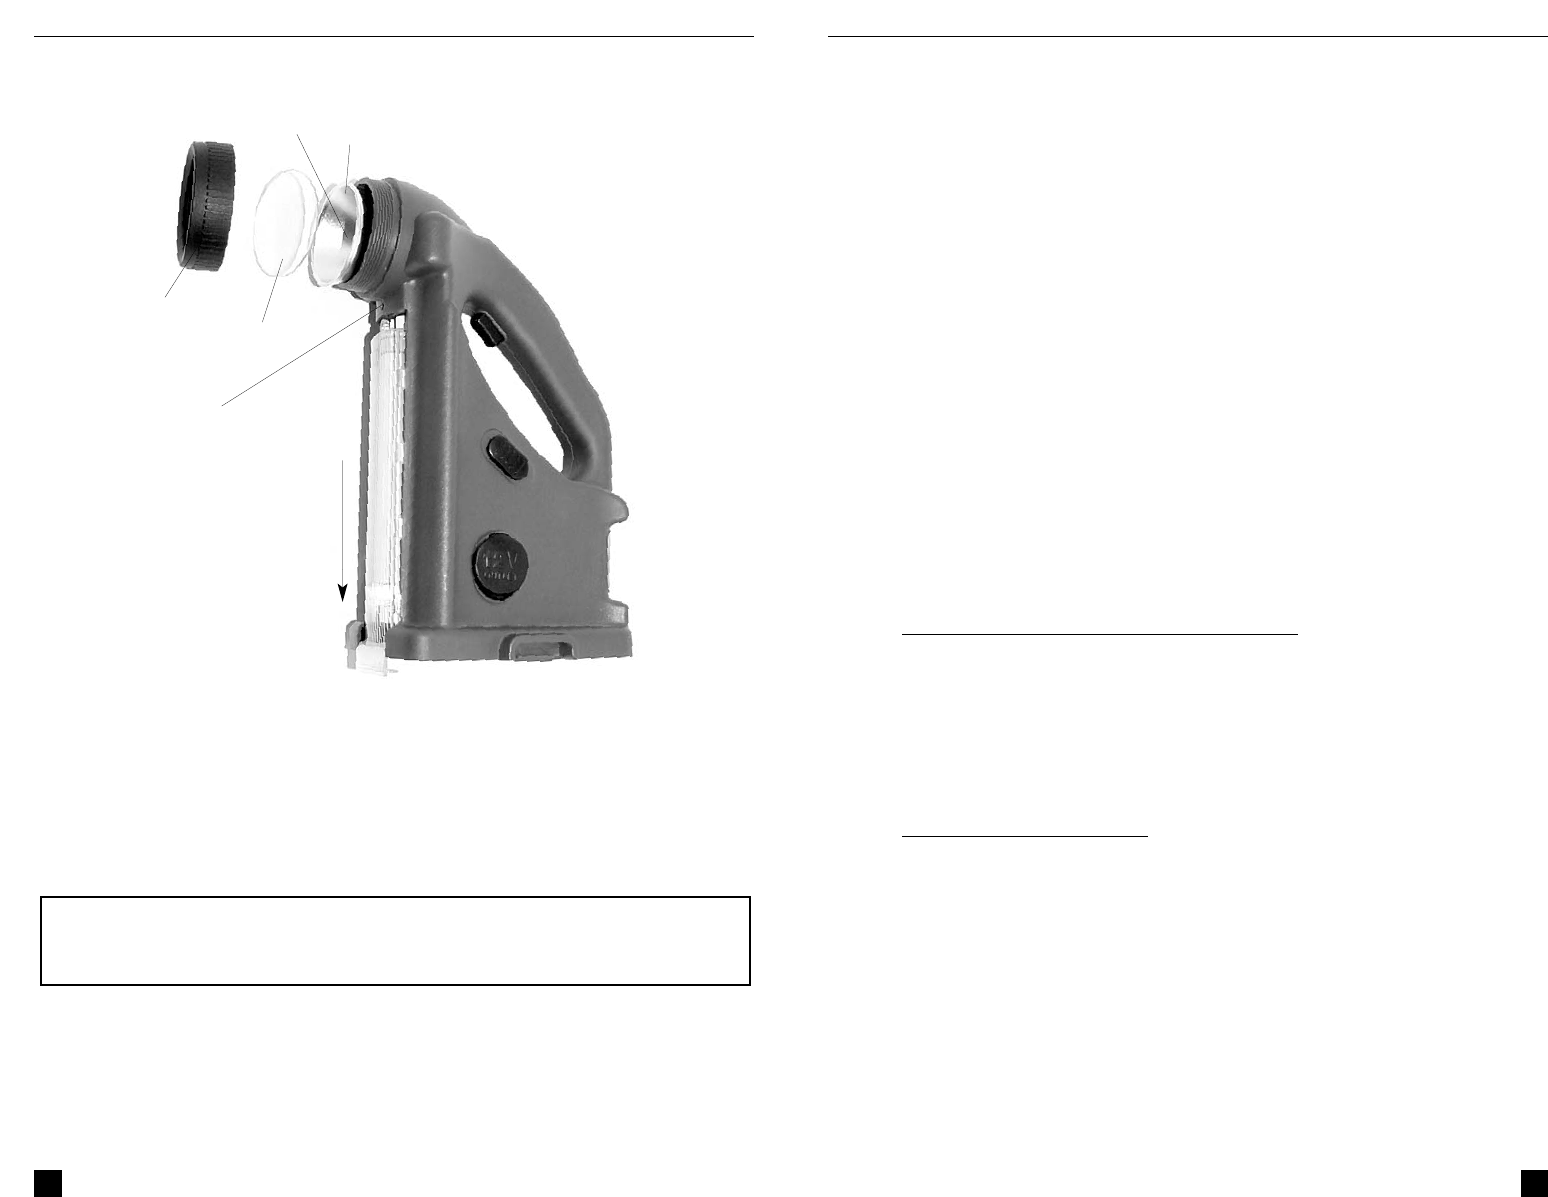
FIGURE 6 - LANTERN LIGHT PARTS REPLACEMENT
9.2 QUARTZ HALOGEN BULB REPLACEMENT
The bulb is a 15 watt, 12 volt, G4 projection type. This type bulb has two connector
pins that plug into a socket. The procedure follows:
1. Unscrew the bezel (counterclockwise) and remove the bezel and lens.
2.
Hold the reflector in place against the body of the lamp and pull the bulb straight out.
Note the location of two socket holes that accept the bulb pins.
3. Using a clean cloth, remove the new bulb from the packing material.
NOTE: Do not touch the new bulb with bare hands; oil from fingers can cause
premature failure of these bulbs. If the bulb is touched, clean the bulb
with alcohol and a clean cloth after the bulb is installed.
11
LENS
REFLECTOR
SCREW HOLE
(SCREW REMOVED)
BULB
BEZEL
REMOVE LENS
4. Push the pins on the new bulb into the socket and make sure the bulb is
fully inserted.
5. Replace the lens and bezel.
6. Tighten (clockwise) the bezel until it is snug.
7. Test the light for proper operation by turning it on and then off.
9.3 FLUORESCENT LAMP REPLACEMENT
The bulb type is a standard 4 watt, F4T5/D fluorescent tube. A replacement bulb can be
purchased from local lighting, hardware or camping stores. The fluorescent lamp tube
can be replaced after the front vertical lens is removed. The procedure follows:
1. Remove the battery pack or DC adapter. Using a small Phillips screwdriver,
unscrew (counterclockwise) the small screw at the top of the lens.
2. Slide the lens down from the top of the unit and remove the lens. Set the lens aside.
3. Remove the fluorescent tube by turning one-quarter turn so pins at both ends of
the tube are released from the sockets.
4. Set the defective tube aside for proper disposal.
5. Put in a new tube, being careful to keep the bulb pins from bending.
6. Rotate the tube one-quarter turn to lock the pins into the sockets.
7. Check the new tube to make sure it is secure in the sockets.
8. Replace the lens, and slide it towards the top of the unit. The screw holes should
align.
9. Replace the small screw and carefully tighten with the Phillips screwdriver.
10. Follow local ordinances for fluorescent bulb disposal.
10. MAINTENANCE/REPLACEMENT P
ARTS
For replacement parts (batteries, DC power adapters, AC charging adapters, cables,
etc.), contact Vector technical support: (954) 584-4446 or toll free (866) 584-5504.
Periodically, cables, hose, nozzles, and connectors should be inspected for damage,
corrosion, dust and dirt. If surfaces are dirty, they can be wiped clean with a cloth
moistened with water and a drop of detergent. Battery pack contacts can be wiped
clean with a dry cloth.
11. BATTERY REPLACEMENT
The battery in the battery pack should be replaced with a new one when the operating
capacity is reduced to about one half or the ability to inflate one and one half
average sized automobile tires. Make sure that the battery is fully charged before
determining that the battery pack should be replaced. Contact Vector technical
support and ask for part VEC194. This battery pack is also used with other Vector
products that include portable inflators and spotlights. For more details, please contact
our technical support department toll free (866) 584-5504.