l
O
SQUEEZE
T
U
R
N
ON
HANDLE
HANDLE
l
O
OFF
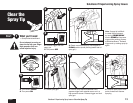
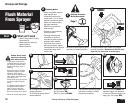
Flush Material
From Sprayer
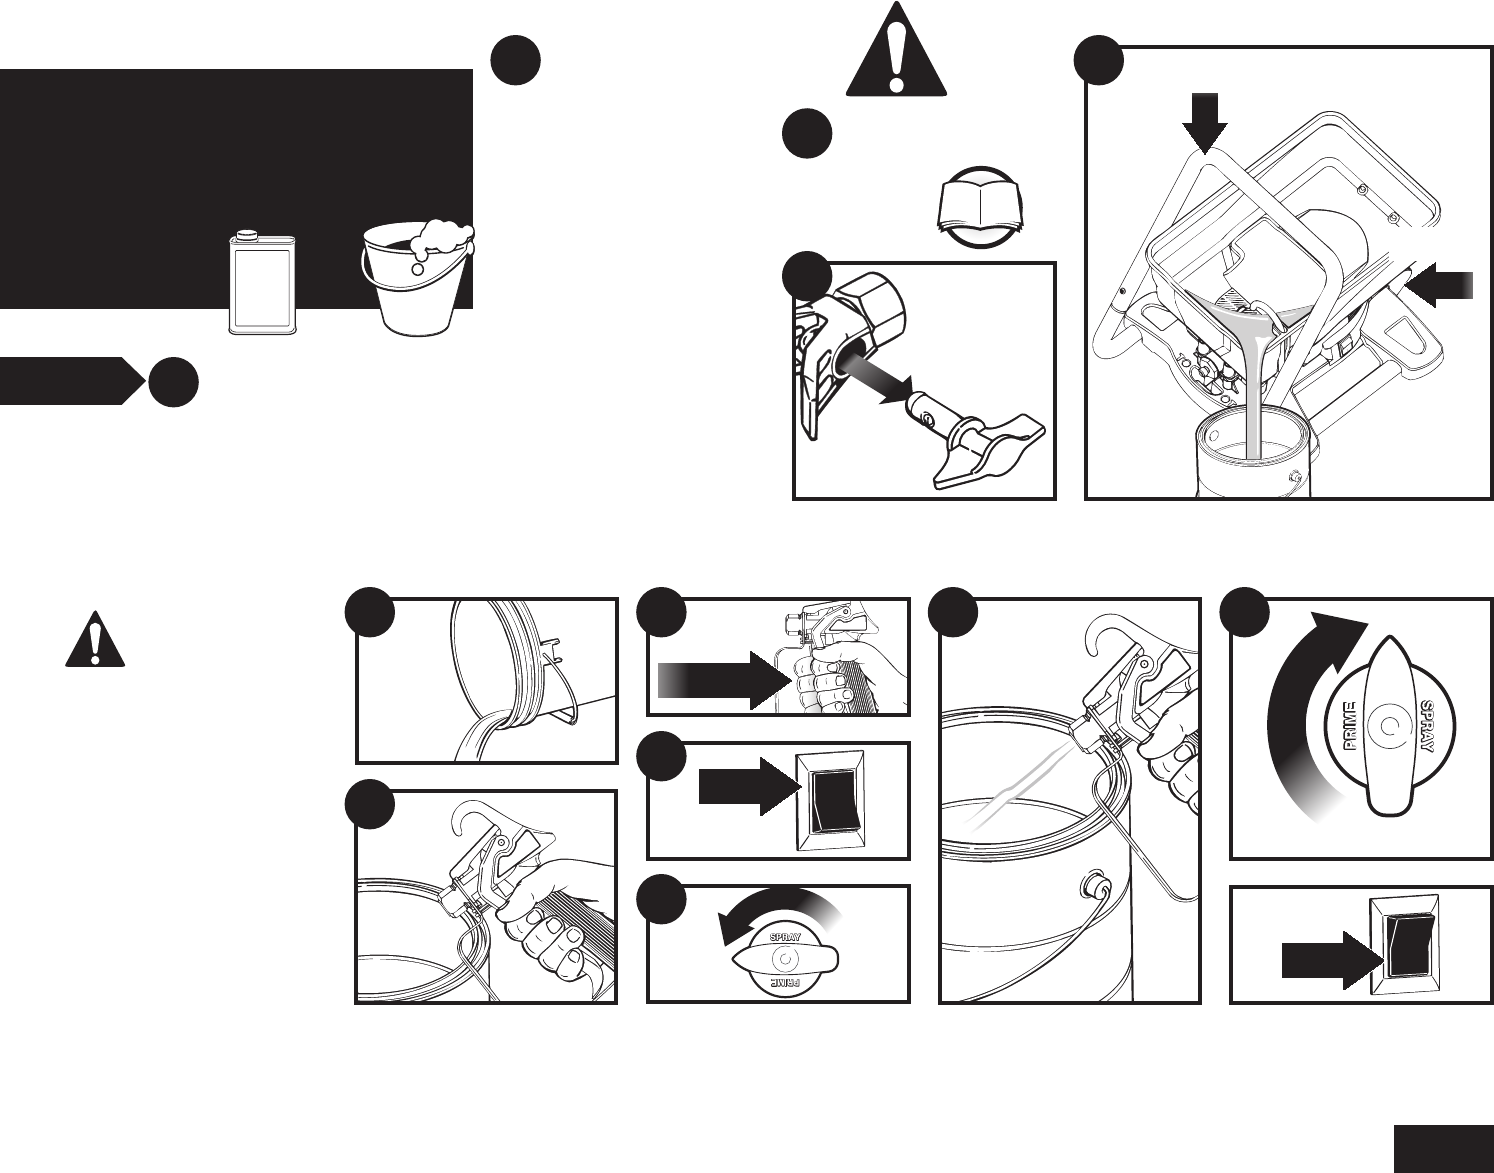
12. Turn knob to PRIME and
squeeze trigger until pressure
is relieved. Release trigger, lock
spray gun, turn power OFF
11. Continue squeezing trigger
until uid is coming out clear.
Repeat as necessary
8. Squeeze trigger
9. Turn power ON
10. Turn knob to SPRAY
6. Fill hopper with appropriate
cleaning solution
7. Point spray gun at side of
waste container
Follow these steps
whenever cleaning
with mineral spirits:
• If spraying or cleaning with
oil-based materials, the spray
gun must be grounded while
preparing the spray hose or
cleaning.
• Ground the gun by holding it
against the edge of a metal
container while purging.
Failure to do so may lead to a
static electric discharge which
may cause a re
• Always ush spray gun at least
one hose length from spray
pump
• If collecting ushed solvent in
one gallon metal container,
place it into an empty ve
gallon container, then ush
• Area must be free from vapors
• Follow all cleanup instructions
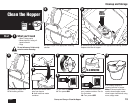
4. Remove spray tip and guard
and place in cleaning solution
What you’ll need
• Warm, soapy water if using
latex material
• Mineral spirits if using oil-
based material
• Waste container
Cleaning Notes
• When using latex material,
clean sprayer and
components with warm,
soapy water. For oil based
material use mineral spirits.
Never use mineral spirits
with latex materials
• NEVER use gasoline to
clean sprayer
• Dispose of used cleaning
solution properly
• Thorough cleaning and
lubrication of sprayer is
important to ensure proper
operation after storage
• If you ush your sprayer
with mineral spirits, repeat
Flush Material From Sprayer
instructions using warm-
soapy water
5. Empty material from hopper into original
material container. Make sure to lift with your
legs and not your back to avoid injury.
Start
T
U
R
N
Perform Pressure
Relief Procedure
Page 7
MINERAL
SPIRITS
or
2
3
4
5
6
7
8 11 12
9
10
1
English
18
Cleanup and Storage
Cleanup and Storage • Clean the Sprayer


