


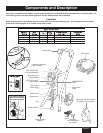

Do not plug in the sprayer until setup is complete.
6
English
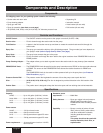
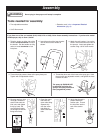
Assembly
WARNING
•
Two adjustable wrenches
• 3/16” Allen wrench
Tools needed for assembly:
I
f you have one of the cart models (9146, 9150, 9170 or 9190), follow these assembly instructions. If you have the model
9140S sprayer, skip to item 4, below.
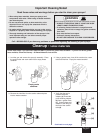
1. Twist the knobs on either side of the
handle
counterclockwise to unlock
the handle. Pull the handle out fully,
and turn knobs
clockwise to lock
into place.
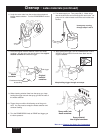
2. Insert the ends of the hose bracket
into the holes of the handle as
shown.
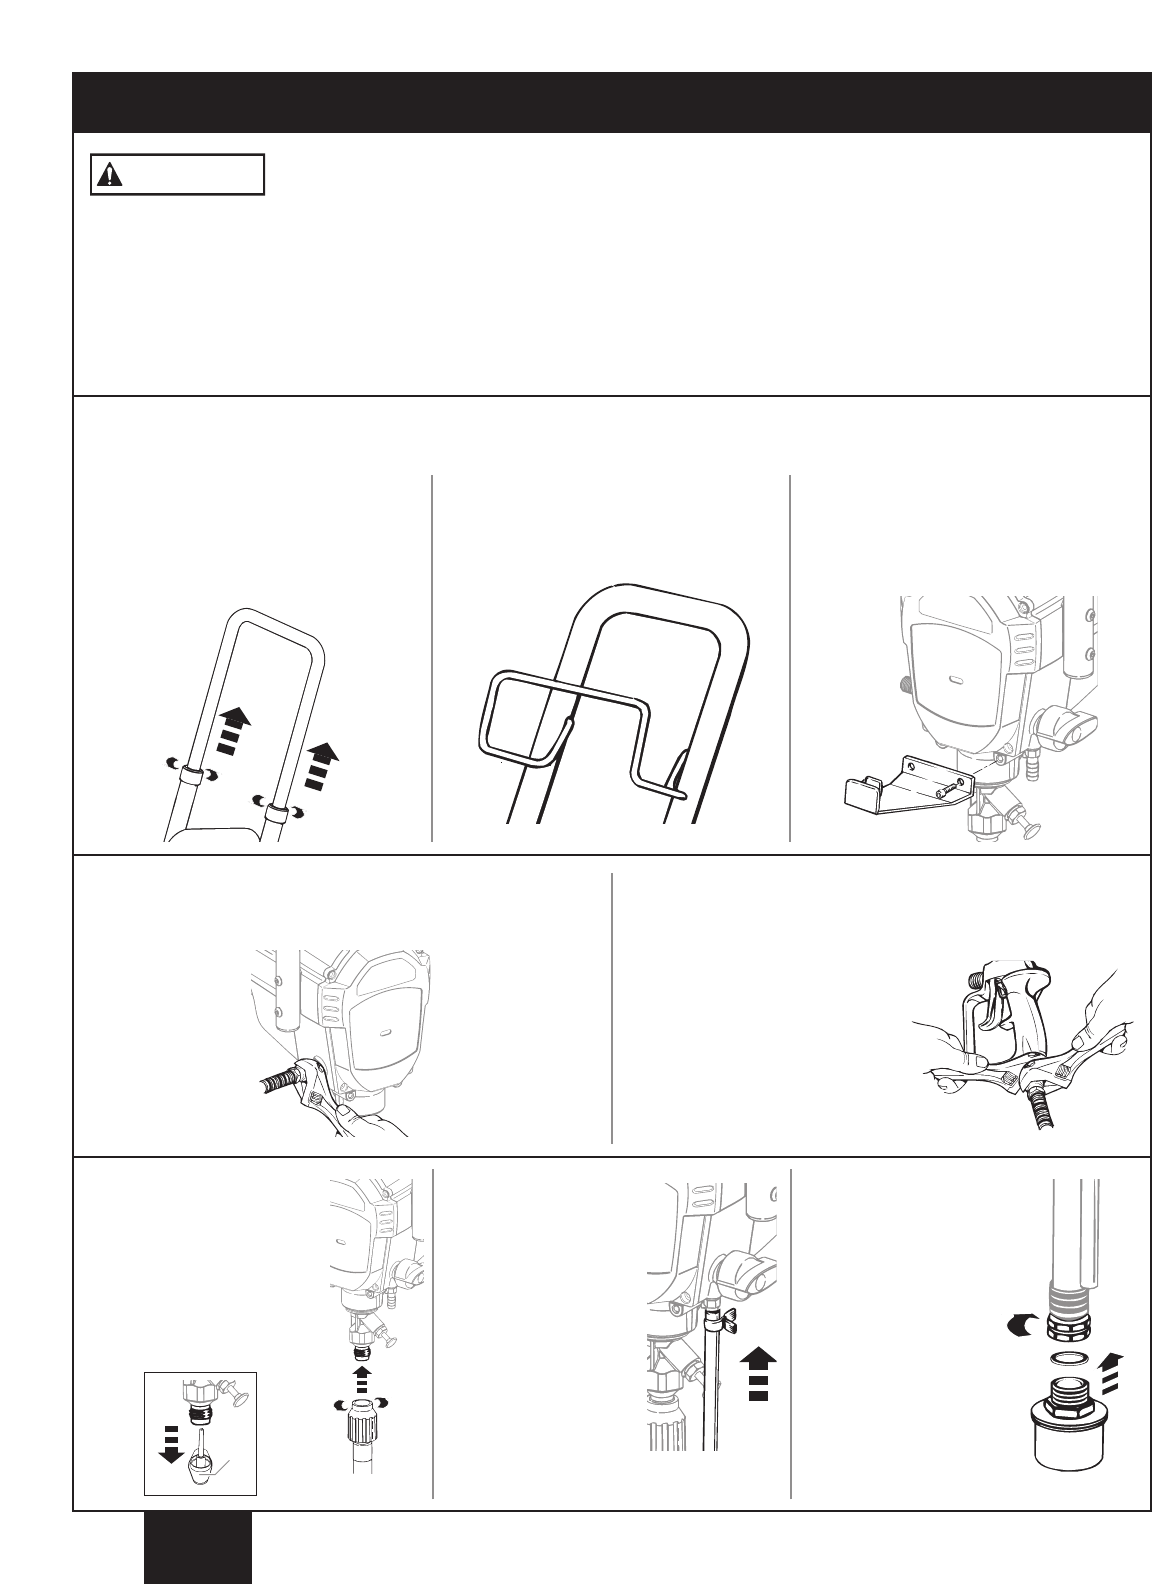
4. Thread the high pressure hose to the spray hose port.
Tighten with an adjustable wrench.
5. Thread the other end of the hose to the spray gun. Hold
the gun with one adjustable wrench, and tighten the hose
nut with the other.
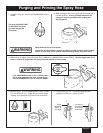
The spray tip
SHOULD NOT
be attached until after the
sprayer and spray hose have
been purged and primed.
•
Extension cord (refer to
I
mportant Electical
Information
(page 3).
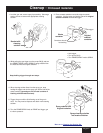
3. Attach the pail bracket. Line up the
holes in the bracket with the holes in
the sprayer. Insert and tighten the
screws using a 3/16” allen wrench.
6. Remove cap from inlet
valve
(a). Thread the
suction tube onto the
inlet valve and tighten
firmly by hand. Be
sure that the threads
are straight so that the
fitting turns freely.
7.
Press the return
tube onto the
return tube fitting.
Squeeze clip
over the return
tube fitting to
secure the return
tube.
8. V
erify that the seal is
present inside the
suction tube. Thread
the inlet filter into the
end of the suction
tube.
(a)