


9
Operating instructions
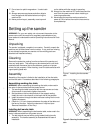
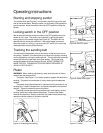
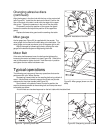
Starting and stopping sander
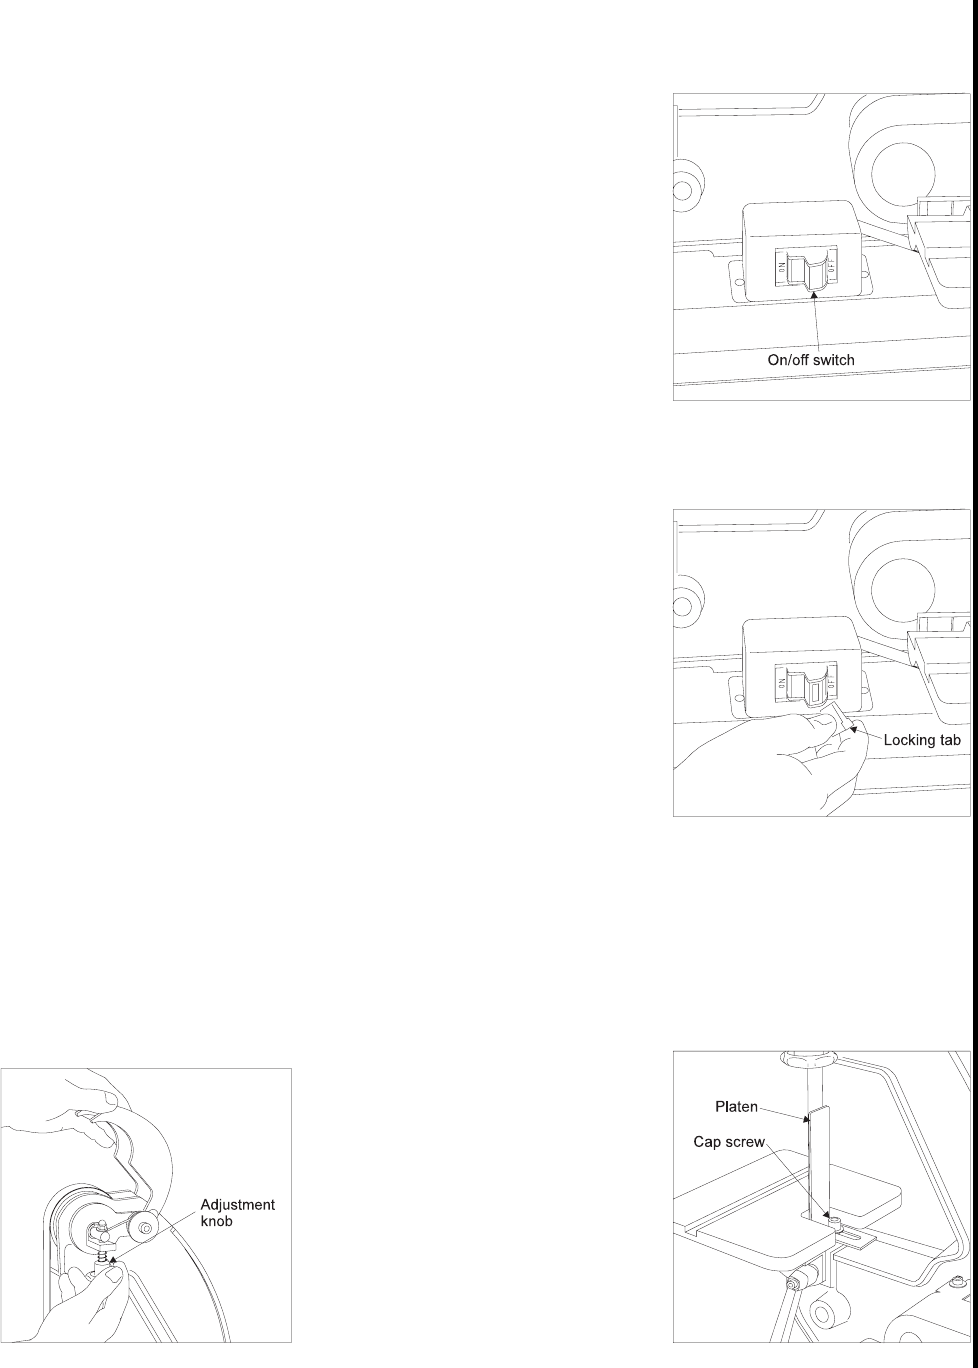
The on/off switch (see Figure 8) is mounted in a switch box on the right
side of the sander base. Move the switch to the forward (ON) position to
start the sander. Move the switch to the rear (OFF) position to stop the
sander.
Locking switch in the OFF position
We recommend that the switch be locked in the OFF position when the
sander is not in use. The switch can be locked by pulling the switch
locking tab out of the switch toggle (see Figure 9). The switch will not
operate with the locking tab removed. If the switch toggle is removed
when the sander is running, it can be turned OFF once, but it cannot be
restarted without inserting the switch tab.
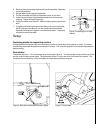
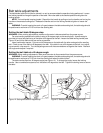
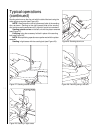
Tracking the sanding belt
The belt tracking adjustment is set at the factory so the belt runs true on
the pulleys. However, if the belt tracks to one side of the pulleys, tracking
can be adjusted by turning the tracking knob . Turning the knob clockwise
moves the belt to the right when facing the sander. Turning the knob
counterclockwise will move the belt to the left. AVOID TURNING THE
KNOB TOO FAR. THE AMOUNT OF ADJUSTMENT REQUIRED IS
USUALLY VERY SLIGHT !
Platen
WARNING: When making adjustments, make sure the motor is discon-
nected from the power source.
The platen (see Figure 11) is used to properly support the work when
sanding. The platen is constructed of heavy steel to provide adequate
support.
The platen should be adjusted so it is almost touching the back of the
sanding belt. Loosen the cap screw and adjust the platen to the desired
position. Tighten the screw to secure the platen.
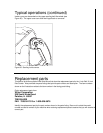
The platen can be removed for operations such as stripping, contour
sanding, polishing or other special operations. To remove the platen,
remove the cap screw. Be sure to reinstall the platen before performing
operations where support of the belt is required.
Figure 8. ON/OFF switch
Figure 9. Switch locking tab
Figure 10. Adjusting belt tracking Figure 11. Platen