


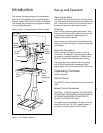


10
Adjustments
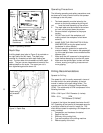
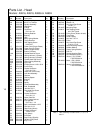
Table Adjustment
The table can be raised or lowered to accommodate
the height of the component being drilled (refer to
Figure 4). To raise or lower the table, loosen the
lock handle. Then use the hand crank to move the
table to the desired height. Then retighten the lock
handle.
Figure 4. Table Adjustment
Head Adjustment
WARNING: CHANGE THE RADIAL POSITION OF
THE DRILL HEAD ONLY IF THE DRILL PRESS
BASE IS SECURED TO THE FLOOR. SWINGING
THE DRILL HEAD WITHOUT THE BASE BEING
SECURED TO THE FLOOR WILL CAUSE THE
DRILL PRESS TO BECOME UNSTABLE AND TIP
OVER RESULTING IN INJURY AND/OR DAMAGE
TO THE MACHINE.
The radial position of the drill head can be changed
to accommodate the drilling of a hole that may be
offset from the center of the table. Reposition the
drill head by loosening the locking handles and
swinging the drill head to the desired position. Then
retighten the locking handles.
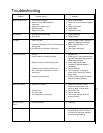
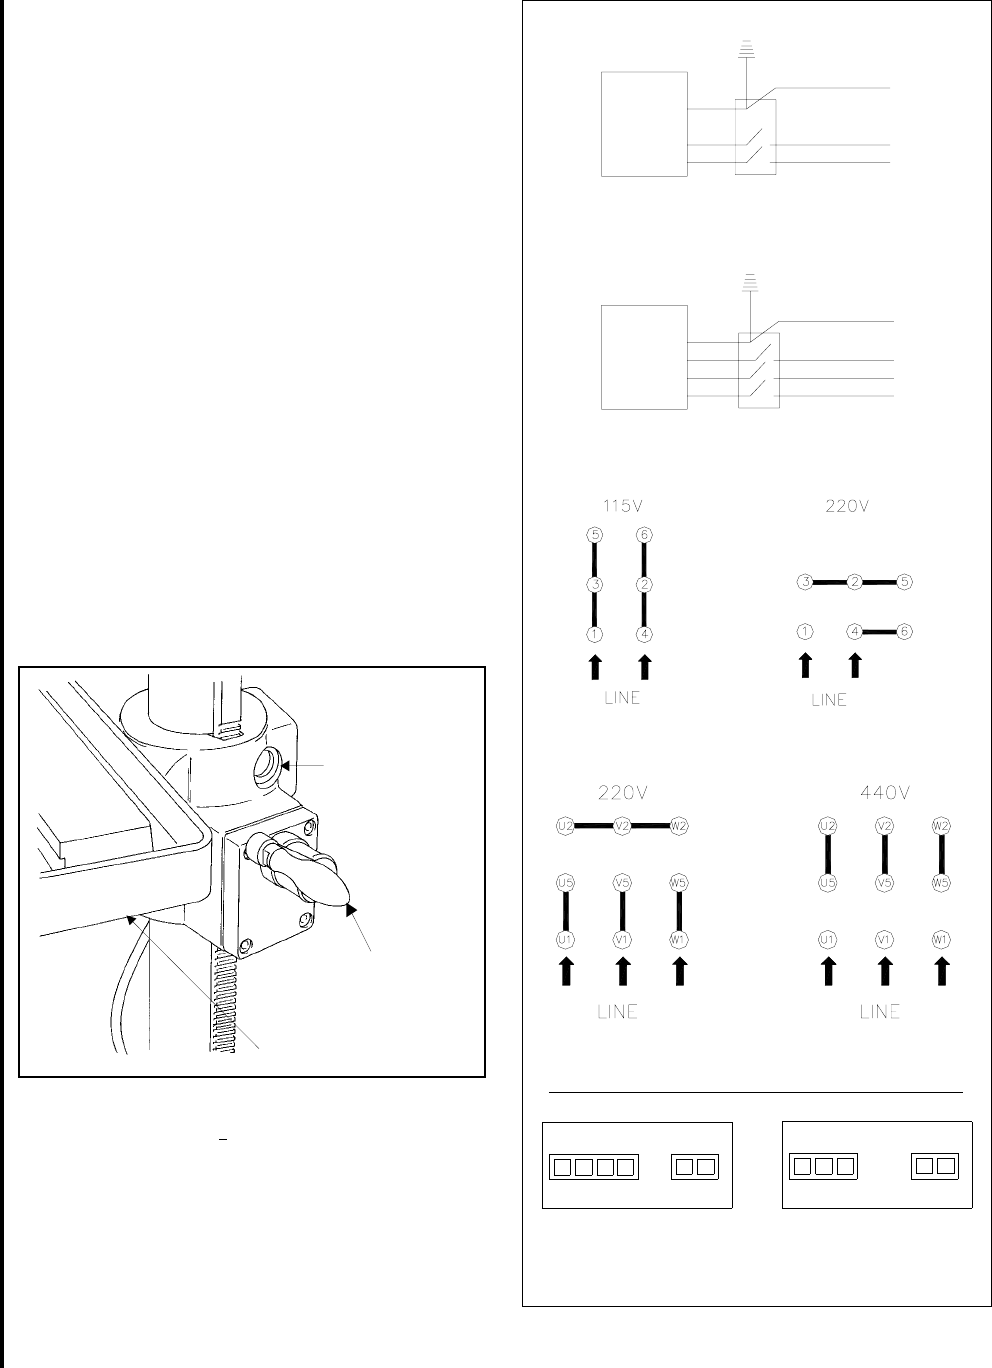
Wiring Diagrams
Refer to Figure 5 for wiring information. The drive
motor is115/230 volt single phase or 220/440 volt
three phase. Notice: When converting machine
voltage, it is necessarry to re-wire the LED display
connection accordingly. Refer to figure 5.
Figure 5. Wiring Diagrams
Table lock
(handle on
opposite side)
Work table
Table
height
adjustment
Green
White
Black
Motor
Switch
1 Phase 115/230 Volts
3 Phase 220/440 Volts
Green
Motor
Switch
Line
Line
LED Display Connection
0 110 220 24
AC Power Sensor
Volts
- +
Input
0 220 440
AC Power Sensor
Volts
- +
Input
1 Phase 115/220
3 Phase 220/440
1 phase Motor Connection
3 phase Motor Connection