P-660W-Tx v2 Quick Start Guide
7
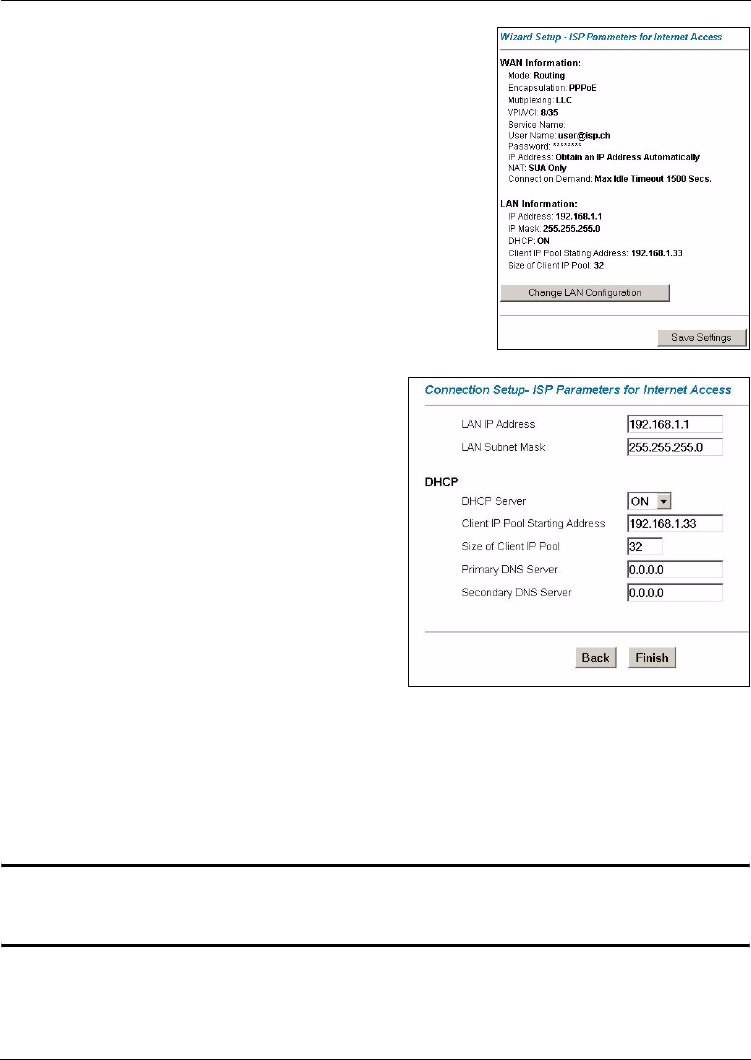
5 Check your WAN and LAN settings in the screen that
appears. Click Change LAN Configuration to configure
the P-660W-Tx v2 for your local area network (LAN) and
go to step 6 of this section.
• Otherwise click Save Settings and go to step 9 of this sec-
tion.
6 If you clicked Change LAN Configuration,
the following screen appears.
• Type the IP address and subnet mask for the P-
660W-Tx v2 on your LAN.
• Disable the DHCP Server if another device on
your LAN, such as a router, already allocates IP
addresses, or devices on your LAN have static
IP addresses. Go to step 8 of this section.
Otherwise, if the P-660W-Tx v2 is to allocate IP
addresses on your LAN, enable the DHCP
Server. Computers on your LAN will then need
to be set to receive an IP address automatically.
See the User’s Guide for more information on
configuring this.
7 If you enable the DHCP Server, ensure the Client IP Pool Starting Address is on the
same domain as your LAN IP Address (that is, the first three parts of the IP addresses
are the same). If you were given DNS Server settings, type them here. Otherwise leave
the default settings.
8 Click Finish to save your settings and go to step 9 of this section. Otherwise, click Back
to check your settings as in step 5 of this section.
" If you change the P-660W-Tx v2’s LAN IP address, you must use the new
IP address if you want to access the web configurator again.
