SKU 93364 For technical questions, please call 1-800-444-3353 PAGE 6
edges of the Cutting Plates should be touching (or almost touching). If they are
not, perform the following steps:
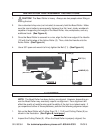
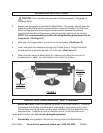
3. Use the 4mm Hex Key Wrench (27) to loosen the two Hex Bolts (16) that secure
the Gear (5) and Collar (6) to the Active Roller (3). (See Figure B.)
4. Slide the Active Roller (3) until the edges of the Cutting Plates (9) are touching.
(See Figure B.)
5. By hand, move the Collar (6) so its edge is touching the Roll Block (2). Then,
re-tighten its Hex Bolt (16). (See Figure B.)
6. Move the Gear (5) so its side is touching the Roll Block (2). Then, re-tighten its
Hex Bolt (16). (See Figure B.)
7. NOTE: If the edges are touching and the Bead Roller does not cut material
properly, adjust the roller tension as discussed in the section
“Adjusting Roller
Tension”
on page 8 of this manual.
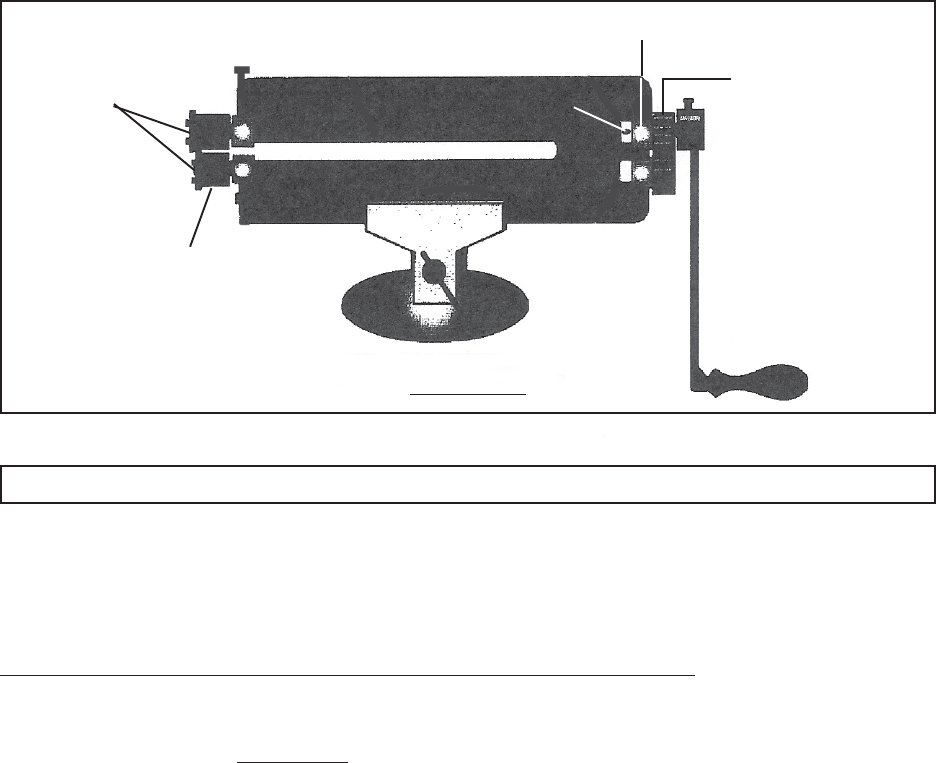
ROLL BLOCK (2)
GEAR (5)
COLLAR (6)
CUTTING PLATES
(9)
CUTTING DIES
(10-1, 10-2)
FIGURE B
CHANGING ROLLERS
NOTE: The Bead Roller Kit comes with a variety of Bead Dies and Flange Dies,
as well as the Cutting Dies and Cutting Plates that are assembled onto the tool
before shipping. Use the following instructions when you change Dies:
To remove the Cutting Dies (10-1, 10-2) and Cutting Plates (9):
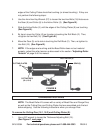
1. Use a 3/8” wrench to loosen the Thickness Adjusting Bolt (15).
(See Figure C, next page.)