1
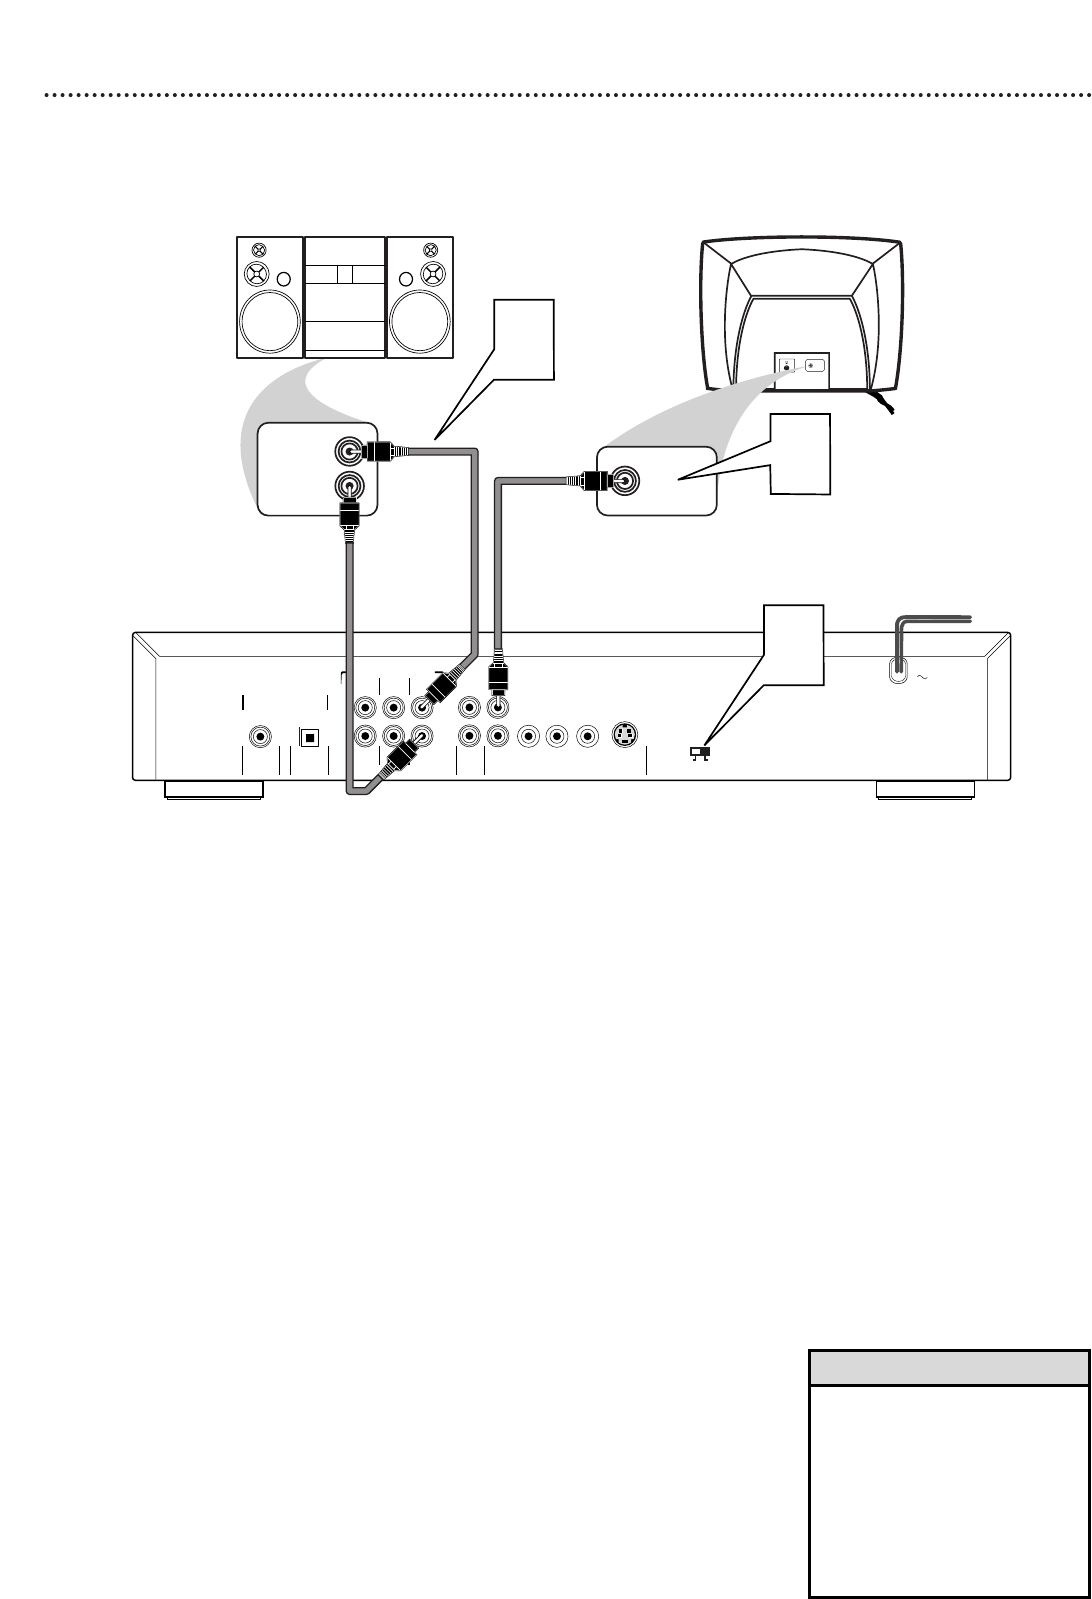
Connect the supplied yellow video cable to the Player’s
yellow CVBS (VIDEO OUT) jack and to the corresponding
VIDEO IN jack on your TV. There are two CVBS (VIDEO OUT)
jacks in case you want to connect the Player to two separate TVs.
For simply connecting the Player to a single TV, you may use either
of the jacks, but you will not have to use both.
2
Connect the supplied red and white audio cables to the
Player’s FRONT (right and left) MULTICHANNEL AUDIO
OUT jacks and to the right/left AUDIO IN jacks on the
Stereo. Match the cable colors to the jack colors. Using the FRONT
jacks will provide the best sound quality when playing Audio CDs
and SACDs.
3
Set the PROGRESSIVE/INTERLACE switch to
INTERLACE.
4
Connect the power cords of the Player,TV, and Stereo to a
power outlet.
Press STANDBY-ON on the front of the Player to turn on
the Player. The red Standby light will disappear.
5
Turn on the TV and set it to the correct Video In channel.
Such channels may be called AUX or AUXILIARY IN,
AUDIO/VIDEO or A/V IN, EXT1 or EXT2, etc.These channels
often are near channel 00. See your TV owner’s manual for
details. Or, change channels at the TV until you see the Player’s
blue screen saver on the TV screen.
6
Turn on the Stereo and set it to the correct Audio In
channel or sound source. Refer to the Stereo owner’s manual.
• Set Analog output accordingly.
Details are on page 41.
• You may use S-Video,
Progressive Scan, or Component
Video connections instead for
higher picture quality.These
options must be available on
your TV. Details are on pages
10-12.
Helpful Hints