4
2. Setting up the monitor
2. Setting up the monitor
2.1 Installation
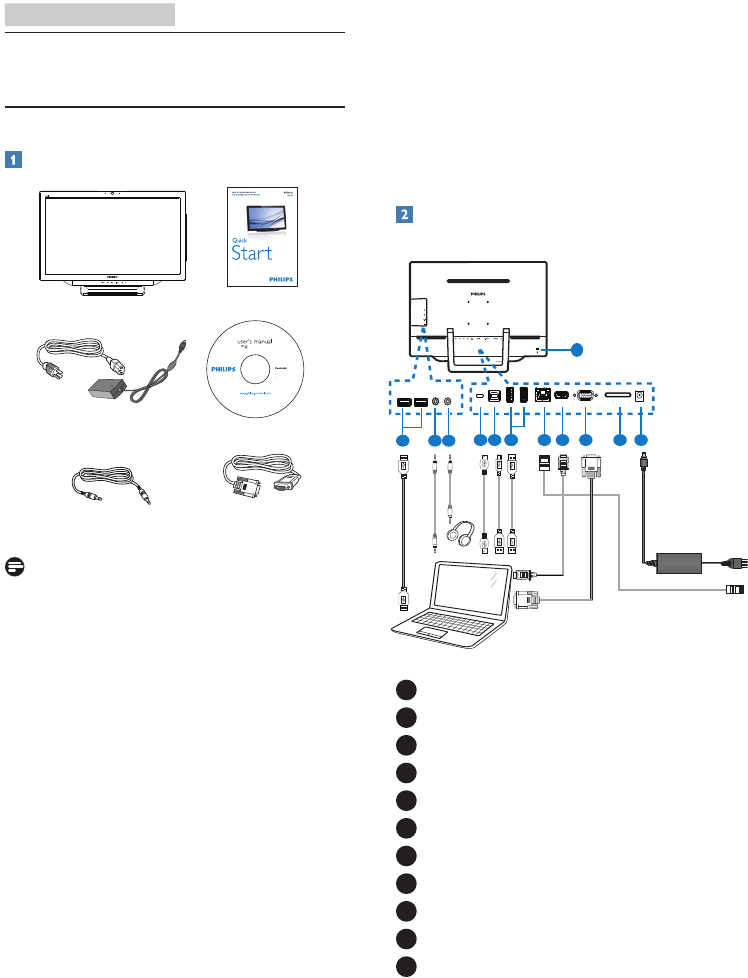
Package contents
AC/DC Adapter
VGA Cable (Optional)Audio Cable
(Optional)
©
2
0
1
3
K
o
n
i
n
k
l
i
j
k
e
P
h
i
l
i
p
s
N
.
V
.
A
l
l
r
i
g
h
t
s
r
e
s
e
r
v
e
d
.
U
n
a
u
t
h
o
r
i
z
e
d
d
u
p
l
i
c
a
t
i
o
n
i
s
a
v
i
o
l
a
t
i
o
n
o
f
a
p
p
l
i
c
a
b
l
e
l
a
w
s
.
M
a
d
e
a
n
d
p
r
i
n
t
e
d
i
n
C
h
i
n
a
.
V
e
r
s
i
o
n
Philips and the Philips’ Shield Emblem are registered trademarks of
Koninklijke Philips N.V. and are used under license from Koninklijke
Philips N.V.
Monitor drivers
SmartControl software
User’s Manual
SMART All-in-One
Note
• Use only the AC/DC adapter provided by
Philips.
• Do not install the SMART All-in-One in a
location near heat sources such as radiators
or air ducts, or in a place subject to direct
sunlight, or excessive dust or mechanical
vibration or shock.
• Save the original shipping carton and
packing materials, as they will come in
handy if you ever have to ship your
monitor.
• For maximum protection, repackage your
monitor as it was originally packed at the
factory.
• To keep the SMART All-in-One looking
new, periodically clean it with a soft cloth.
Stubborn stains may be removed with
a cloth lightly dampened with a mild
detergent solution. Never use strong
solvents such as thinner, benzene, or
abrasive cleaners, since these will damage
the cabinet. As a safety precaution, always
unplug the SMART All-in-One before
cleaning it.
• Do not scratch the screen with hard things,
it may cause permanent damage.
• Don’t leak liquid into monitor which will
result in the damage of component.
Connection
1
DC Power Input
2
SDHC Card Slot
3
VGA Input (D-Sub)
4
HDMI Input
5
LAN Port (RJ-45)
6
USB Downstream (Type-A)
7
USB Upstream (Type-B)
8
Micro-USB (Mini-A)
9
Earphone Output (3.5 mm Stereo)
10
Audio Input (3.5 mm Stereo)
11
Kensington Anti-theft Lock


