4
operate the drill in forward for drilling holes or driving screws (as well
as when using other accessories) release the trigger switch and push
the lever to the right (when viewed from the chuck end).
Return the reversing lever to the forward position after all operations
in reverse are completed.
SWITCH LOCK-ON
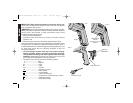
Your drill is equipped with a switch lock-on feature. If you wish to
disable this feature, take your tool to any authorized service center.
The service center can provide a lock-out key to prevent the unit from
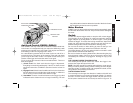
being locked in the on position (Figure 3).
Operation
DRILLING
1. Always unplug the drill when attaching or changing bits or
accessories.
2. Use sharp drill bits only. For WOOD, use twist drill bits, spade bits,
power auger bits, or hole saws. For METAL, use high speed steel
twist drill bits or hole saws. For MASONRY, such as brick, cement,
cinder block, etc., use carbide-tipped bits.
3. Be sure the material to be drilled is anchored or clamped firmly. If
drilling thin material, use a wood “back-up” block to prevent
damage to the material.
4.Always apply pressure in a straight line with the bit. Use enough
pressure to keep the drill biting, but do not push hard enough to stall
the motor or deflect the bit.
5. Hold the tool firmly to control the twisting action of the drill.
6. IF THE DRILL STALLS, it is usually because it is being overloaded
or improperly used. RELEASE THE TRIGGER IMMEDIATELY,
remove the drill bit from work, and determine cause of stalling. DO
NOT CLICK TRIGGER OFF AND ON IN AN ATTEMPT TO
START A STALLED DRILL — THIS CAN DAMAGE THE DRILL.
7. To minimize stalling or breaking through the material, reduce pres-
sure on drill and ease the bit through the last fractional part of the
hole.
8. Keep the motor running when pulling the bit out of a drilled hole.
This will help prevent jamming.
9. With Variable Speed Drills there is no need to center punch the
point to be drilled. Use a slow speed to start the hole and
accelerate by squeezing the trigger harder when the hole is deep
enough to drill without the bit skipping out.
Keyed Chucks
Open chuck jaws by turning collar with fingers and insert shank of bit
about 3/4" into chuck. Tighten chuck collar by hand. Place chuck key
in each of the three holes, and tighten in CLOCKWISE direction. It’s
important to tighten chuck with all three holes to prevent slippage. To
release bit, turn chuck key COUNTERCLOCKWISE in just one hole,
then loosen the chuck by hand. Any authorized D
EWALT service
center can install a keyless chuck in place of a keyed chuck.
Keyless Chucks
Open chuck jaws by turning plastic collar with fingers and insert
shank of bit about 3/4" into chuck. Tighten plastic collar CLOCKWISE
while depressing spindle lock button on the right side of the tool
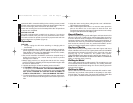
housing (Fig. 4). To release bit, turn plastic collar COUN-
TERCLOCKWISE while depressing the spindle lock button (Fig. 4).
NOTE: DO NOT DEPRESS LOCK BUTTON WHILE OPERATING
DRILL or while the chuck is moving.
Drilling in Metal
Use a cutting lubricant when drilling metals. The exceptions are cast
iron and brass which should be drilled dry. The cutting lubricants
that work best are sulfurized cutting oil or lard oil; bacon-grease will
also serve the purpose.
Drilling in Wood
Holes in wood can be made with the same twist drills used for metal.
These bits may overheat unless pulled out frequently to clear chips
from the flutes. For larger holes, use power drill wood bits. Work that
is apt to splinter should be backed up with a block of wood.
English
385932-02/NStar220 Drills.rev 7/2/02 3:49 PM Page 4


