


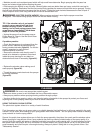
If you are using the direct to can hose, you will need to prime the sprayer by
removing air from the system. To prime:
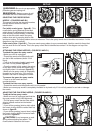
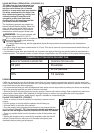
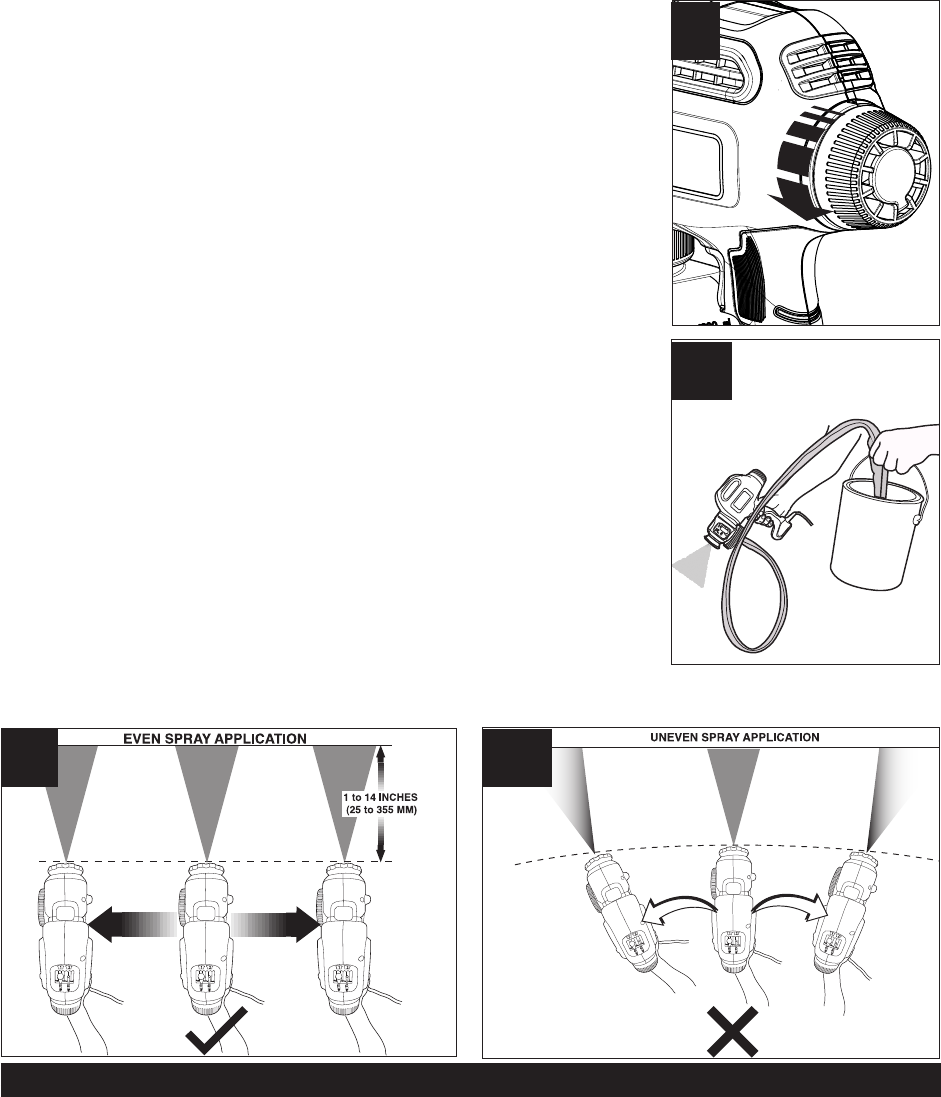
1. Make sure the sprayer is plugged in, and turn the flow control knob
counterclockwise to maximum (figure K).
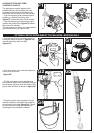
2. Hold the sprayer below the level of the paint. This will speed up the priming
(figure L).
3. Aim the sprayer at a piece of scrap wood or cardboard. Squeeze the trigger and
hold until all air is out of the system and material is flowing freely out of the sprayer
tip. This could take up to three minutes.
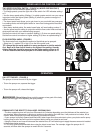
Important: The end of the direct to can hose must remain completely submerged
in the material. If it is not completely submerged and air is sucked into the system,
the piston could seize. If the piston seizes, the sound the sprayer makes will
change to a low hum and the sprayer will quickly become hot to the touch. Never
run the sprayer when the piston is seized. Should this happen, clean the piston
and the pump housing thoroughly using the cleanup procedures found in this
manual.
DEVELOPING THE PROPER SPRAYING TECHNIQUE
• Practice spraying on a piece of scrap material such as cardboard to test your spray pattern and become familiar with
the speed settings flow control features of the sprayer.
• Ensure surface to be sprayed is free of dust, dirt, and grease.
• Ensure spray area is clean and free of dust that could be blown onto newly sprayed surfaces.
• Cover any areas not intended to be sprayed.
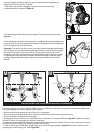
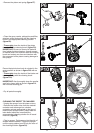
• Always spray from a minimum of 1 inch (25mm) to a maximum of 14 inches (355mm) (figure M). Optimal is usually
around 10 inches or use a paint stir stick as a reference.
• A commonly used method for spraying a large surface is the “crisscross” pattern. This is done by spraying in horizon-
tal strips and then crossing over these strips with vertical strips.
• To get an even spray distribution, always keep your arm at the same distance (figure M) from the surface you are
spraying and avoid moving your wrist (figure M1).
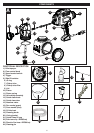
11
K
L
M1
M