


Disconnect battery pack
from tool or place the
switch in the locked or off position before
making any assembly, adjustments or
changing accessories. Such preventive
safety measures reduce the risk of starting
the tool accidentally. Make certain that the
collet nut is securely tightened before turning
the tool on.
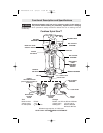
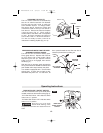
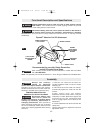
REMOVING AND INSTALLING THE
DEPTH GUIDE ASSEMBLY
The depth guide assembly consists of the
depth guide, locking screw and bracket.
In order to remove the depth guide from the
tool, release the locking lever and pull the
entire assembly straight off of the tool. To
reattach the assembly, fully replace the guide
onto the tool collar and lock the clamp lever
(Fig. 1).
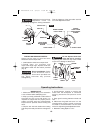
REMOVING AND INSTALLING THE
RZVAC1 VACUUM ADAPTER
(Not included, available as accessory)
The vacuum adapter is sized to accept 1-1/4"
vacuum hoses.
The vacuum adapter assembly consists of the
vacuum adapter, locking knob and bracket.
In order to remove the vacuum adapter
assembly from the tool, release the locking
lever and pull the entire assembly straight off
of the tool. To reattach the assembly, fully
replace the vacuum adapter assembly onto the
tool collar and lock the clamp lever (Fig. 1).
-11-
Assembly
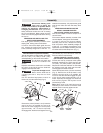
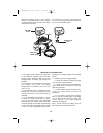
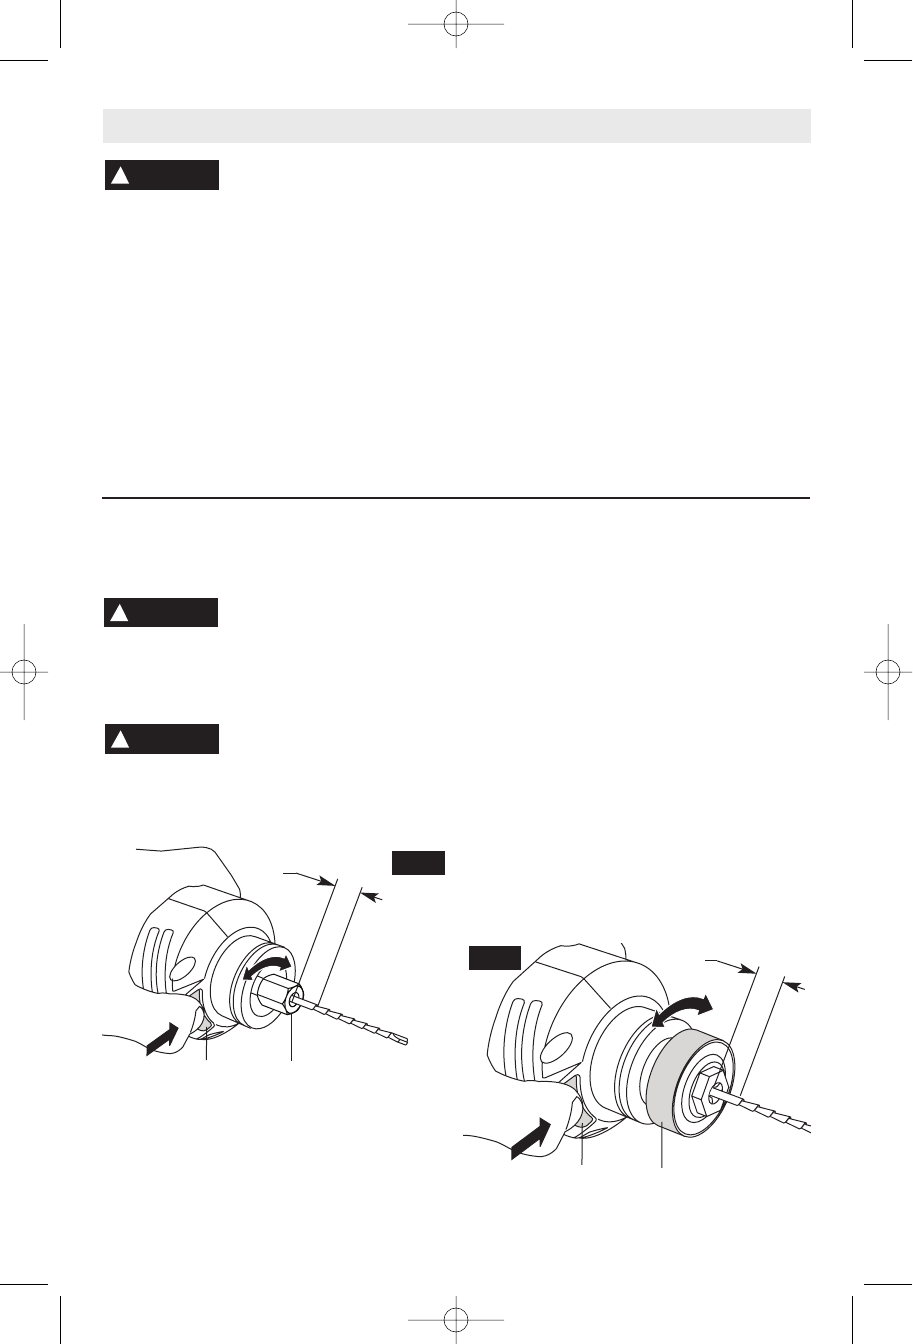
INSTALLING BITS (Standard models)
The bits are held by a collet system. Use either
the 1/8" (.125"), 1/4" (.250") or 5/32" (.156")
collet depending on the size of the bit shank.
The bit flutes are sharp and
should be handled with
caution.
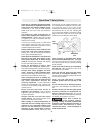
Depress and hold the shaft-lock in and rotate
the collet nut and shaft until the shaft-lock
engages and holds the shaft.
To prevent damage to tool.
Never use the shaft lock as
a braking devise to stop the tool from
rotating.
Use the standard equipment wrench to
loosen nut (counter-clockwise) (Fig. 2).
Remove the old bit (if there is one) insert the
new bit as far in as possible, but not so far
that the bit flutes engage the collet (leave
approximately 1/8" of shank exposed)
Re-engage the shaft-lock and tighten the nut
(clockwise) by hand and then with the
wrench until bit is held securely.
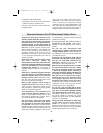
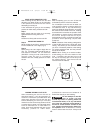
INSTALLING BITS (Keyless models)
(Not included, available as accessory)
The bits are held by a keyless collet system
designed specifically for spiral saw bits with
1/8" (.125"), 1/4" (.250") or 5/32" (.156") shanks.
Depress and hold the shaft-lock in and rotate
the keyless chuck and shaft until the shaft-
lock engages and holds the shaft.
Rotate the keyless chuck (counter-clockwise)
(Fig. 3). Remove the old bit (if there is one)
insert the new bit as far in as possible, but
not so far that the bit flutes engage the jaws
of the chuck (leave approximately 1/8" of
shank exposed) Re-engage the shaft-lock
and securely tighten the keyless chuck
(clockwise) by hand.
Note: When using 1/4" & 5/32" bits it may be
necessary to use a wrench on the front of the
keyless chuck to securely tighten the bit.
!
WARNING
!
WARNING
!
CAUTION
COLLET
NUT
FIG. 2
SHAFT
LOCK
1/8"
KEYLESS
CHUCK
SHAFT
LOCK
1/8"
FIG. 3
RZ 2610925600 9-05 9/1/05 11:04 AM Page 11