


14
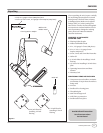
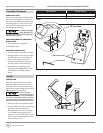
4. Strike the tools rubber bumper firmly
with the rubber end of the mallet. The
tool should cycle and drive fastener
into floor board.
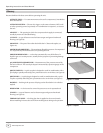
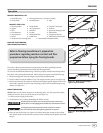
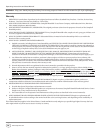
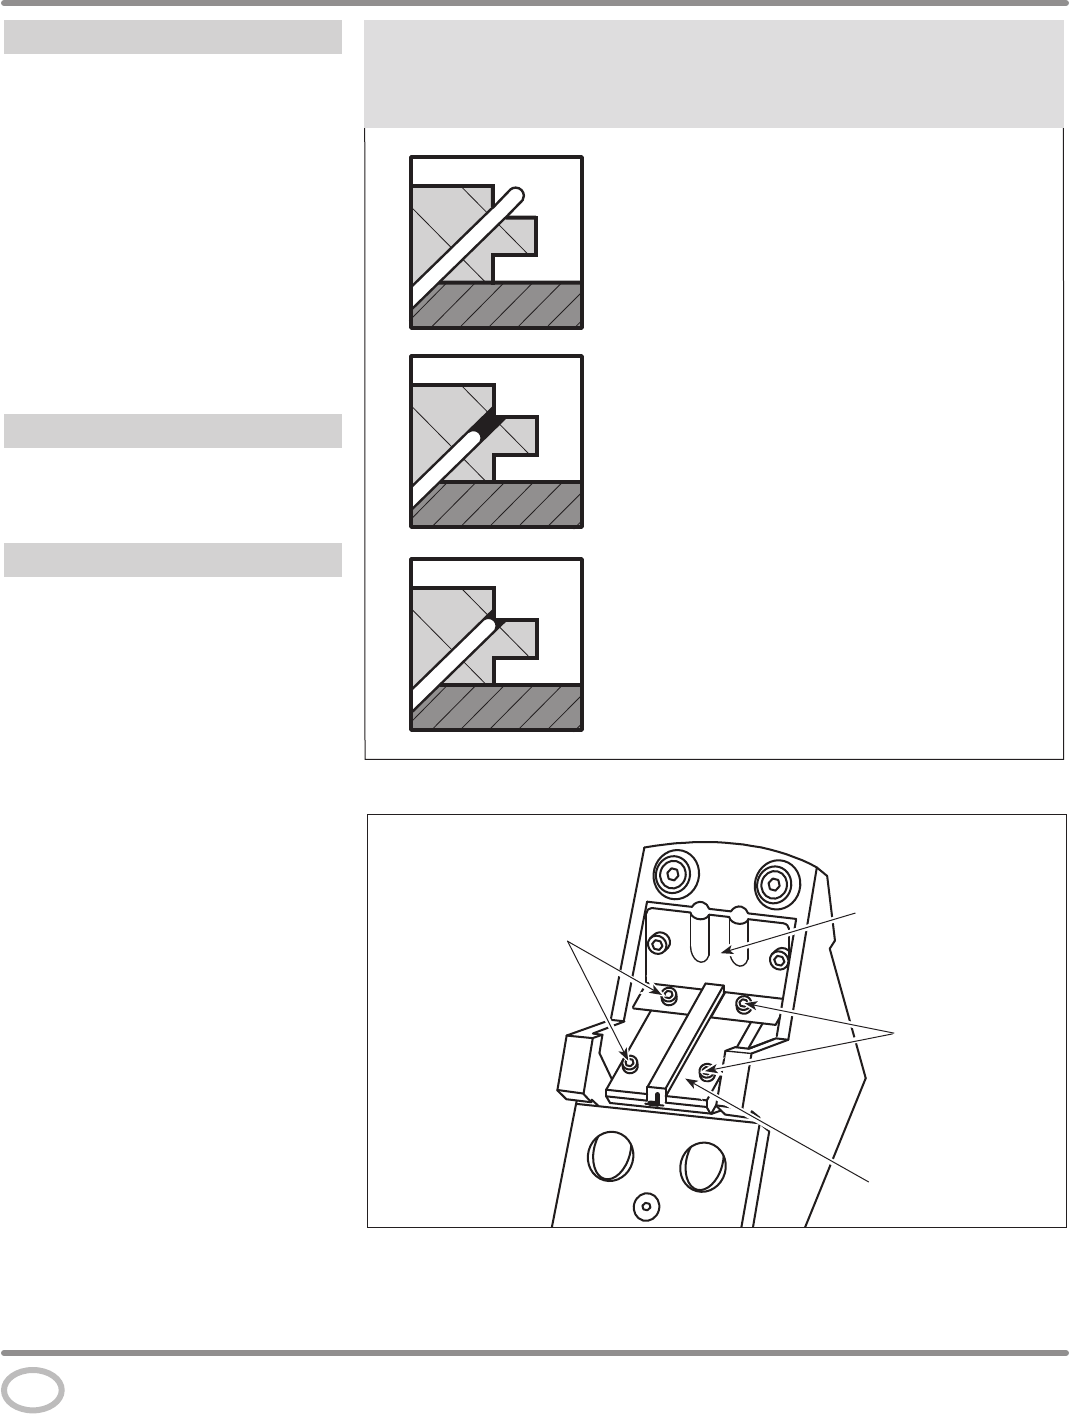
FASTENER DEPTH & PLACEMENT
Refer to Figure 23 for correct depth
placement of fasteners in hardwood
tongue. Use a scrap piece of the flooring
to help determine correct air pressure
settings. Damage to the tongue upon
installation will make remaining project
difficult.
Storage
The flooring nailer/stapler should be
stored in a cool dry location.
Maintenance
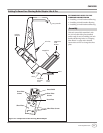
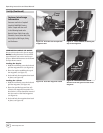
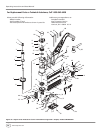
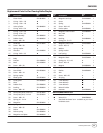
CLEARING A JAM FROM THE NAILER
(See Figure 24)
1. Disconnect the air supply from the
nailer.
2. Remove staples or L-Cleats from
magazine.
3. Using provided 4 mm wrench, remove
the four nose plate screws, washers,
nose plate, and dust shield.
4. Using a small tool, pick out the
jammed fastener.
5. Reattach all hardware (apply a good
quantity of threadlock glue on screw
threads before installing; tighten
firmly).
NAILER REPAIR
Only qualified personnel should repair
the tool and they should use genuine
Campbell Hausfeld replacement parts
and accessories, or parts and accessories
which perform equivalently.
Operating Instructions and Parts Manual
www.chpower.com
Figure 23 - Fastener depth
Fastener seated High.
Air Pressure set too LOW.
Fastener seated Low.
Air Pressure set too HIGH.
Fastener seated Correctly.
Air Pressure set CORRECTLY.
Use A Scrap Piece Of Flooring
To Determine Correct Air Pressure Settings.
Dust Shield
Nose Plate
Nose Plate
Screws
Figure 24 - The underside of the flooring nailer
Nose Plate Screws
Operation (Continued)